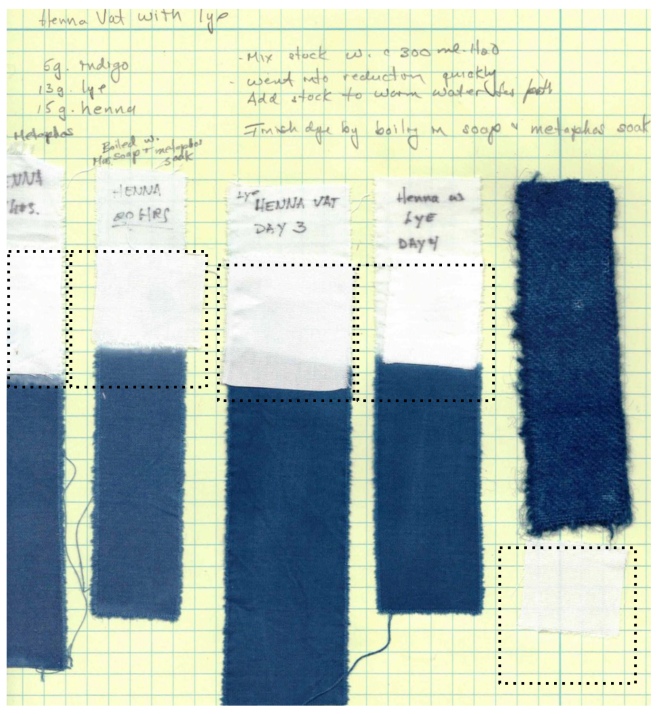
The indigo chapter of the book Joy Boutrup and I wrote, The Art and Science of Natural Dyes (Schiffer Press), focuses on the use of quick reduction vats that use iron, henna or sugar, along with lime (calcium hydroxide) to reduce the indigo. Since the book was published I have been very interested to learn more about indigo fermentation. The concept seemed daunting and I was hesitant to begin.
Why did I want to make a fermentation vat?
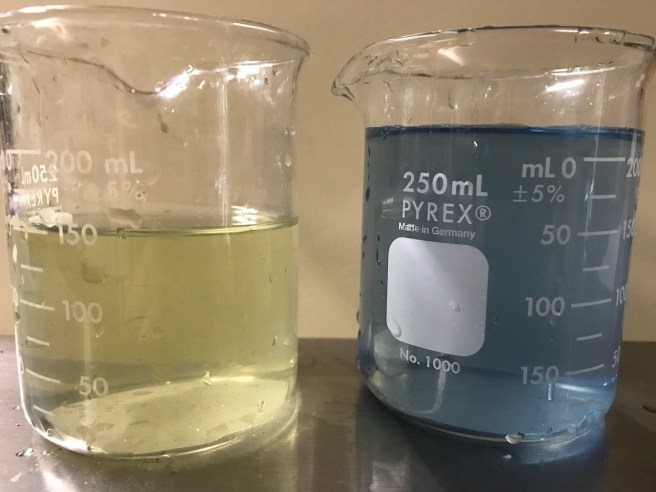
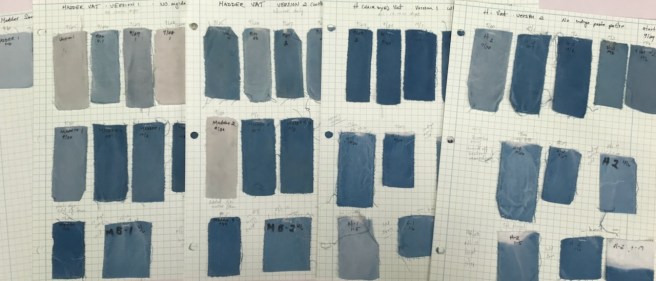
Initially, I thought that the indigo crocking issues that I described in the last post might be solved by making a vat that did not use large quantities of lime.
The vats that use large quantities of lime (calcium hydroxide) also seemed to be presenting a challenge with “fading” issues. I had fabrics that were not exposed to direct light, but the exposure to air itself seemed to make the indigo fade in a very unattractive manner. I consulted with another experienced indigo dyer who was having this same issue with her vats and we suspected that the amount of lime in the henna and sugar vats was part of the problem. Textiles dyed in an iron vat do not seem to exhibit this type of fading, despite the high volume of lime.


And finally, and maybe most importantly, fermentation seemed like the ultimate in understanding indigo. It’s the oldest, traditional process where bacteria is used to reduce the indigo. I wanted to experience it.
At the end of last summer, I made the commitment to begin working with a fermentation vat. Hisako Sumi, a friend, colleague, and indigo dyer from Japan, has been encouraging and coaching me through the process.
I began with a simple recipe for a fermentation vat that was published online by Cheryl Kolander of Aurora Silks. The vat was made with
-
- indigo pigment
- ground madder root, the source of fermentation
- soda ash, to achieve the correct pH
It worked! It took several days of warm weather (or some applied heat) and patience. The blue dye from the vat was clear and strong. Thank you, Cheryl.
Since that first vat I have made and maintained many small (1 or 2 liter) experimental vats. I have a 30 liter vat that I have using regularly for several months and am now preparing to make a 150 liter vat for use with larger textiles.


The Indigo dye
A typical fermentation vat in Japan is made using sukumo. Sukumo is composted indigo (polygonum tinctorium) leaves. The sukumo is both the source of the indigo dye and the source of bacteria that results in fermentation of the vat. I do not have access to sukumo although I still have plans to make a small batch of sukumo. I have been using organic indigo pigment from Stoney Creek Colors for all of my fermentation vats.
Alkalinity
Fermentation vats do not require the high alkalinity that is necessary for the quick reduction vats, which perform best at a pH near 12.0. The fermentation vats require a pH between 9 -10. I have made many fermentation vats since that first one, experimenting with various alkaline sources: wood ash lye that I leached from hardwood ash, soda ash, potash, and very small amounts of lime (calcium hydroxide) or lye (sodium hydroxide) to control the pH. I have monitored the pH carefully. In the first few days, when fermentation is beginning, the pH will go down.
pH papers were not accurate enough to discern the pH fluctuations. I invested in a good pH meter, which I calibrate regularly. Because of the relatively low pH, the vat is suitable for both cellulose and protein fibers without fear of damaging the textiles.
Organic material for fermentation
I used a very finely ground madder root powder from Maiwa in my initial experiments. I’ve been told that the freshness of the plant material matters for purposes of fermentation. Madder root was traditionally been used as a source of bacterial fermentation. Indigo dyers typically used madder root that had already been used for dyeing red. Once the red dyes have been extracted, the plant material is still a viable source for fermentation.
Other sources of material for organic fermentation that I have used include: wheat bran (cooked for a few minutes in a little water) and dried, ground indigofera tinctoria leaves, which are sold as a hair dye (also called “black henna”). I was given a woad ball and added that to one of my vat experiments and it definitely speeded up the fermentation/reduction.
Traditionally, in England, woad balls were “couched” or composted in order to extract both pigment and provide bacteria for fermentation – much like sukumo. When indigofera tinctoria was introduced from India, woad was used more often to boost fermentation, as opposed to being the primary source of dye.
Hisako encouraged me to use indigo plants from my own garden to to increase the source of bacteria for the vat. I grow small amounts of persicaria tinctoria, indigofera suffruticosa, and isatis tinctoria in the garden. After grinding the fresh plant material, forming the balls or patties, they are dried for storage and added when needed to boost the fermentation of the vat. I assume that once the plant material breaks down in the vat, it is also a minor source of indigo pigment but this is speculation.


Natural fermentation vats have changed how my dye studio smells – no longer the sweet sugar or plant smell of the quick reduction indigo vat – but now the odor of true fermentation and rotting plant material. I’ve quickly gotten used to it and it is now the smell of a successful vat, though my husband finds the smell very offensive and avoids coming into the studio!
Temperature
The ideal temperature for fermentation is between 80-90°F (27-32°C). Think of the rising of bread dough! Warm climates are the natural environment to make and maintain these vats. In my North Carolina mountain dye studio (with no heat) it is more of a challenge. In Japan, I saw many large indigo vats wrapped in electric blankets. I use heating pads around my small one-liter and two-liter vats and a bucket warmer (used to keep honey in a liquid form) for the larger vat. To prevent the vat from getting too warm, I use a temperature controlling outlet with a thermostat and probe.
Maintaining the Vats
I have been keeping careful records of these vats, sampling on a regular basis and documenting and recording any additions. Keeping good records is key to my understanding and confidence!
Every few weeks the vats are “fed” with a small amount of cooked wheat bran or a small amount of indigo balls or patties.
The quick 1,2,3 reduction vats using sugar, fruit, or plants have introduced many of us to non-chemical reduction processes and made it possible for us to dye with indigo on a regular basis. They are accessible, easy to make, and can be ready within a few hours, thus making them ideal for workshops and experiments. These vats have taught us the principles of indigo reduction and dyeing and I am forever grateful to Michel Garcia for teaching us about them.
For the long-term serious dyer, I believe that the fermentation vats are a viable alternative. They require more time and attention but I have been surprised at how well these vats have tolerated neglect when I am away from the studio – sometimes for several weeks. When I go away, I turn off any supplemental heat, cover them, and just let them be. When I return home, I check the pH and adjust if necessary. Then I dye a test sample. If the color is weaker than when I last tested, I will “feed” them, stir, add some heat and wait a day before test dyeing again.
The fading issue seems to be solved with the use of fermentation vats. I can’t say that I have completely solved the crocking issue, though I think that yarns dyed with the fermentation vat are crocking less. Maybe this is just the nature of indigo…