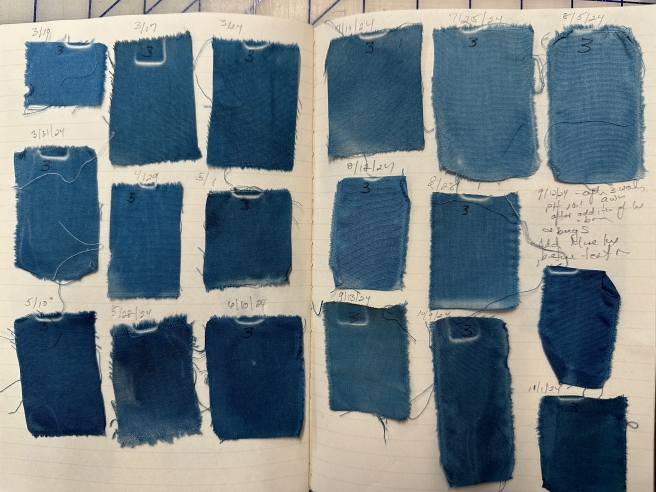
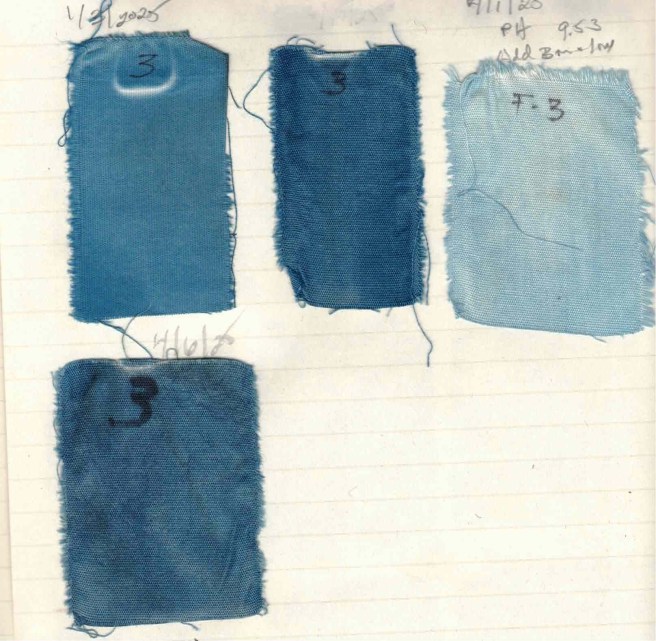
Set up a small notebook/logbook for each vat that you make. Record the ingredients included, their amounts, procedure, and dates. Use this book to retain samples of your initial testing to determine when the vat reduces. Record any additions that you might make over time. Over time, this book is the “story” of your vat and will be a very valuable tool. I have books that I have maintained for months or even years.
These simple notebooks are invaluable in helping me to care for my vat and predict the dye colors I can achieve.
Stir the vat daily, (see note below *)
Measure and record the temperature and pH on a regular basis. Add this information to your log/notebook
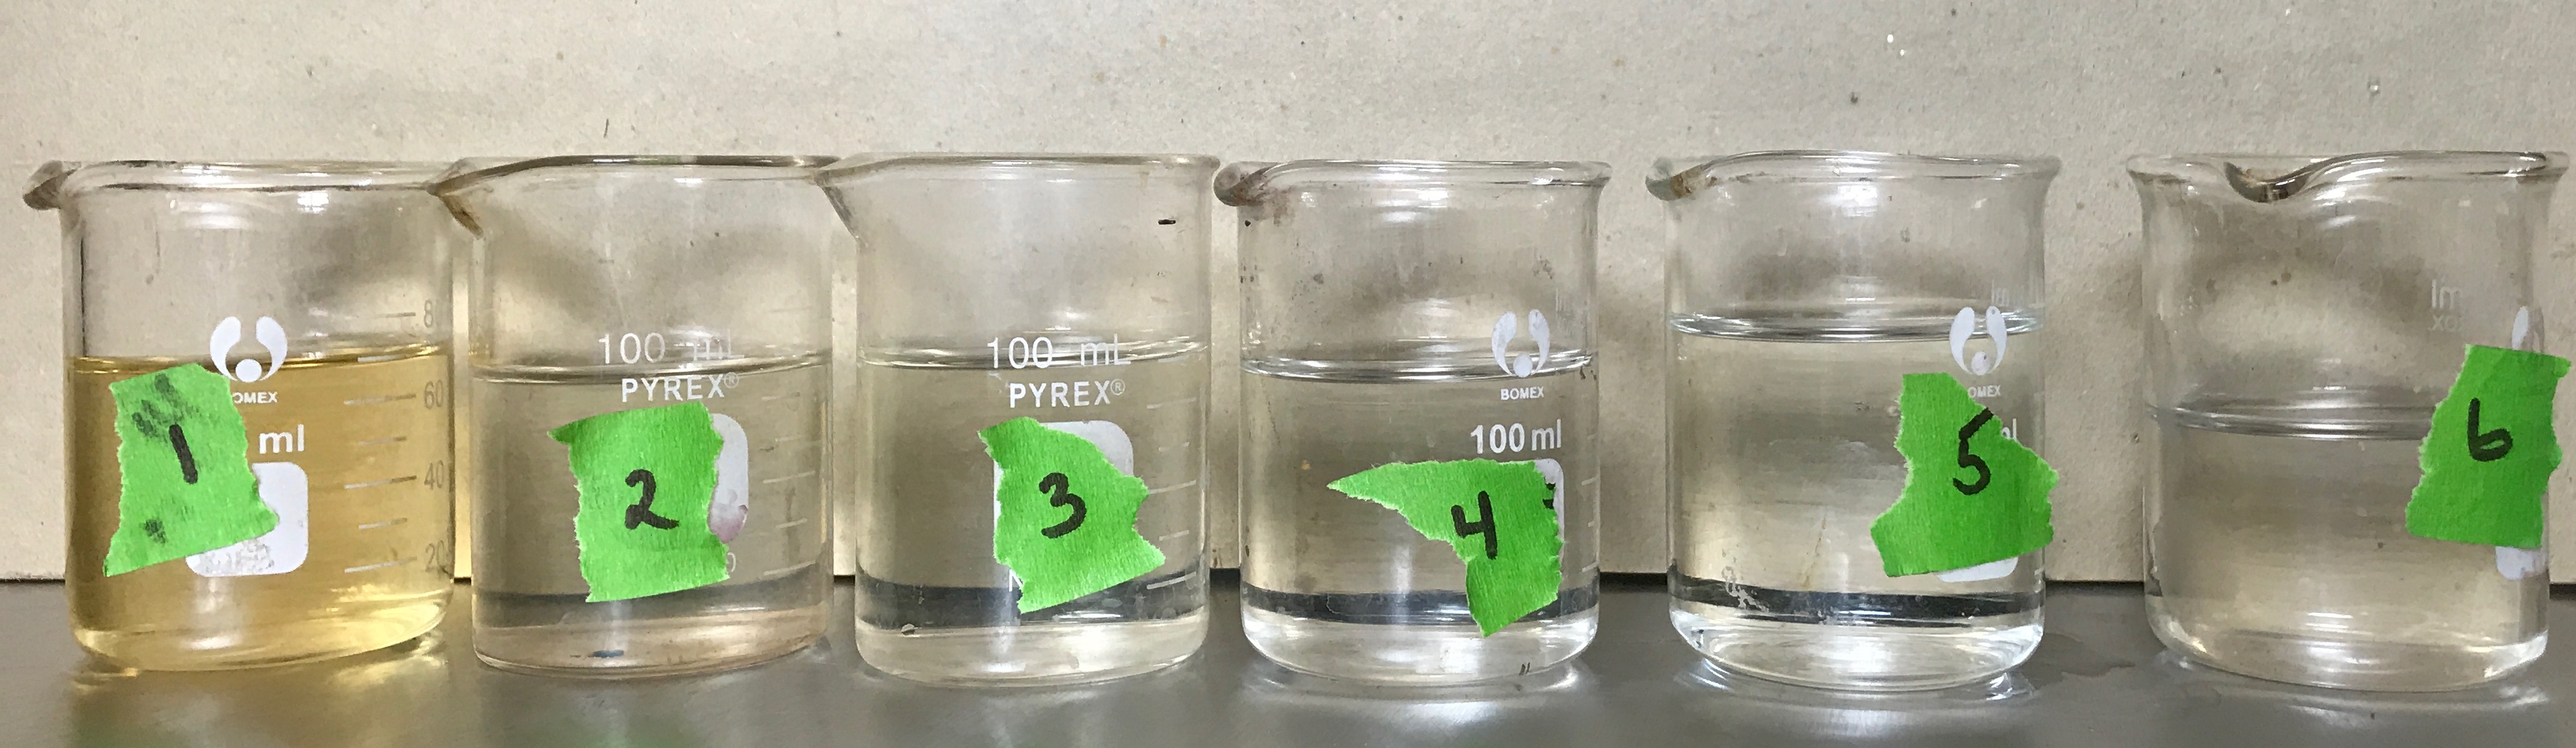
Record the results of dye tests regularly: once a week or so. Add this information and the samples to your log/notebook
Once a week, add a small amount of lime (calcium hydroxide) to the vat: 0.1 g/liter (that’s 1/10th of a gram/per liter). Document this in your vat log/notebook.
Once a month, add a small amount of dry wheat bran that has been freshly cooked wheat bran to the vat. 0.5 gram dry bran per liter. Document.
Use a paper calendar, or any other method you find useful, to keep track of regular additions of lime and bran.
If the dyed color suddenly becomes very pale, check the pH. If the pH is within range (9.5-11), the vat may need additional organic material to boost fermentation. Cook a small amount of bran (about 1-2 grams/liter) and add it to the vat. Stir, wait until the next day, and then dye another test.
If possible or practical, keep a running record of the quantity of textiles that are dyed in the vat, either by weigh, yardage, etc. This will give you a sense of how much indigo you are using/depleting over time if that is important to you. This may not be important to all dyers but a production dyer will benefit from this information.
If the pH of the vat drops below 9.5 add additional lime (calcium hydroxide) to boost the alkalinity.
Measure and record the temperature of the vat. NOTE: once the vat has reached full fermentation, it can be maintained without supplemental heat. Do prevent it from freezing, as that can destroy the bacteria in the vat.
If the volume of solution in the vat decreases, (due to evaporation or dyeing) add warm water into which you have dissolved 25 grams of soda ash or potash per liter OR add wood ash lye. If you are continuing to make small test vats, then they can also be added to the vat to supplement the volume in the vat.
At some point the indigo in the vat will be diminished. These older vats are valuable for obtaining pale blue colors. You can begin a new vat for darker colors.
* You do not need to be a “slave” to your vat! I have gone away from home for as long as 3 weeks without tending the vats. On returning the vats were just fine, although they did need pH adjustment and an addition of cooked bran to revitalize them.
A sampling of pages from my dye log:
It’s always instructive to see how the vat becomes livelier after additions of bran.
This recipe, which uses wood ash lye as the source of alkalinity, is an alternative to the one made with Wood Ash lyesoda ash or potash. If you have access to hardwood ash, you may want to try this approach. It is said that the tannins in the ash may improve lightfastness of the dye.
Wood ash lye is the traditional alkaline used for sukumo vats and will work well for any fermented vat. The first step is to make enough lye to build the vat. This requires sourcing hardwood ash. Do not try to make the lye with ash made from soft wood, such as pine, as those ashes do not contain enough potassium. I source my ashes from a friend who burns hardwood in her wood burning stove. Ashes could, perhaps, be gathered from restaurants that use wood fired ovens.
I also like to keep wood ash lye solution in the studio for topping up the liquid volume of all my fermented vats and for cooking the bran that is fed to the vat on a regular basis. This is also useful for vats made with soda ash or potash. So, don’t be intimidated by the need to make enough lye for an entire vat. You may want to start with smaller quantities and use it to simply top up your vat or use as a liquid for cooking your bran.
How to make sufficient wood ash lye solution for a 50-liter vat.
I make my lye using boiling water. Lye can also be made with cold water and a slower drip method. There are online sites that describe the drip method.
The following recipe can be downsized to make a less of lye for a smaller vat or if a smaller amount of ash is available.
What you will need:
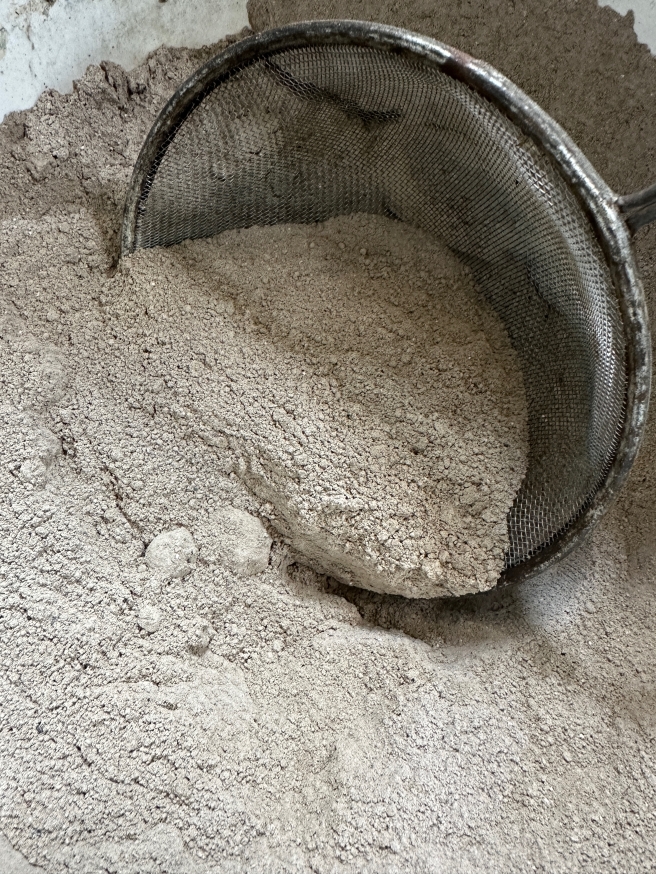
I use 3 kilos (about 6.5 pounds) hardwood ash, sifted. I sift the ashes through a coarse strainer/sieve to remove any large chunks. Fine ashes will make a more potent lye.
A large pot for heating water
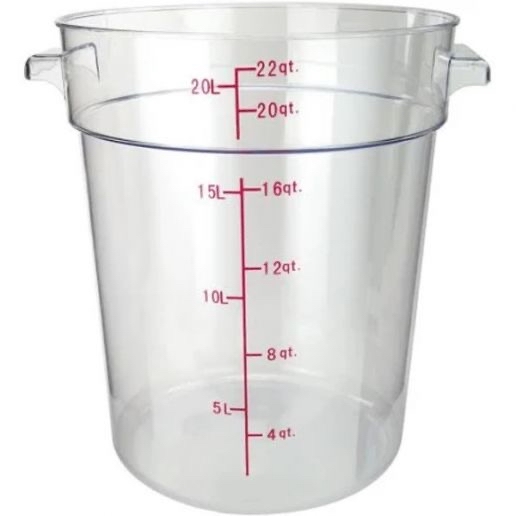
A vessel to hold the ashes and hot water – my preference is a 22-quart transparent polycarbonate container, as it makes it easy to see when the ashes have settled. A restaurant grade vessel, such as the one pictured here, can withstand the heat of the hot water and ashes. Stainless steel can also be used but it is not as easy to see when the ashes have settled. Do NOT use an aluminum vessel. The alkalinity of the lye deteriorates the aluminum.
SAFETY NOTE:
Eye protection and gloves should always be used when making lye or working with it.
PROCESS:
1. Place all of the ashes into the polycarbonate vessel, or the vessel of your choosing.
2. Heat the water in a separate container to the boiling point or close to boiling.
3. Carefully pour the hot water over the ashes, nearly filling the vessel. Be sure to use eye protection and gloves for this, as there will likely be spattering and bubbling.
4. Stir the ashes in the water to completely distribute them.
5. Allow the ashes to settle for several hours or overnight.
6. Once the ashes have settled, remove the clear liquid lye solution from the top and place into a clean empty bucket. This can be done by carefully scooping out the liquid (without disturbing the ashes on the bottom) or siphoning with a small hose. Be sure to use eye protection and gloves for this as the solution is very alkaline. The liquid can be filtered through a cotton cloth to catch any ash particles that may remain in the lye solution. This is your first “batch” of lye and may be somewhat discolored.
Dry ashes in the bottom of the vesselAshes are beginning to settleFully settled ashes
7. Repeat this process (steps 2-6) five more times, using the same ashes in the vessel to obtain more lye solution. Subsequent batches will become clearer and more colorless.
8. The lye will weaken with each subsequent batch (see table). It’s best to store the separate batches in different containers (labeled with their pH) so that you can selectively use the “weaker” or “stronger” lye as needed. Lye that is stored will slowly decrease in pH over time.
Early batches of lye solution will be colored, likely from the tannins present.
Batch #
pH
1
12.45
2
12.0
3
11.6
4
11.3
5
11.2
6
10.5
Building the vat: Although much of the process is the same as the vat made with soda ash or potash (Blog Post #6), and may seem repetitive, there are some differences when building the vat with lye.
Ingredients:
Wood ash lye of various strengths
Indigo pigment: 2-10 grams per liter (see note #1 below)
Dried and ground Indigofera tinctoria leaves: 5 grams per liter (see note #2 below) OR
Ground, “spent” madder root: 5 grams per liter. (see note #3 below)
Wheat bran: 5 grams per liter. I typically use “feed-grade” bran sourced from my local farm supply store.
Optional, if you have them: dried woad balls/patties or dried polygonum leaves etc., crushed: 5 grams per liter. (see note #4 below)
Note #1: Deciding how much indigo pigment to put into a vat is a complex decision and largely based on:
The size of the vat
The amount of dyeing that will be done in the vat
The amount of dyeing that will be done in the vat
How long the vat is expected to last.
The fermented vat seems to be very efficient at reducing the indigo available in the vat. I have observed that a vat with 2 grams of indigo pigment/liter can produce a blue that is almost identical to one with 8 grams per liter, but the vat with the smaller amount of indigo will not last as long. Fermented vats will result in pale colors only after much of the indigo has been used up and the vat becomes weaker. My 50-liter vat with 2 grams of indigo per liter took over 20 months to reach a point where it produced pale blues.
Vats that are kept and used for a long time will build up solid materials on the bottom: mostly spent lime and wheat bran. When stirring the vat, you will notice more “stuff” on the bottom over time. I suspect that I have kept vats longer than might be recommended.
For all the above reasons, I would recommend using a smaller amount of indigo pigment in the vat. Use it up. Dye some pale colors and mix a new one. Ideally, the studio will have two vats: an old vat for pale colors and another, fresher one for darker colors.
Note #2: Spent madder has already been used for dyeing red. The alizarin and other dye components in the roots are not necessary for the fermentation.
When dyeing with madder root, I place the ground roots into a fine mesh bag that is large enough for it to move freely. When the red dyeing is completed, I removed the ground root from the bag and dry it. This can be stored until it is needed for an indigo vat. Madder that has not already be used for dyeing red can be used but it would a waste of good red dye. Traditionally, the madder dyers would sell their spent madder root to the indigo dyers.
Note #3: Dried and ground indigofera leaves are often sold as “black henna” and used, in combination with madder, to dye hair black. I source mine from Maiwa.
Note #4: When I have fresh indigo of any variety in the garden, I grind up the leaves, then form them into small “patties” and dry them. The theory is that these will introduce another type of bacteria and nourishment for that bacteria to the vat.
Procedure
1. Fill the dye vessel about 1/2 full of the weaker lye. You will want to save the strongest lye to use for adjusting the pH, once fermentation begins and the pH begins to decline.
2. Hydrate the indigo pigment in water unless you are using paste pigment. Add to the vat.
3. Boil the bran in a small amount of water (or wood ash lye) for about 10 minutes. It should be the consistency of cooked cereal and emit a slightly sweet smell. Cool until just slightly warm. Add to the vat.
4. Prepare the “food” for the vat. If using madder root, cook this briefly. It can be combined with the bran and they can be cooked together. Add to the vat.
5. If using ground Indigofera tinctoria leaves, add warm water to make a smooth, watery paste. Add to the vat.
6. If using dried indigo patties or woad balls, crush and add that material to the vat to the vat.
7. Stir the vat carefully with a centrifugal motion and cover loosely.
8. Apply heat to the vat, if required. Optimum temperature for bacteria growth is 30°C/86°F but it can grow between the temperatures of 10-50°C/50-122°F. Bacterial growth activity decreases at temperatures greater than 36°C/96.8°F
9. Check the pH. It should be in the range of 9.5-11. Adjust as necessary, by adding some of the stronger lye.
Over the next few days, stir the vat regularly, a couple of times each day. Monitor the pH and begin to do dye tests. Expect the pH to drop as fermentation begins and lactic acid results. This is the time to add the strongest lye to the vat, filling the vessel to capacity. Continue doing daily dye tests until full reduction is reached.