
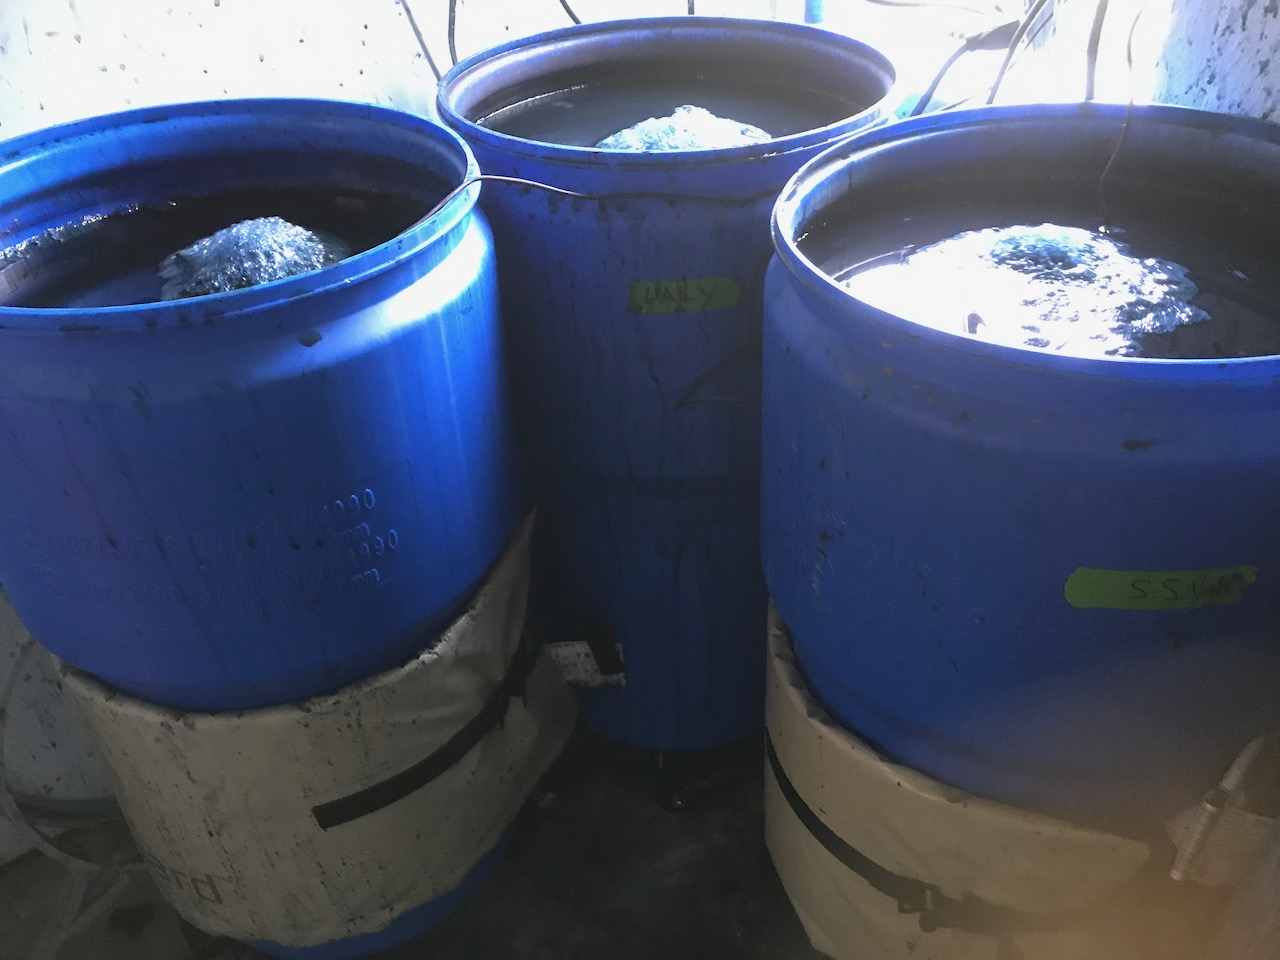
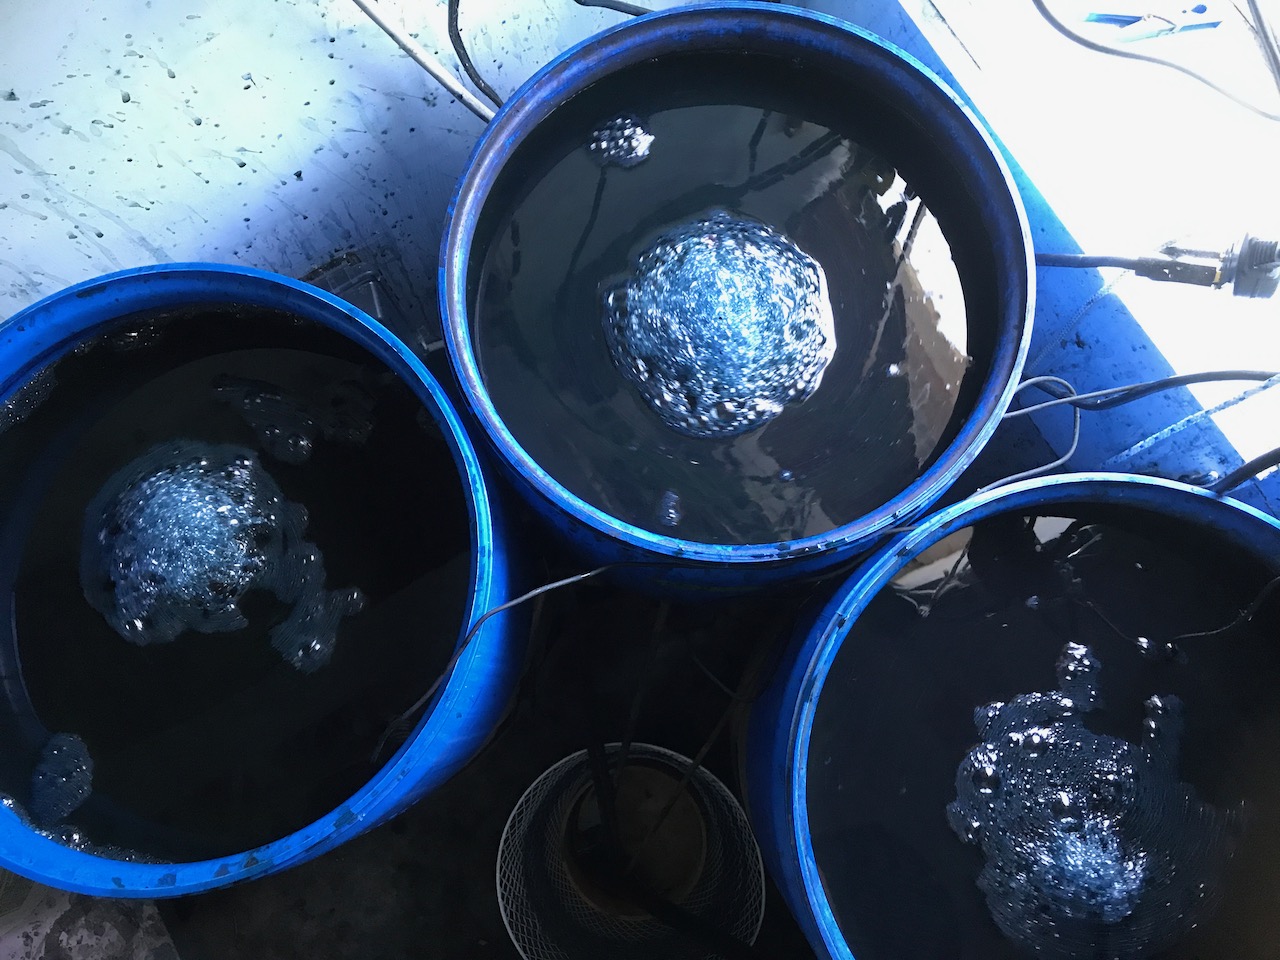
I now have, and am actively using, three 50 liter (15 gallon) indigo vats, in addition to a 100 liter (30 gallon) henna vat.
I am loving the size of the 50 liter vat! The vessel is tall and narrow. It’s just the right shape for a vat, with a relatively reduced surface area, and a great size for studio immersion dyeing. I have been dyeing samples, skeins of yarn, my own shibori work, and even clothing in those vats.

Like most dyers, I began with what I then thought was a “large” 5 gallon vat. That is still the most practical size for teaching workshops and I am guessing that it’s the size/shape that many dyers start with – and most stay with.
But, I don’t think it’s the best for studio work. IT’S TOO SMALL! When working with natural indigo vats, whether they are fermentation vats or quick reduction vats, there is going to be a lot of ‘sludge” at the bottom of the vat. With some vats this can be up to 1/3, or more, of the total depth. If you keep the textiles above that sludge , it doesn’t leave much room for dyeing. I am afraid that many dyers might tend to let their textiles dip into that “wasteland” at the bottom, exposing the fibers to concentrated lime or plant material. As a result, the dyeing is not as good as it could be.
A 50 liter/15 gallon liter vat is a much greater commitment than an 18 liter/ 5 gallon bucket, both in terms of financial investment and engagement. Yet, it is so much more useful and the dyeing is so much better! It’s also harder to just “give up” on a larger vat. You get better at maintaining and problem solving.
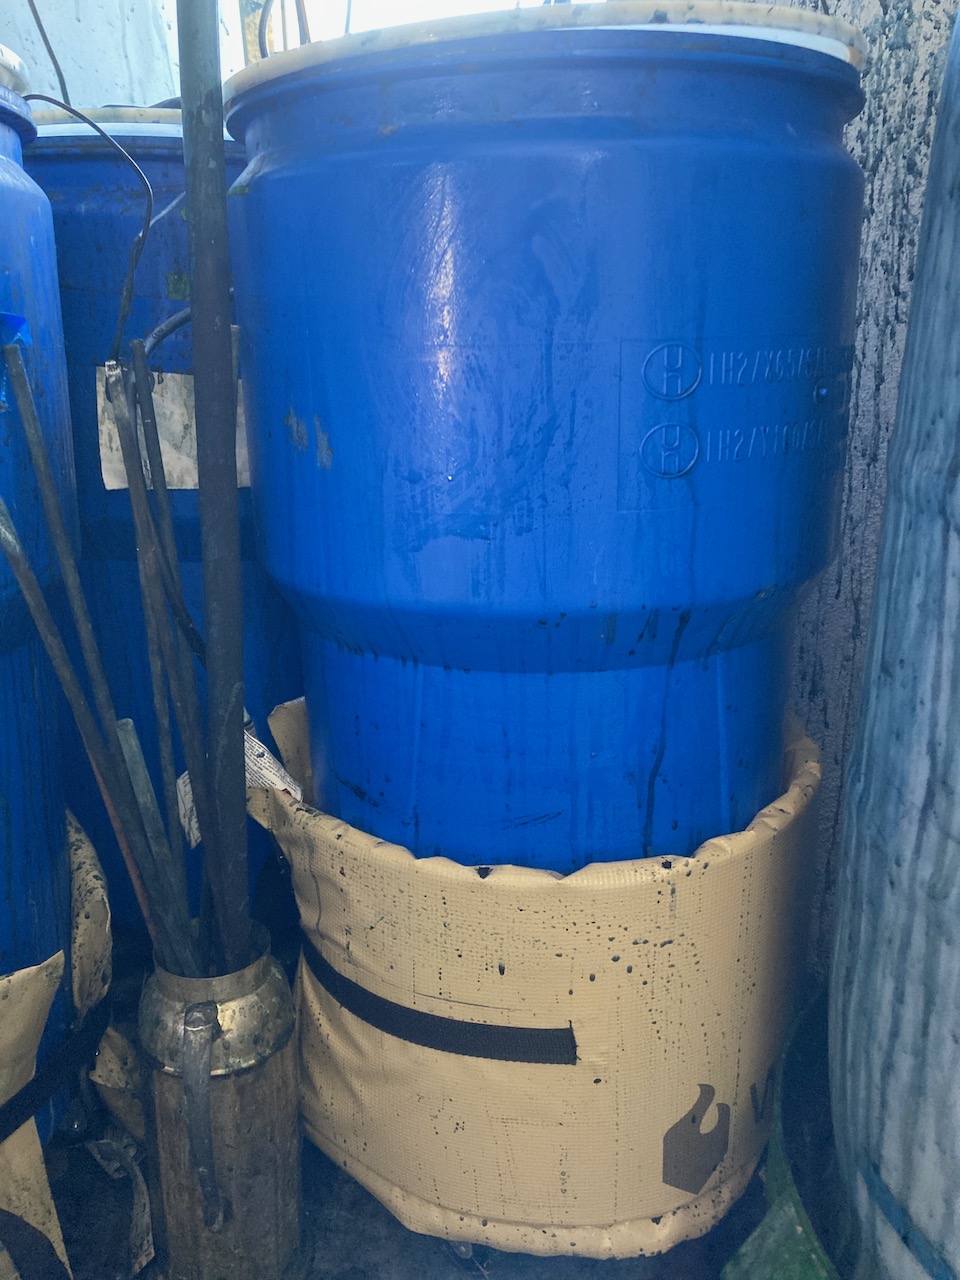
This is the vessel that I use. It’s a hard, durable plastic. I place it on a wheeled dolly. Otherwise it’s too difficult to move. A heavy duty plant caddy works just fine.
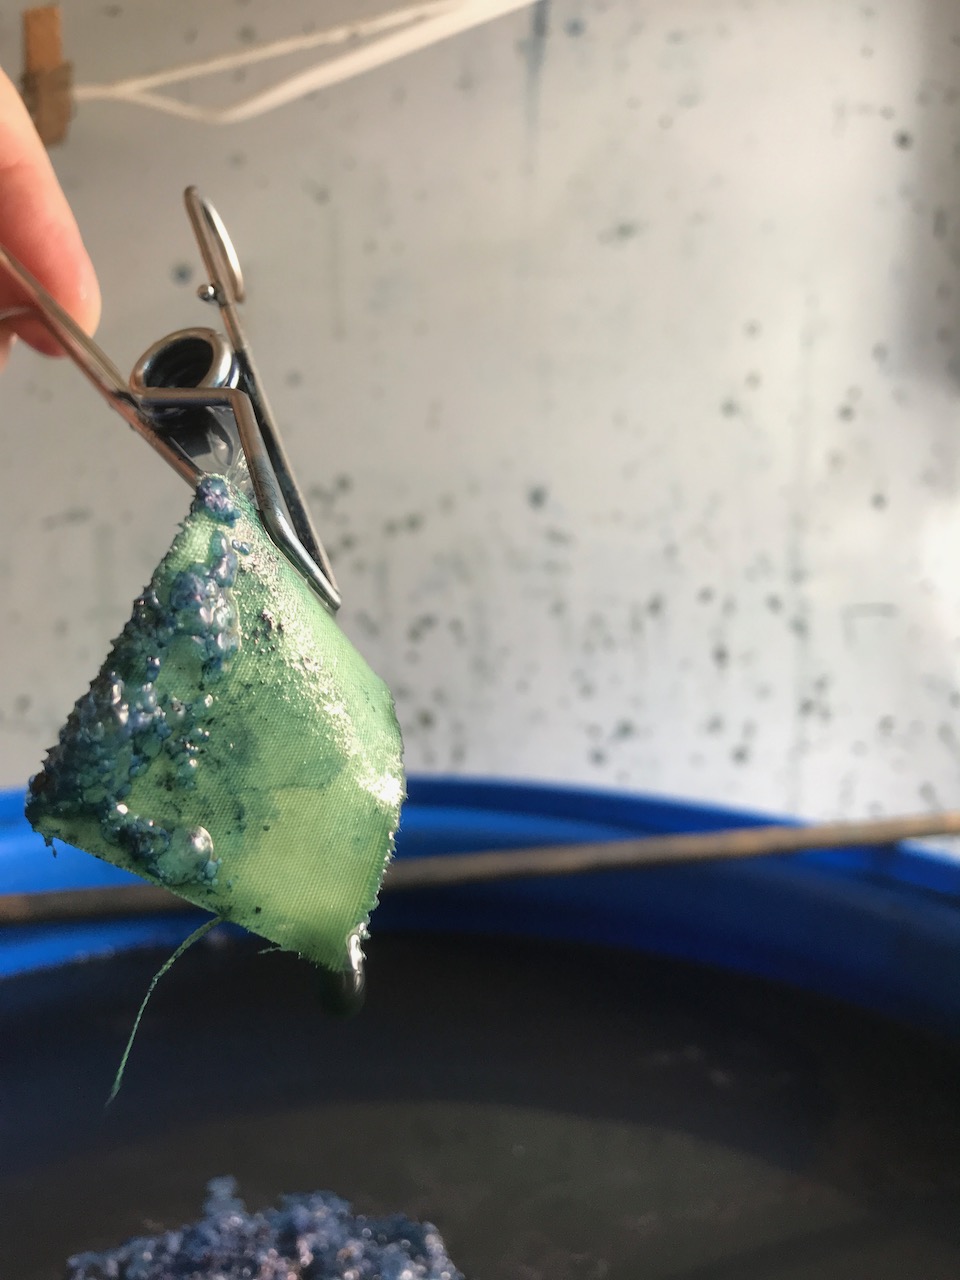
Sometimes I suspend samples and other small pieces from the top, using stainless hooks and wooden rods.
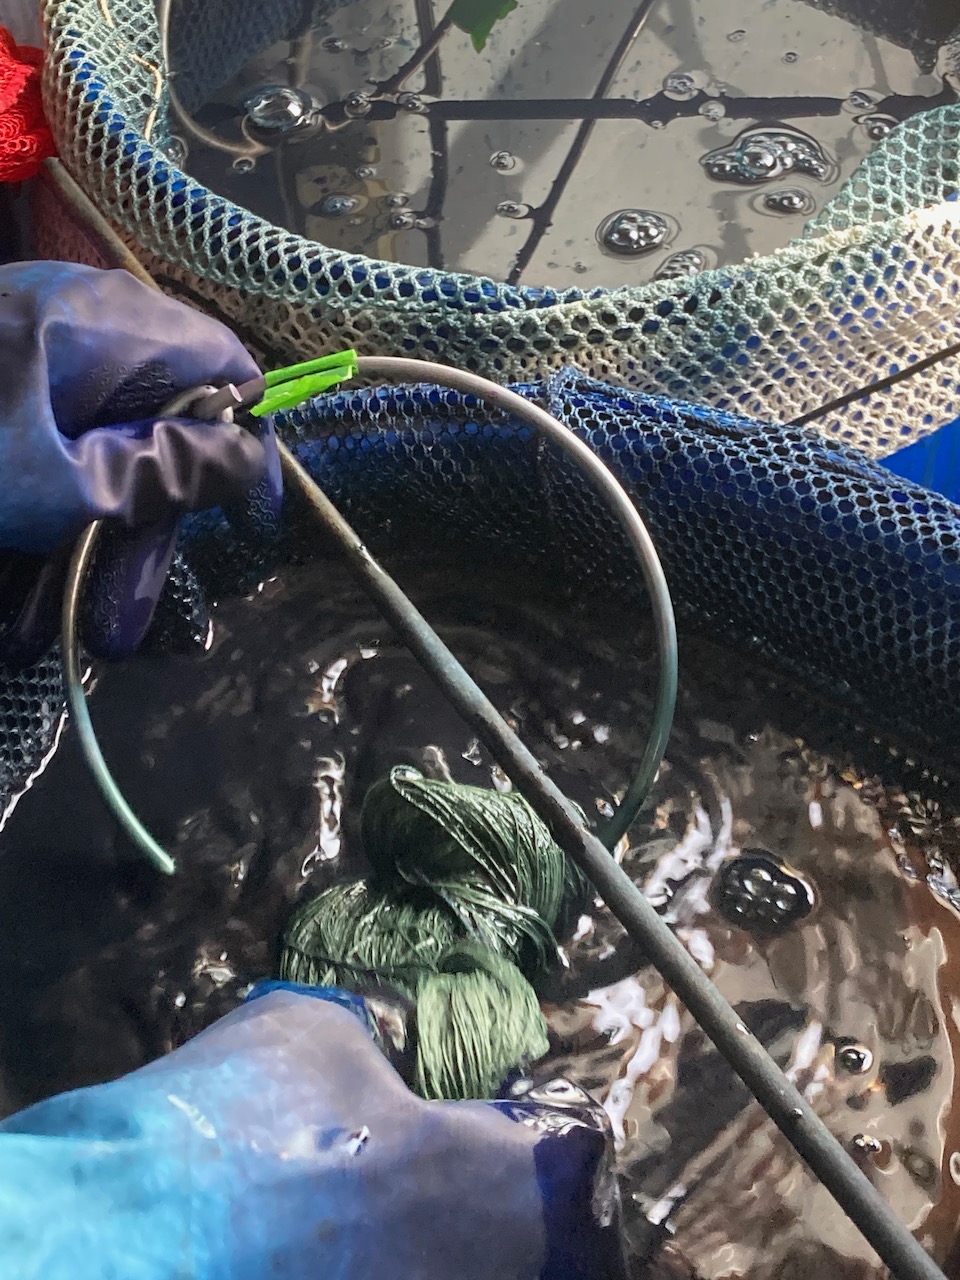
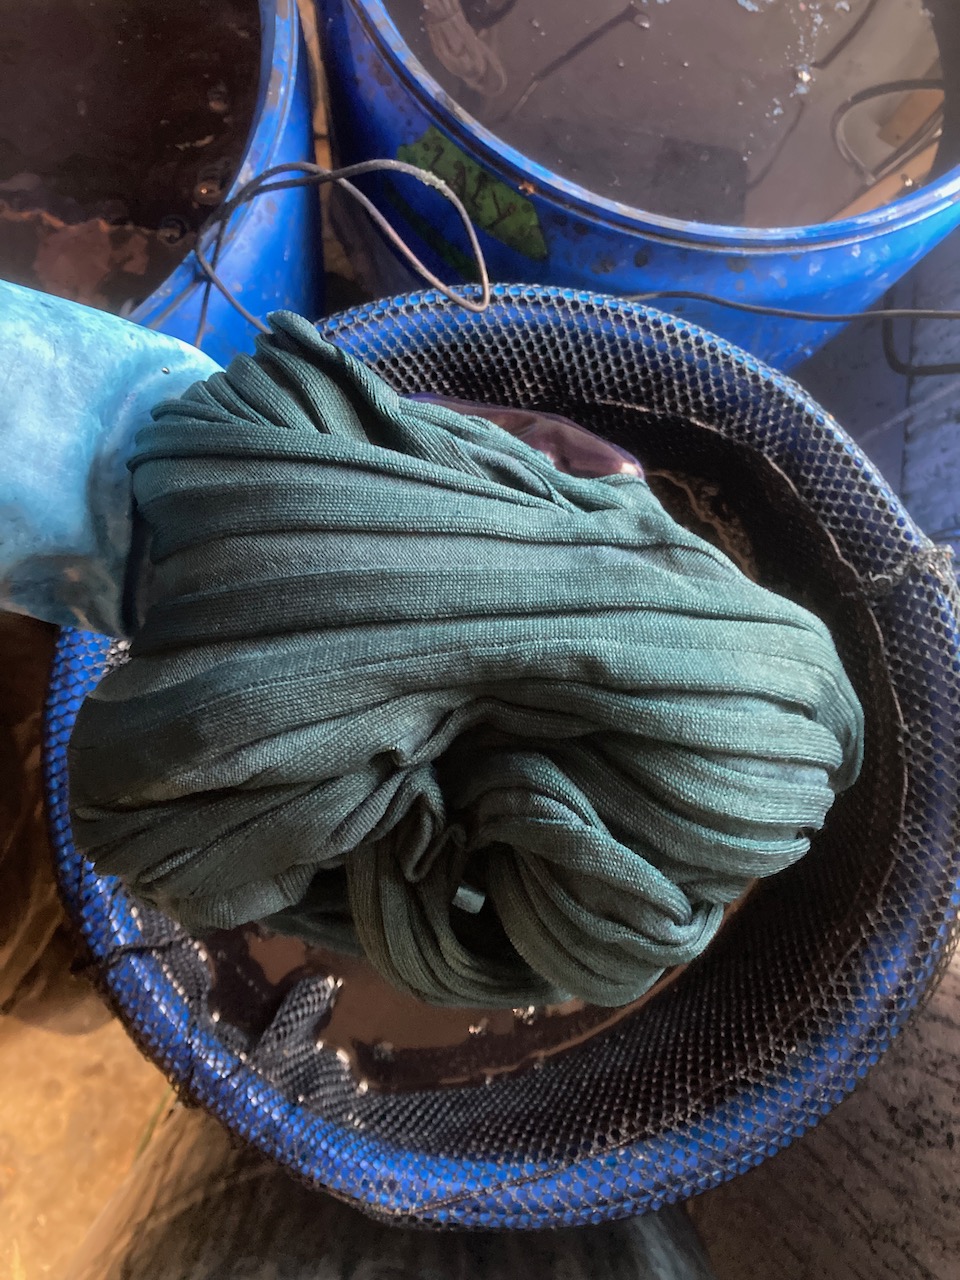
I have experimented with several types of baskets, nets, etc. to hold my larger textiles and keep them away from the bottom of the vat. I have finally settled on using a large, mesh laundry bag. It fits the vessel nicely, is flexible, re-usable, completely contains the textiles, and prevents things from getting lost in the bottom.

As I experiment with the fermentation vats, it becomes necessary to do a lot of dyeing. I am working on a long-term woven series, but regular dyeing has become increasingly important with my fermentation vats – and more possible, now that I am staying home.
I’ve taken some of my white or light colored clothing (too impractical to wear in the studio) and turned them into indigo dyed “dyeing clothes”. It took some courage to put a large linen tunic in the vat but I’ve been surprised at the even dyeing of even these larger, constructed pieces. I always do at least 3 long dips into the vat, which will assure that the dye “evens out”. I would never have attempted dyeing clothing in a 5 gallon vat.

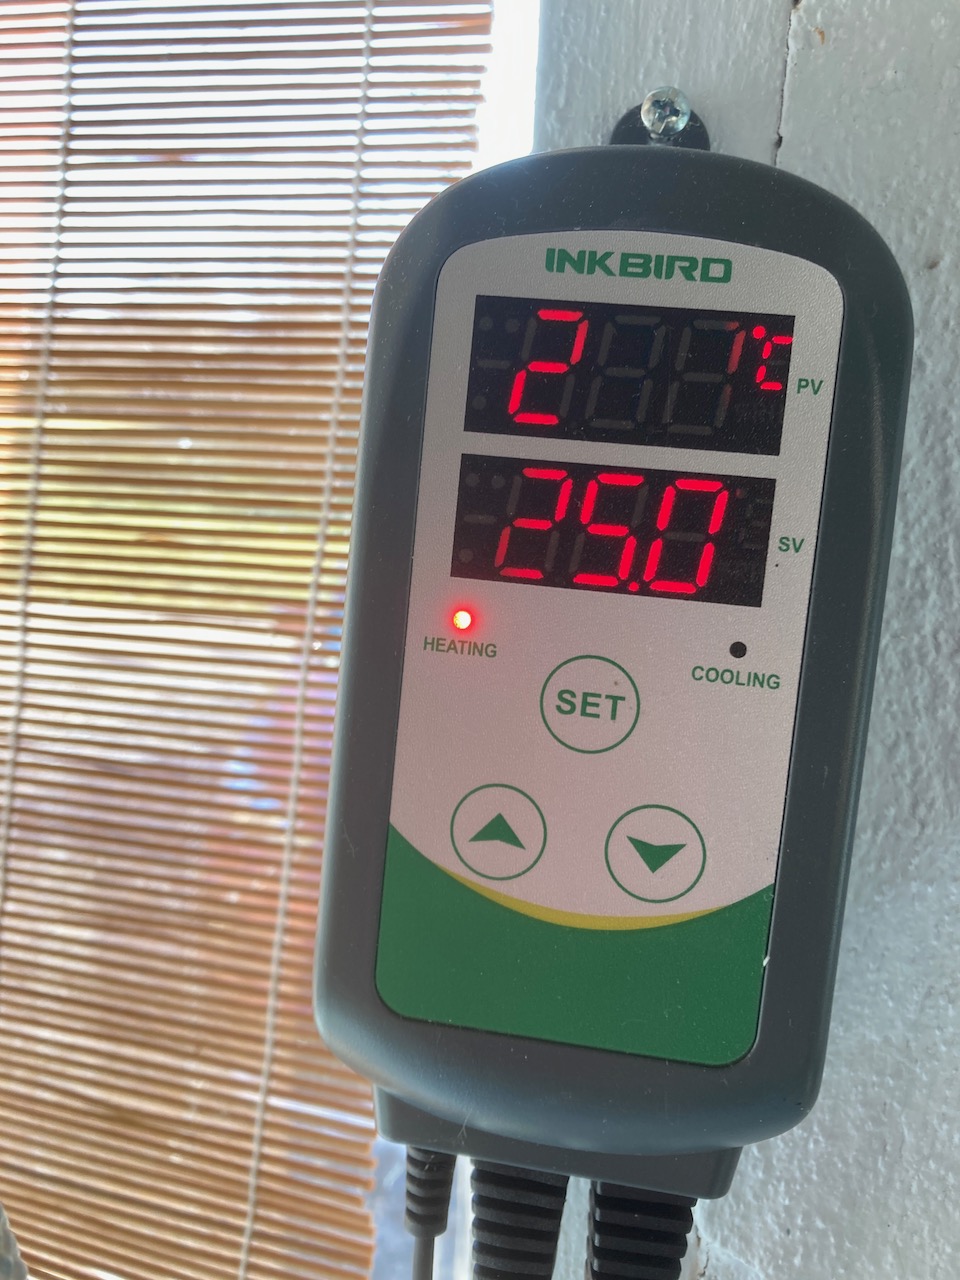
Maintaining a good dyeing temperature is important, especially with the fermented vats. I have successfully used a band-type pail warmer and plugged it into a digital temperature controller. This has been keeping the vats at a regular temperature in my unheated studio.
AND if you are going to make wood ash lye for a fermentation vat, this is the time of year to connect with friends who are burning wood. You will want to identify someone who burns only hard wood in an efficient wood stove. That will result in the best ash for making lye.

Katharine, thank you for this information. I appreciate you sharing this kind of knowledge with us.
The color of the clothing you dyed is lovely.
Thanks the mesh laundry bag is a great idea.
On Sun, Jan 10, 2021 at 12:58 PM Natural Dye: Experiments and Results wrote:
> Catharine Ellis posted: ” I now have, and am actively using, three 50 > liter (15 gallon) indigo vats, in addition to a 100 liter (30 gallon) henna > vat. I am loving the size of the 50 liter vat! The vessel is tall and > narrow. It’s just the right shape for a vat, with a rel” >
Over the years, I have tried bottom racks and various baskets to keep the cloth away from the bottom sludge. I am definitely going to try the laundry bag idea. Brilliant. Thank you.
Decades ago I bought two of the largest size stainless steel cook pots from a commercial kitchenware shop. They were a bit pricey then and probably prohibitively expensive now, if new, but they will last forever and can be easily heated. I’ve used the big plastic garbage containers for really large vats but reheating is difficult, if not impossible. How do you reheat your vats?
I always enjoy your posts and your book is my main reference book.
Thanks so much and stay safe.
When I keep the warming blankets on the vats, I don’t have to “reheat”, as they are always at the correct temperature. If I turn off the warmers for some reason, then it will take a day or so for the vat to heat back up.
I was able to purchase 3 25gallon containers from a closed restaurant business. They had been used to store flour. I’m now using those for my fructose vats. As one vat ages, I’m able to get the lightest blues (per Aboubakar Foffana) until it is truly exhausted and then I start a new strong vat. I found round plastic laundry hampers with holes that I put into the vat after stirring and letting the sludge settle. I also use the bucket wrap heaters to keep the vat at about 120 F. It’s been a game changer…now I’m on the lookout for 50 gal. containers (used so I don’t have to pay the “NEW” price, yikes!). Thanks for all you are doing to help our dye community learn more!
You are a treasure! Thank you for this truly practical info and your vast expertise.
Interesting read Catharine. I cannot imagine having fermentation vats in snowy conditions. I clicked on the link for your vessel at Amazon. The price was $40 plus $450 postage to Australia. Think I’ll stick to my large stainless steel pots (tho they are a bit wide.)
I think you should stick to what you have, too! But it’s always good to be on the lookout for appropriate vessels. Sometimes those used for brewing or fermenting will work well.
Hello Annie, I’m in Australia too–used barrels that have stored olives or other foodstuff can be found second hand, they are sturdy and often of a suitable shape–in some cities there are sellers that specialise. A dyeing friend bought hers at the Melbourne markets. Apologies if this is stating the obvious! That $450 postage fee is a bit wild! m
Es tan maravilloso e inspirador leer su explicación Catherine !!!!!!!!!! Muchas Gracias !!! Susana
This is really interesting, and so helpful to see your process, thanks for the tip about wood ash too! (Also I’m really enjoying your book).
Thank you for the heating ideas! I have a big garbage can inside a bigger one with insulation in between but have not been able to maintain the proper warmth thus far. I was wondering if there are any fish-tank type heaters that would survive the alkaline environment, but the external wrapping seems like a game changer.
Thank you Catharine for sharing your ongoing indigo exploration. I see there are used barrel sellers here in southern Ontario, Canada, with cheap used food-grade varieties in 10-15 gallons. I will buy one when I start another vat. Why do you have three vats going? You also mentioned having a henna vat. At one time, you used Maiwa’s madder (which I also used) to feed the fermentation vat. Do you now use henna? I have tried that too – it’s certainly much less expensive than madder. Happy New Year to you and Joy, Cassandra
Each one of the three vats was started to learn something new: one uses soda ash as the alkaline, another uses wood ash lye, etc. The henna vat is a quick reduction vat that I have had for nearly 5 years. It has been boosted with additional indigo, lime, etc. several times. At this point the henna vat has a great deal of lime in the vessel and I am not planning on reviving it. Instead, I will make a large sukumo vat in that vessel. I prefer working with the fermented vats. Henna requires the very high pH from lime in order to reduce. The fermentation vats use a lower pH and madder root can be used as organic material. I save my madder from spent dye baths for this.
Thanks for the reply, Catharine. I misunderstood the henna vat – thought you were dyeing with henna, then using some as a reduction agent for the indigo vats. Thanks for pointing out that using madder entails a lower pH than henna. I haven’t paid attention to the pH level where my various vats (iron, banana, henna and madder) have been most effective. So much to learn!
Hi Catherine–I wonder if u can use a HEATER with COILED STAINLESS STEEL as a warmer for the 50Gallon vats? Will that be ok inside the indigo vat?
Thank you. Kat
One of the challenges with heaters is to maintain an even, steady heat for the vat. That is why I prefer the warming blanket. In Japan, I say many indigo vats with electric blankets wrapped around the outside. I don’t know if the alkaline vat will have an adverse effect on the metal coils.
Hi Catherine, thank you for a thought provoking piece! I’ve often wondered where and how to get suitable large containers. May I ask what you call ‘a long dip’? Over the years I’ve been told many different things by different teachers regarding dipping methods, for example including using fast ‘in and straight out’ again dips after the first 10 minute dip and several other variations. I’m now at the point where I’m not sure any more what is best, or why. They have all been very experienced people and their methods obviously work for them so I’m not criticising anyone at all, I’m just confused! They have all been ‘workhorse’ vats, made with either soda ash or washing soda. Thank you for any light you can shed! Eve
Hi Eve. My colleague, Joy Boutrup, insists that each immersion into the vat should be 5-10 minutes in order for the large dye molecule to penetrate the fibers. That makes sense but it’s been a challenge for me to achieve very pale colors in this way. Another professional colleague in Japan recommends doing 30-60 second dips to get the palest colors – but always do at least 3 dips. I think that the key to the pale colors is a very weak vat. Longer dips and a minimum of 3 dips seems to be good advice. Still learning…..
Hi Catharine, Thank you, if you’re still learning there’s hope for me too! I will try it come spring when I can get fabric dry again. Yes, I’ve been told ‘3 dips minimum’ by several folk and find that for me the best pale colours come when I look at the vat and start to wonder if there’s any indigo left in it…
Thank you again, Eve
Hi Catherine, Thanks for sharing this information! I’m curious about the wood ash vat. Have you determined a “recipe” for using the wood ash instead of the purchased lye?
Working on it…..
Thank you so very much for posting this and all other experiments and results. I commandeered our turkey fryer for my fructose indigo vats and the stainless steel basket that came with. I currently have a very large stock pot for smaller pieces that is easy to pick up and place on stove to reactivate. I also have two vats in large plastic contractor’s buckets with tight sealing lids that I can easily place into a sink filled with hot water. They do get heavy though! But they travel well for workshops and I am able to leave them outdoors, even in the winter and bring them in when needed. I have kept them going in the past for almost 8 months, feeding and warming them, etc. I have also found using large plastic storage bins work for oversized projects but the drawback for me are that the lids are not tight sealing (allowing air in and they don’t travel well…..) and they get quite heavy and impossible to move.
On another note, your work is inspirational and having seeing your experiments and feedback is amazing!
Thanks for this…. it’s always good to know that what I put out there is received and used.
Thanks Catherine, you’ve inspired me to try the fermentation vat in a large bucket! I had good result so far but when attempting to “feed” it might have added too much bran and caused it to over-ferment, pH is now bellow 9. How much addition of wheat bran and soda ash is needed to keep the vat going? Or should it be left alone as long as the pH is at 9 or above? Thanks for so generously sharing your knowledge.
I add small amounts of lime (calcium hydroxide) each week to the vat: about 1.5 grams per 10 liters. That seems to maintain the pH and it’s important to do that. You don’t want to go below 9 – so you might add a little more initially. The very small amounts of lime quickly bring up the pH efficiently.
Then once a month, I add 5 grams of cooked bran for every 10 liters.
Hope that helps.
Good luck with your vat.
I am taking the plunge and have just scaled up to a 30 gallon vat! I have used large stock pots and contractor’s buckets (great for traveling), but with larger pieces to dye it now seems practical. It’s summer here so.I am going to rely in the sun for now to warm it up! Thanks for your amazing posts/tutorials! I would not have started on my journey without you and Joy and your amazing books as well!
Always good to hear that we have inspired experimentation and courage!
On the subject of the care and feeding of an indigo vat (mine is a 1-2-3 with sucrose), I have just read your May 7, 2021 reply regarding the amounts and timing of the addition of lime and bran. Question 1. I am assuming that the bran is to boost reduction. Is that correct? Question 2. Having started with sucrose for reduction, must I continue or can I transition to Henna or spent madder or bran? Question 3. Is the timing of your vat “tune-ups” related to the amount of use that your vat is getting/the amount of fabric processed?
I received your book a couple of months ago. What an excellent resource! Best book out there!
I use the bran to boost the fermentation in a FERMENTATION vat – one that is begun slowly with a lower pH. The sugar vat is a quick reduction vat and the easiest way to boost your reduction is with the addition of more sugar. I have used both sugar and henna in a quick reduction vat. I have not experimented with the use of bran. Typically, I will add more sugar at the end of each dyeing session but if the vat is not being used, it should still be maintained: stirred, checked for pH and reduction. So glad that you find the book helpful.