
© Catharine Ellis, as posted to the blog: Natural Dye: Experiments and Results
This recipe can used to make a 1-liter vat or can be scaled up to a larger vat. I typically make a vat that is 50 liters in volume. The recipe is intended as a starting point for the dyer who wishes to explore fermentation.
Observe carefully. Be flexible. Experiment. Keep records!
As stated earlier, please start with a small vat of 1-4 liters. Get comfortable with it and wait for reduction. Any successful test vat can be added to a larger vat, speeding up the fermentation/reduction time for the new vat. So, small vats are useful.
Ingredients:
- Indigo pigment: 2-10 grams per liter (see note #1 below)
- Dried and ground Indigofera tinctoria leaves: 5 grams per liter (see note #2 below)
OR
Ground, “spent” madder root: 5 grams per liter. (see note #3 below)
- Wheat bran: 5 grams per liter. I typically use “feed-grade” bran sourced from my local farm supply store.
- Soda ash (sodium carbonate) OR potash (potassium hydroxide): 25 grams per liter. Either soda ash or potash is effective. (see note #4 below)
Optional: If you have them: dried woad balls/patties or dried polygonum leaves etc., crushed: 5 grams per liter. (see note #5 below)
Note #1: Deciding how much indigo pigment to put into a vat is a complex decision and largely based on:
- The size of the vat
- The amount of dyeing that will be done in the vat and the size of the dyeable goods
- The type of textiles that will be dyed: yardage requires much more volume that yarn.
- How long the vat is expected to last.
The fermented vat seems to be very efficient at reducing the indigo available in the vat. I have observed that a vat with 2 grams of indigo pigment/liter can produce a blue that is almost identical to one with 8 grams per liter, but the vat with the smaller amount of indigo will not last as long. Fermented vats will result in pale colors only after much of the indigo has been used up and the vat becomes weaker. My 50-liter vat with 2 grams of indigo per liter took over 20 months to reach a point where it produced pale blues.
I have never added additional indigo to a vat. I have always felt that when a vat was “finished” it was time to start fresh again, although that might be something to consider.

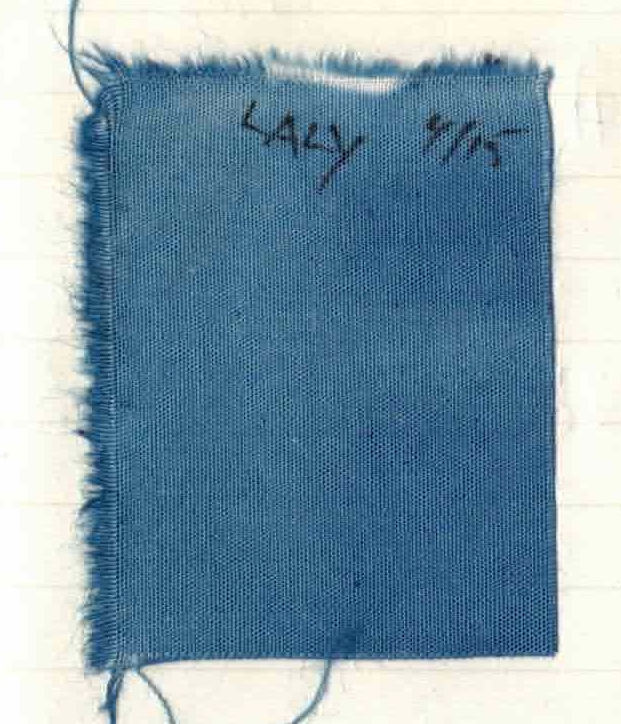
Although the vat on the right uses 4x the amount of indigo pigment, and the the vats were equally reduced, they are close to identical in depth of shade.
Vats that are kept a long time will build up solid materials on the bottom: mostly lime and wheat bran. When stirring the vat, there is noticeably more “stuff” on the bottom. I suspect that I have kept vats longer than might be recommended – I guess I may not be dyeing enough!
For all the above reasons, I would recommend using a smaller amount of indigo pigment in the vat. Use it up. Dye some pale colors and mix a new one. Ideally, the studio will have two vats: an old vat for pale colors and another for darker colors.
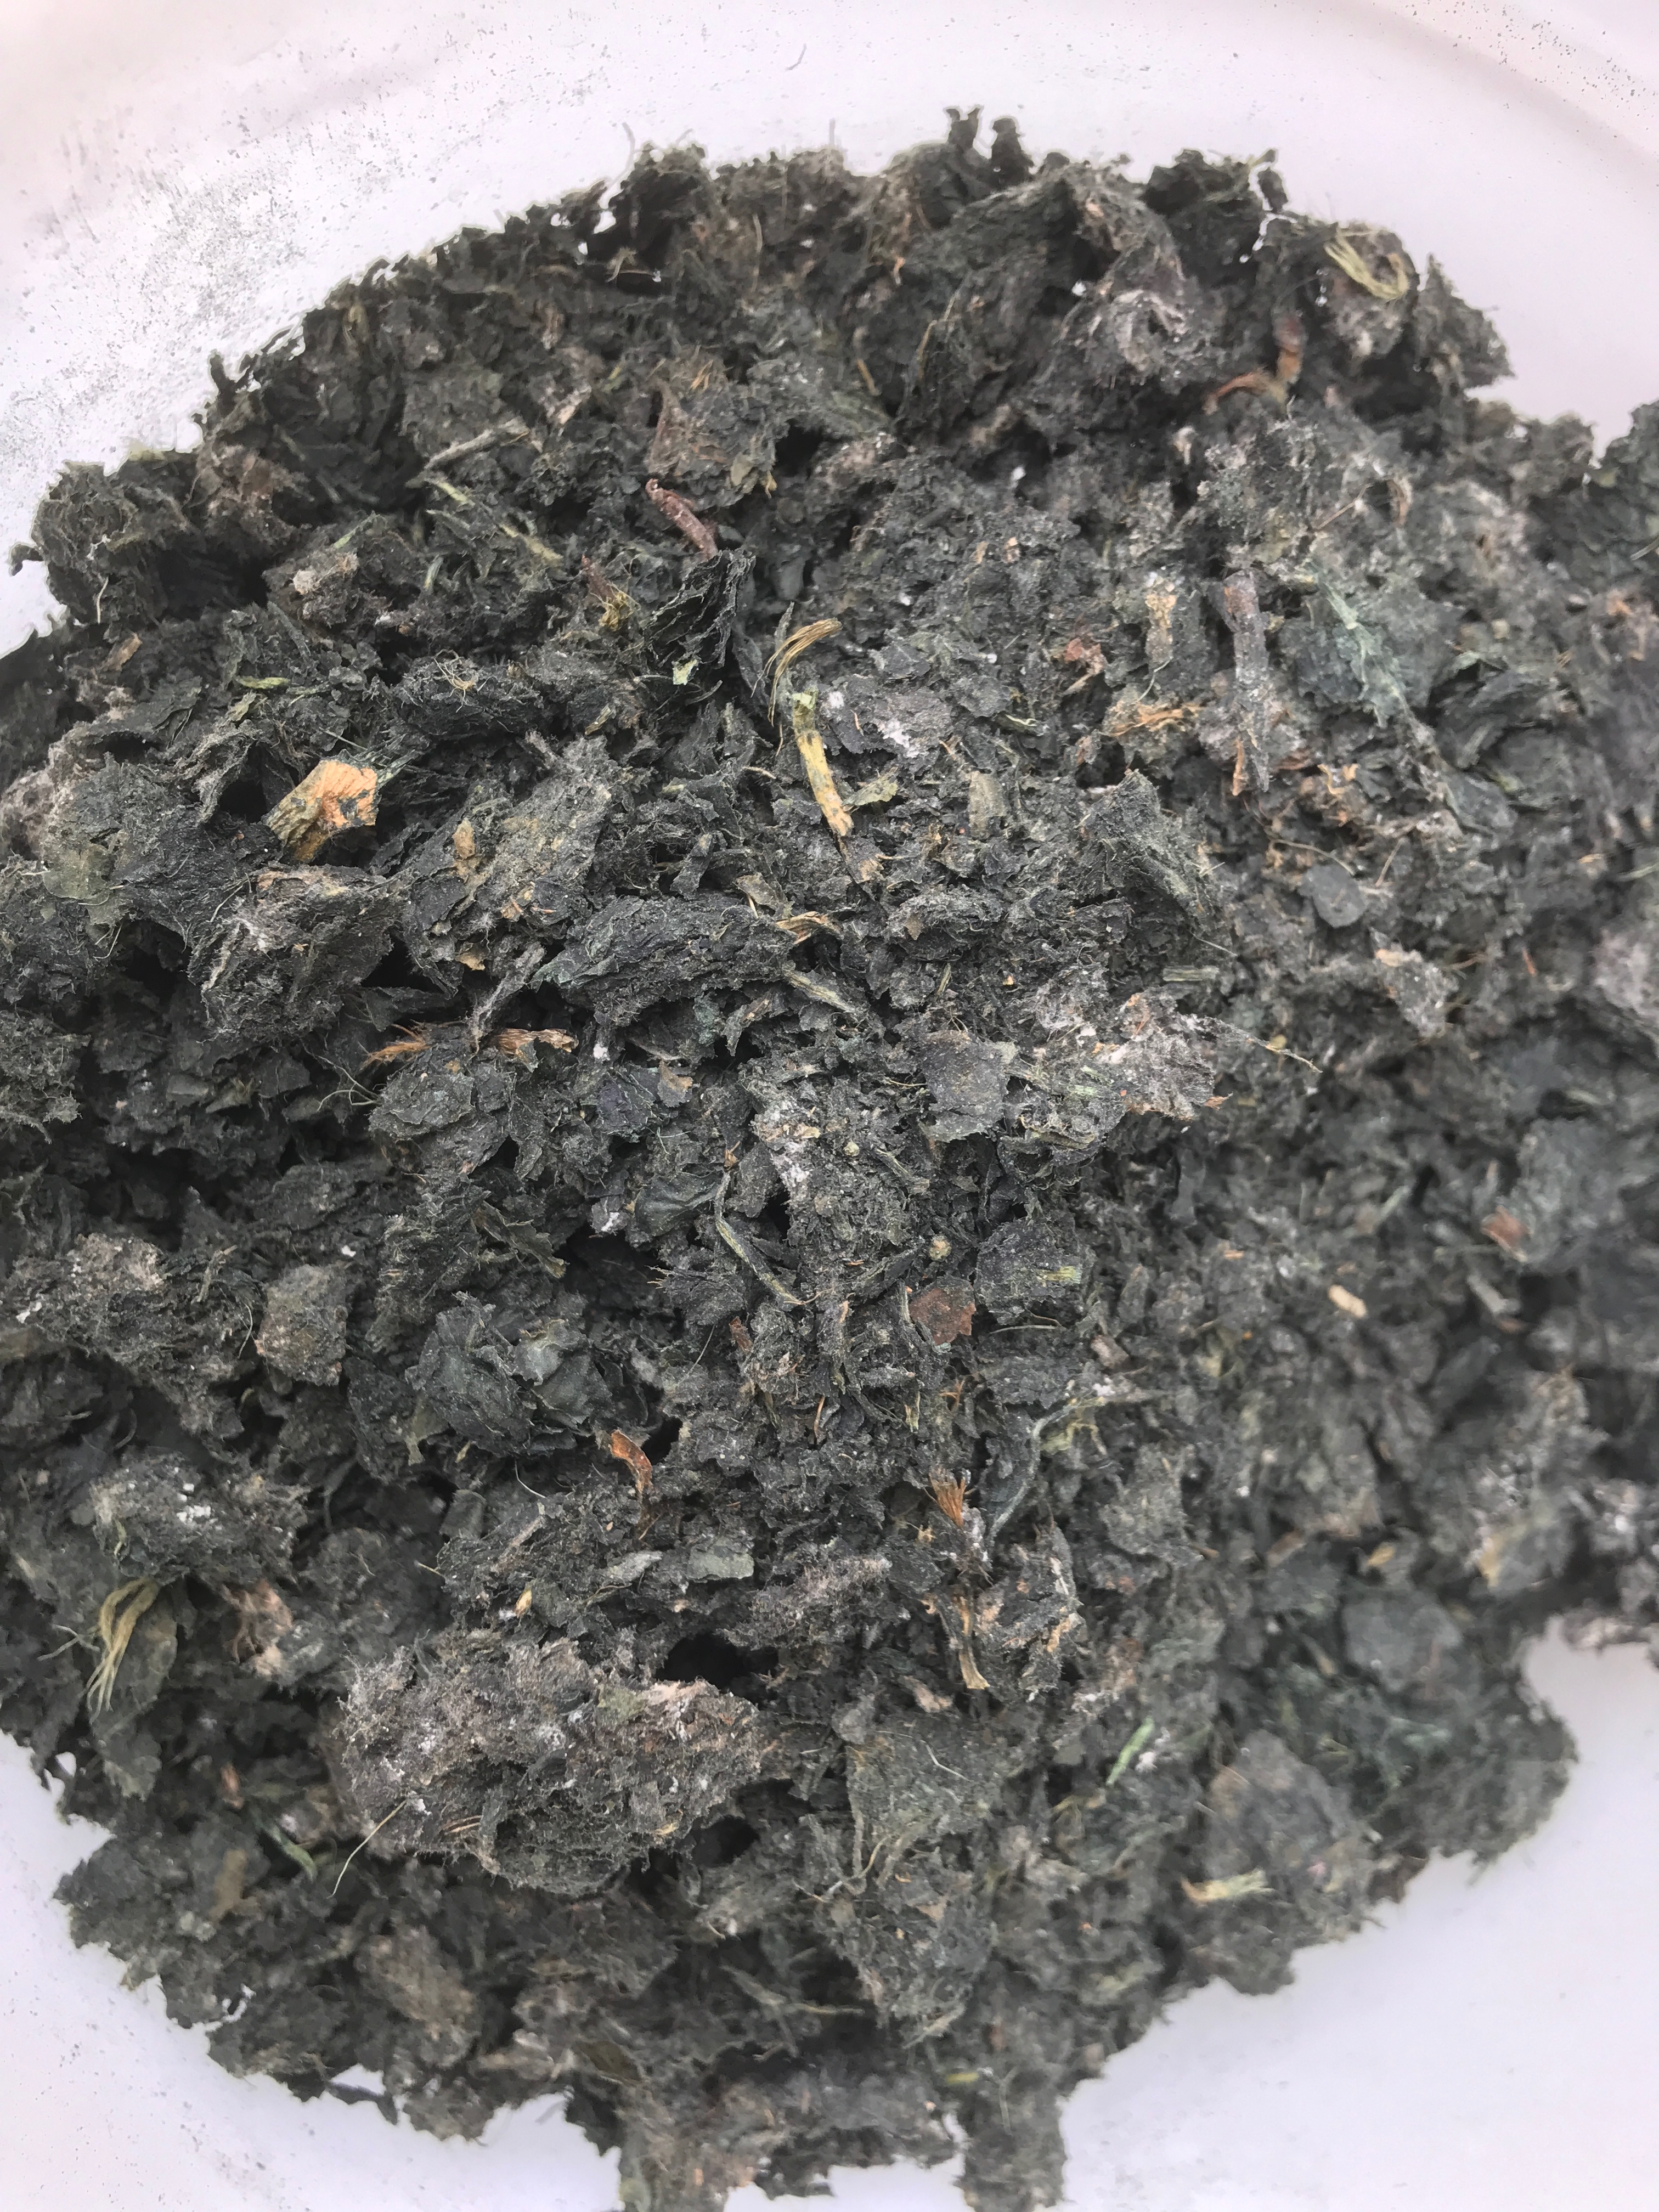
Note #2: “Spent” madder has already been used for dyeing red. The alizarin and other dye components in the roots are not necessary for the fermentation.
When dyeing with madder root, I place the ground roots into a fine mesh bag that is large enough for the dyestuff to move freely. When the red dyeing is completed, I remove the ground root from the bag and dry it. It will dry easily on a tray if left in the open air. Once completely dry, the madder can be stored until it is needed for an indigo vat. Madder that has not already be used for dyeing red can be used but it would a waste of a good red dye. Traditionally, the madder dyers would sell their spent madder root to the indigo dyers.
Note #3: Dried and ground Indigofera tinctoria leaves are often sold as “black henna” and used, in combination with madder, to dye hair black. I source mine from Maiwa.
Note #4:The stated quantity of soda ash or potash is ideal to achieve the desired pH (12.0) using MY WATER, which is acidic (pH 6). If your water is neutral, less soda ash might be required.
Note #5: When I have fresh indigo of any variety in the garden, I will grind up the leaves, form them into small “patties” and dry them. The theory is that these will introduce supplemental bacteria to the vat. When I use them, my vats tend to reduce a little bit faster. If you do not have fresh indigo to make these, that is just fine.

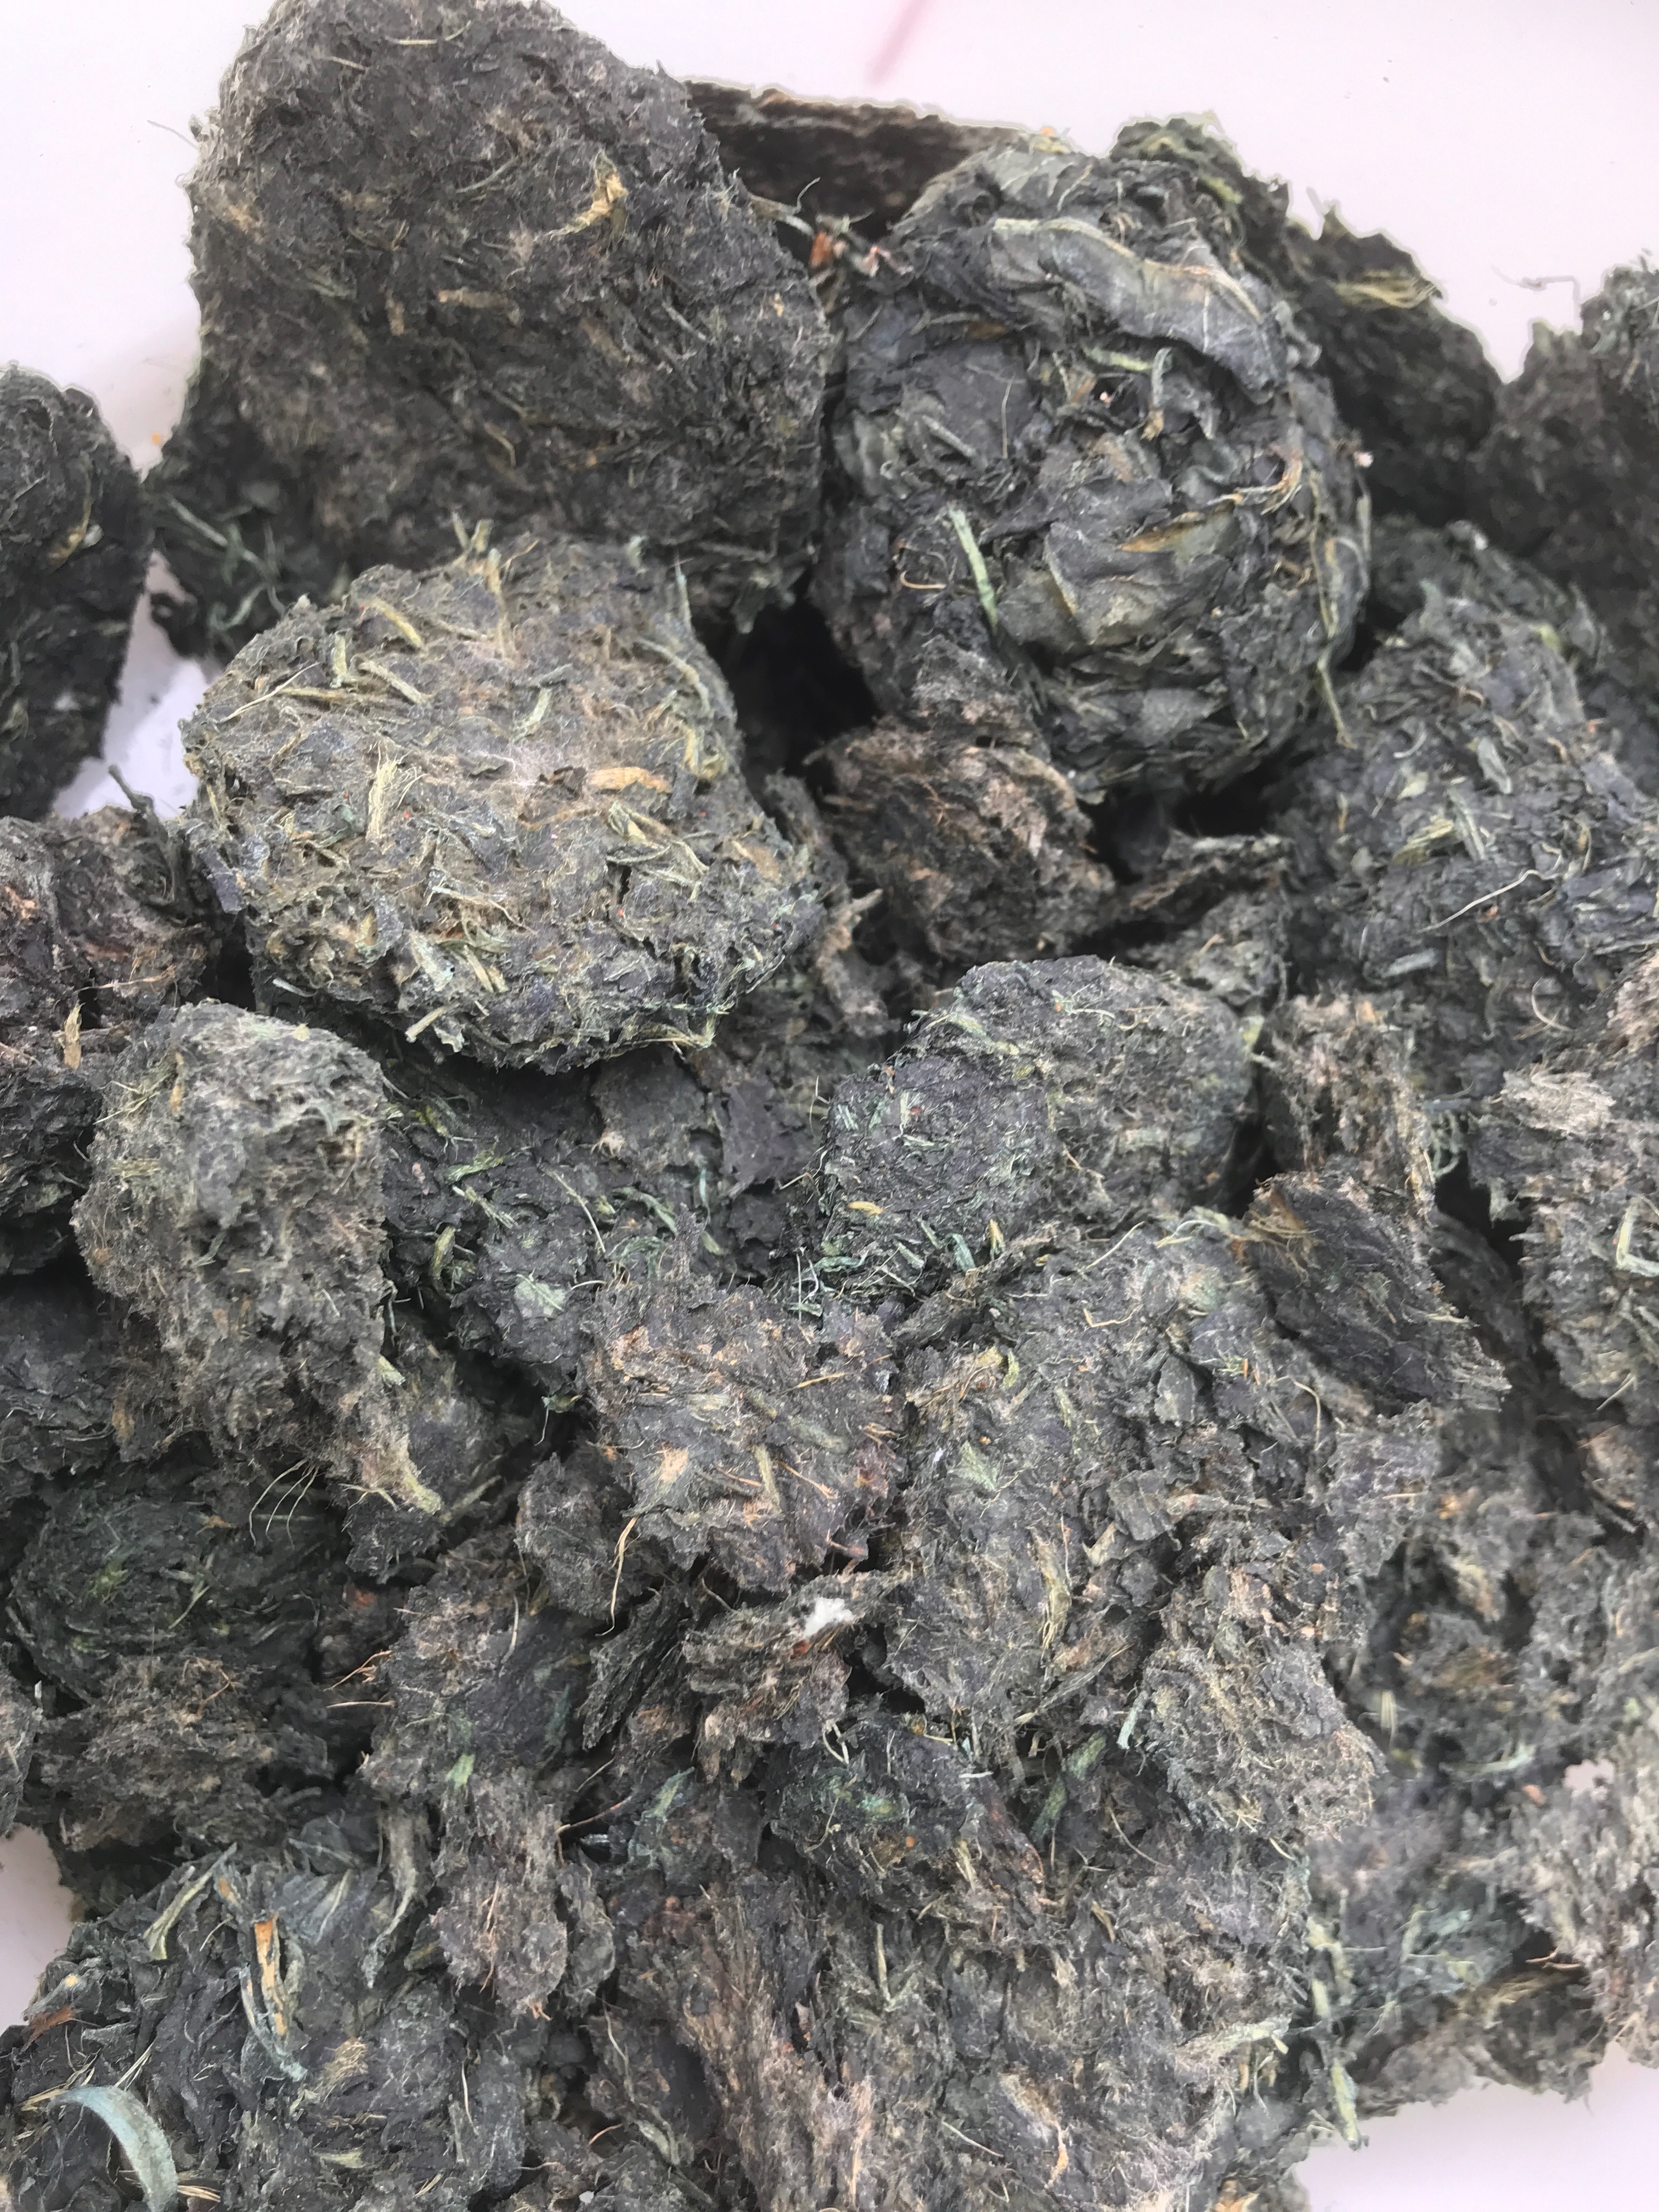
Indigo leaf patties, made from fresh indigo leaves (left). They are dried to preserve (right) and can be added to feed the vat and to boost fermentation. I have used all types of indigo leaves from my garden for this: Persicaria tinctoria, Indigofera suffruticosa, and Isatis tinctoria.
Procedure:
- Thoroughly hydrate the indigo pigment in water unless you are using paste pigment.
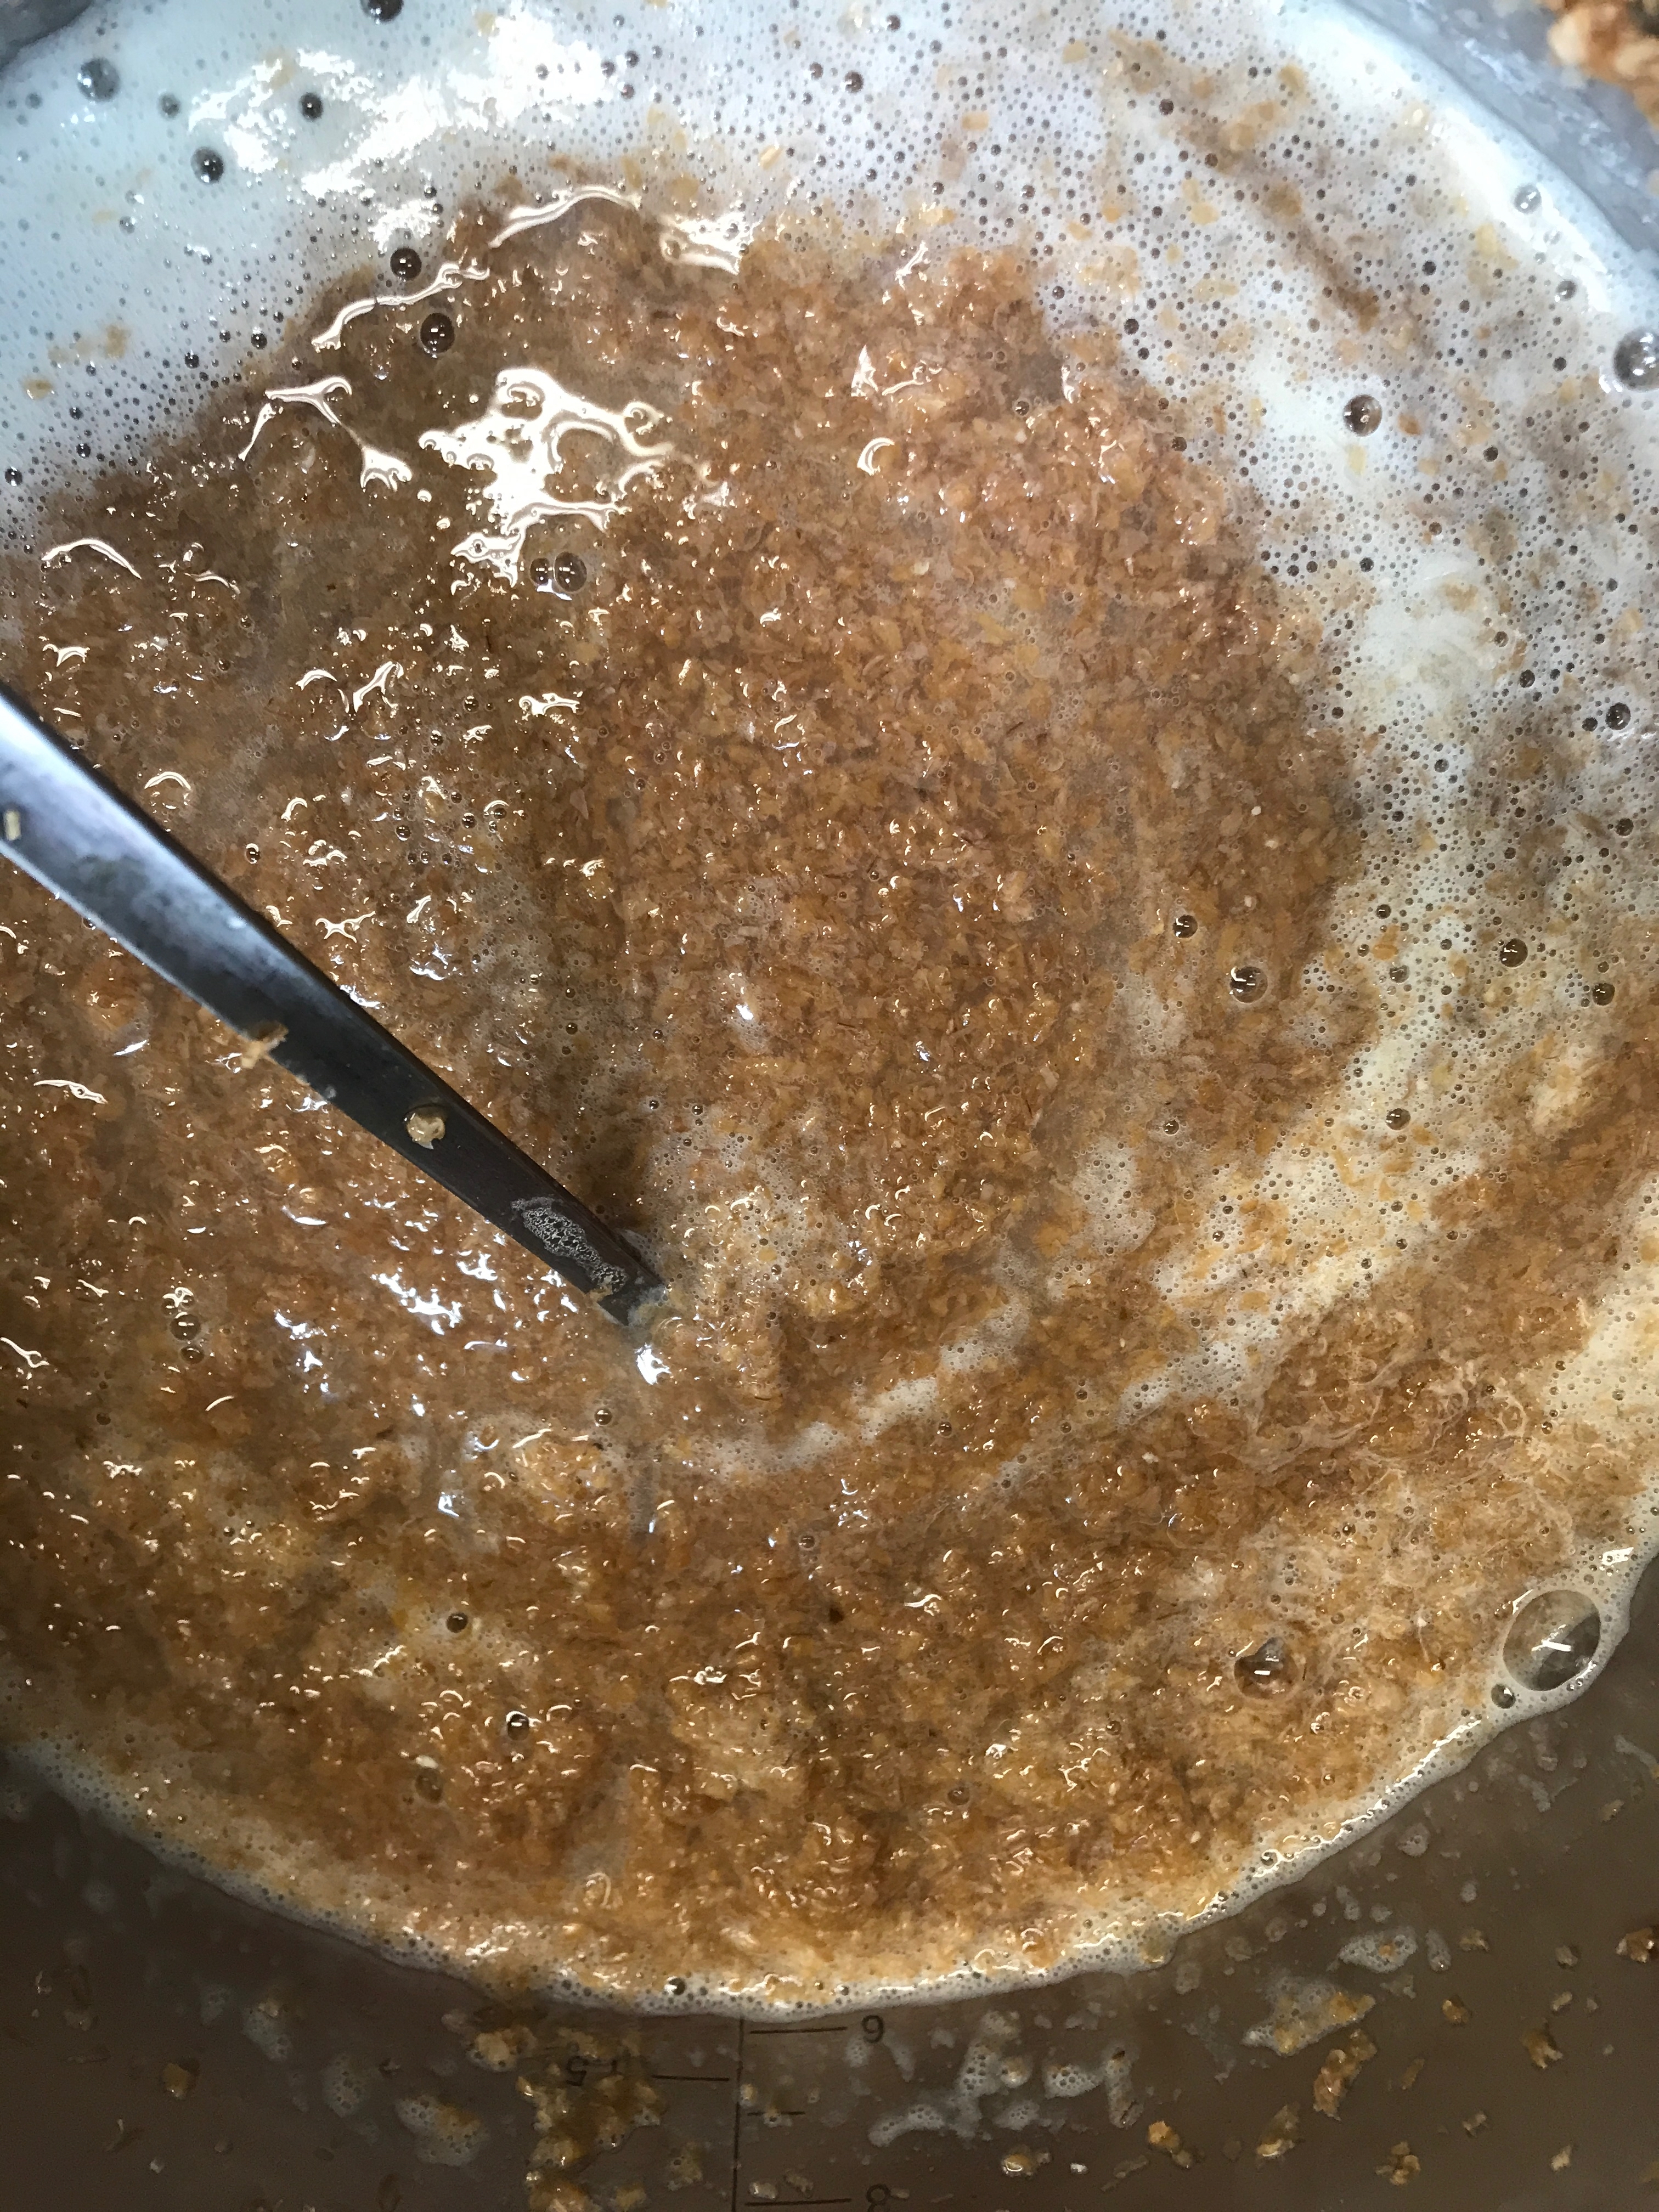
- Boil the bran in a small amount of water for about 10 minutes. It should become the consistency of cooked cereal and emit a slightly sweet odor. Cool before use, until just warm.
- Prepare the “food” for the vat:
- If using madder root, cook this briefly. It can be added to the bran and they can be cooked together for efficiency.
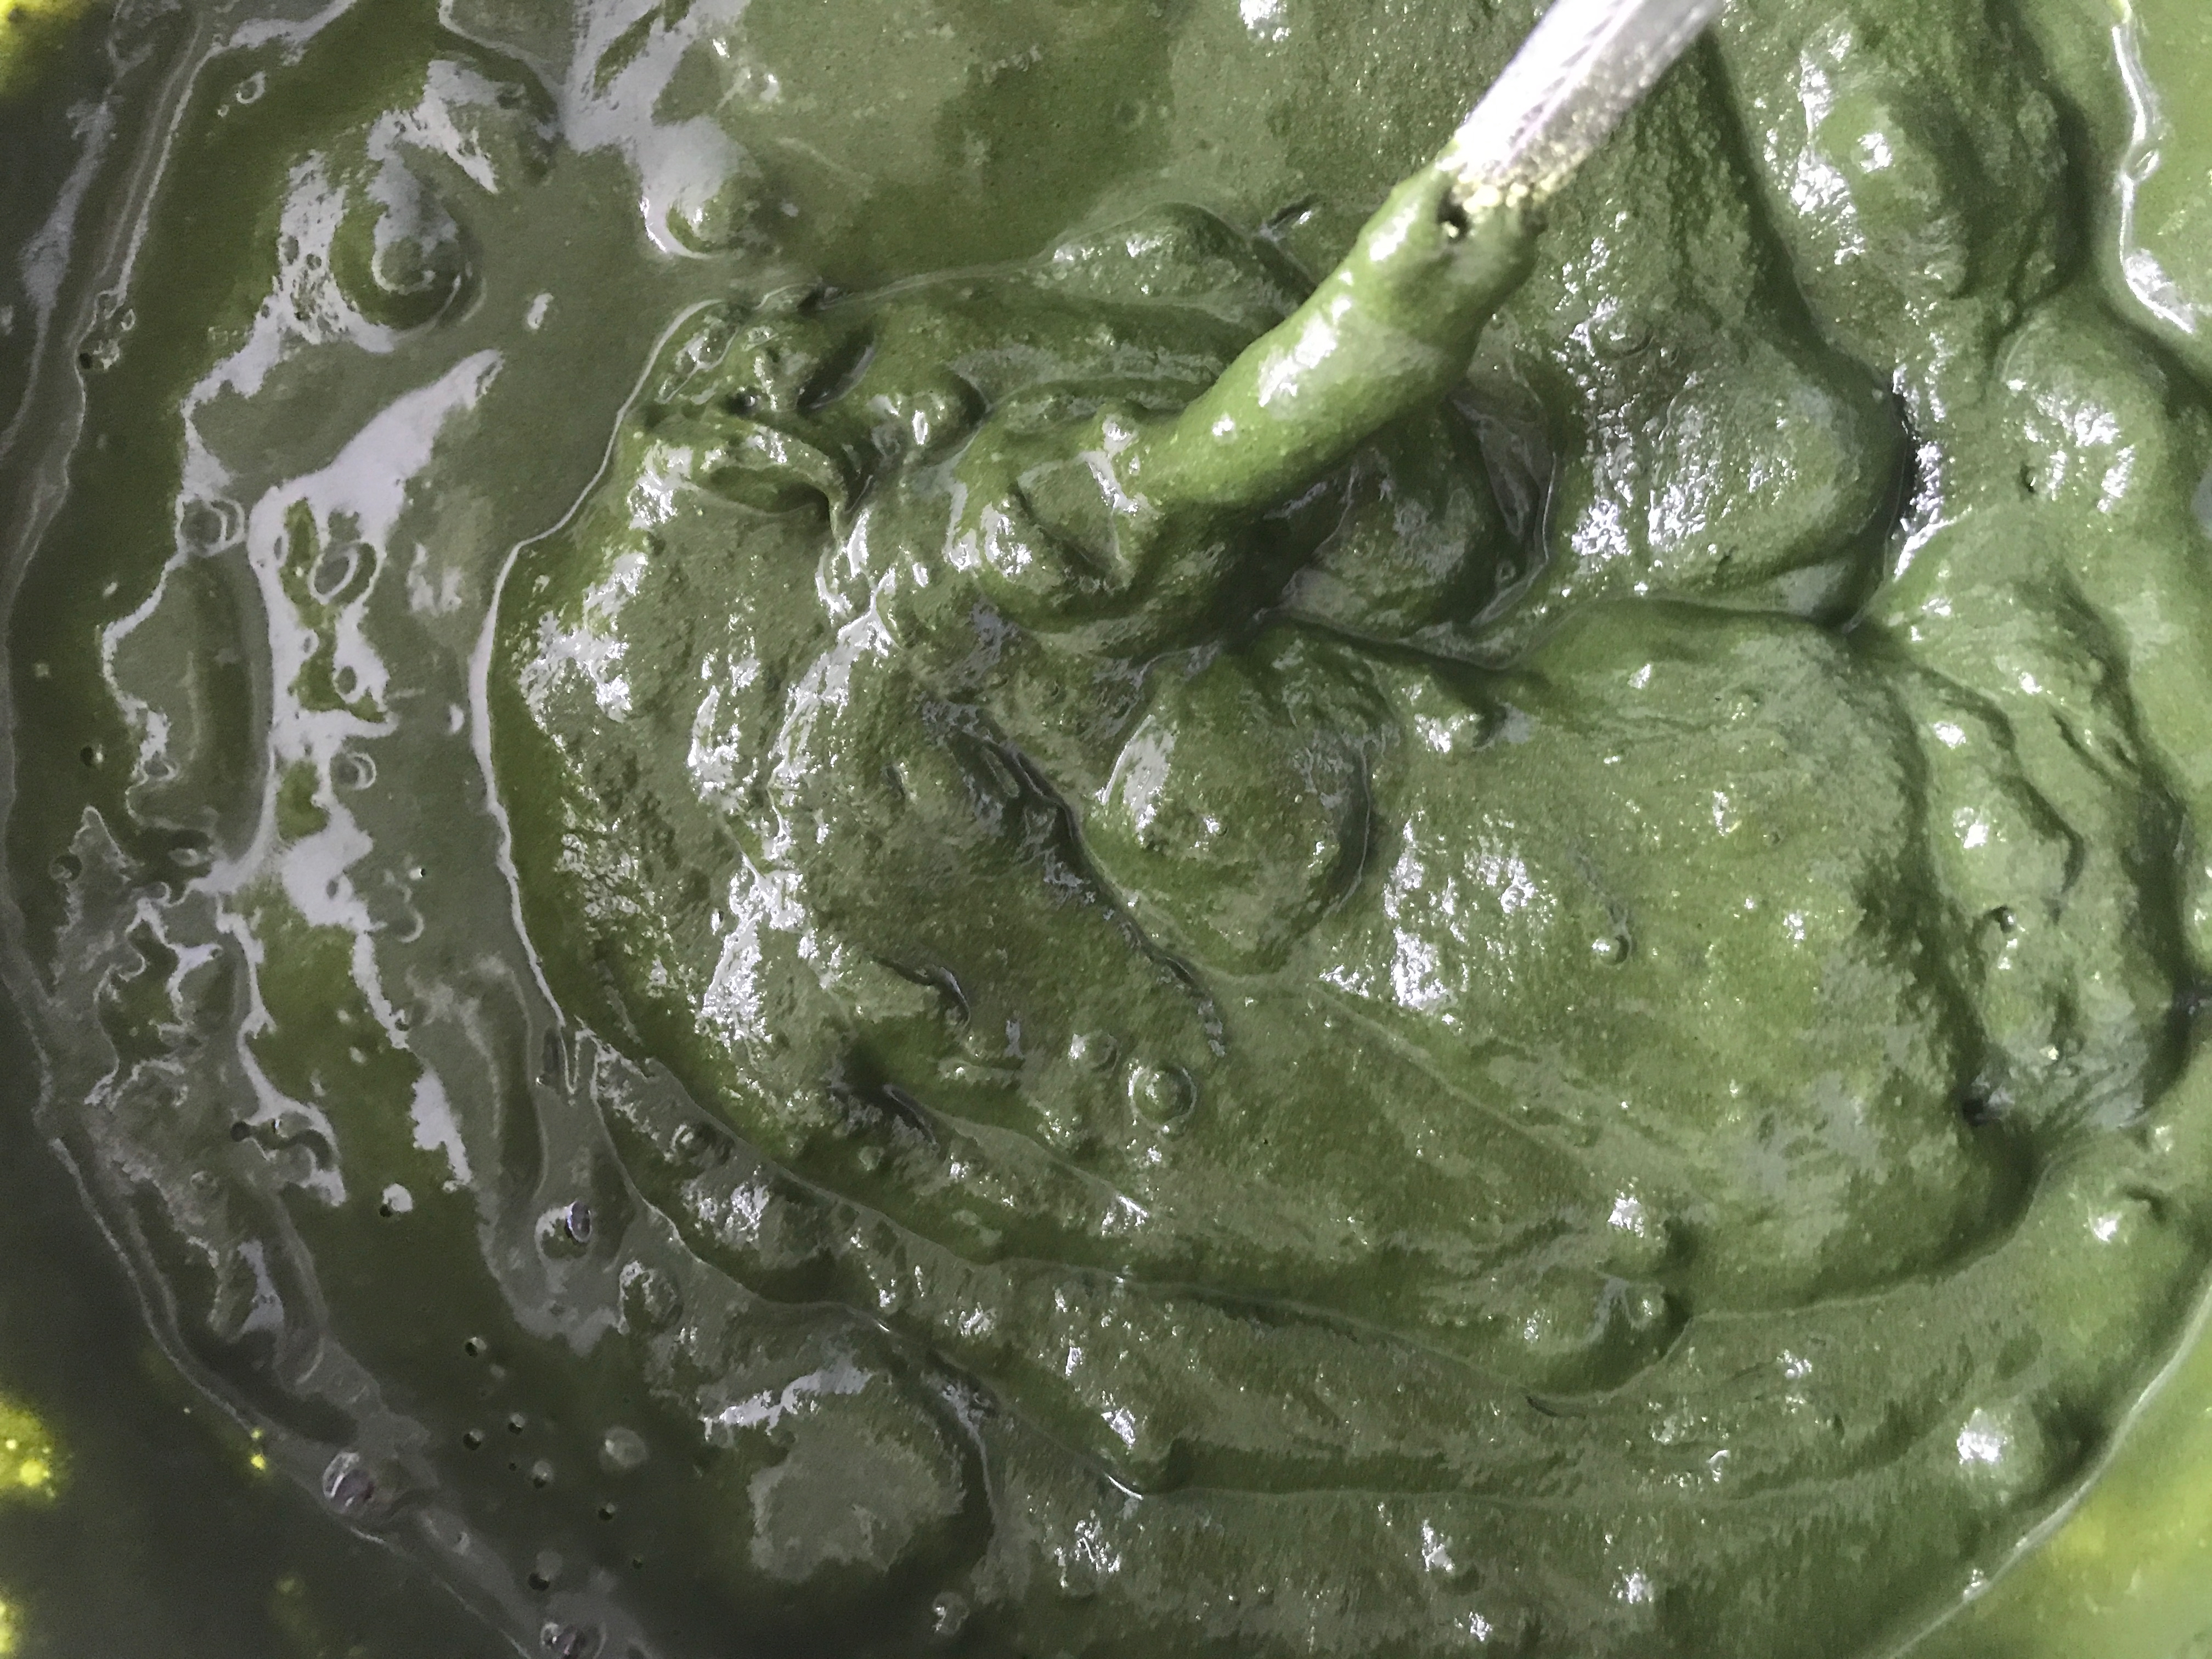
- If using ground Indigofera tinctoria leaves, stir them into warm water to make a smooth, watery paste.
- If using dried indigo patties, crush them up before adding to the vat
- Dissolve the soda ash or potash in boiling water. Cool before use until just warm.
- Add warm water to the dye vessel until it is approximately ¾ full.
- Add the remainder of the ingredients to the dye vessel.
- Wait a few days, to add the liquid to full capacity.
- Stir the vat carefully with a circular, centrifugal motion. Cover the vat loosely.
- Warm the vat, if required. Optimal temperature for bacteria growth is 30°C/86°F but it can grow between the temperatures of 10-50°C/50-122°F. Bacterial growth decreases at temperatures greater than 36°C/96.8°F
- Measure the pH. It should be in the range of 10-11. Once the vat is at full capacity, add a very small amount of lime, (calcium hydroxide) and re-test the pH.
Over the next few days:
- Stir the vat in a centrifugal motion 2-3 times a day.
- Monitor the pH – A good pH meter is an excellent investment. Alternatively, use pH papers that have multiple indicator zones.
- As the fermentation begins, lactic acid will be created, and the pH of the vat will fall. This is the time to completely fill your vat using warm water into which you have dissolved soda ash or potash (25 grams per liter).
- Measure the pH It should be in the range of 9.5-11. Once the vat is at full capacity, test the pH and record this.
- Add a very small amount of lime (calcium hydroxide), if necessary. Lime is a much more concentrated “fix” for pH adjustments.
- Watch for the vat to form an iridescent film on the surface. This is an indication that fermentation and reduction has begun.
- Smell the vat. As bacteria causes the fermentation of the vat, the “odor” will be an indicator of activity.
Concurrently, test the color: the best way to tell if the vat is reduced, is to test its ability to dye.
- Starting on day two, begin test dyeing. Place a small piece of wetted-out cotton cloth into the vat for 10 minutes. Observe and note the results. Continue to test the vat each day, maintaining a record of the dye tests.
- Once the test fabric dyes a clear blue color, the vat is ready to use for dyeing. Usually this takes about 8-14 days.
- Dedicate a small notebook to each vat that you build so that the vat can be observed over weeks/months. Place the dyed samples in your notebook. This will be an important resource tool to understanding your vat.
- Once reduced, the vat can be monitored by weekly testing.
- From this point, follow the instructions in “Vat Maintenance” post, which will follow.
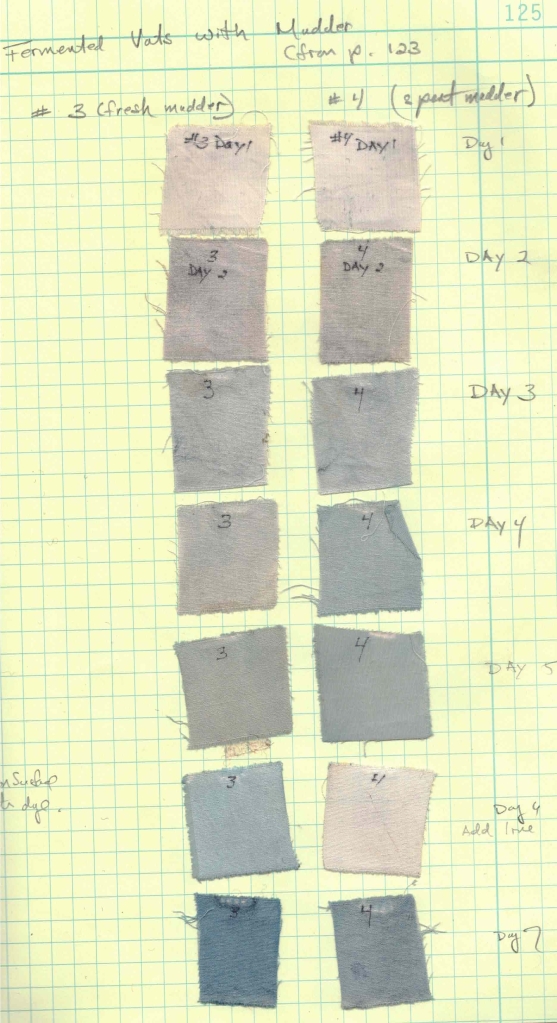
Day 1 – Day 13 of two vats made with madder root. One was made with “spent” root, the other was made with root that had not been used for dyeing. (I knew that they would both work, but sometimes I just need to prove it to myself!)
By day 6 the pH had begun to drop. The lack of color on that day is a great indicator that something is out of balance – and most likely it is the pH. A small amount of lime was added to both vats, and the color improved.
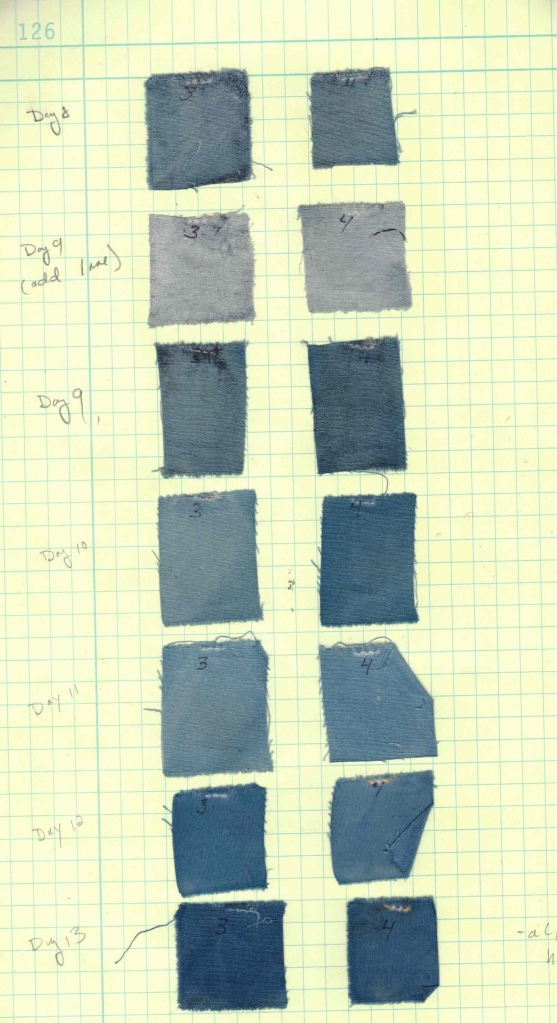
The same drop in pH happened on day 9. This illustrates how easy it is to read the condition of your vat from dyed samples. After day 13, I began using these vat for dyeing.
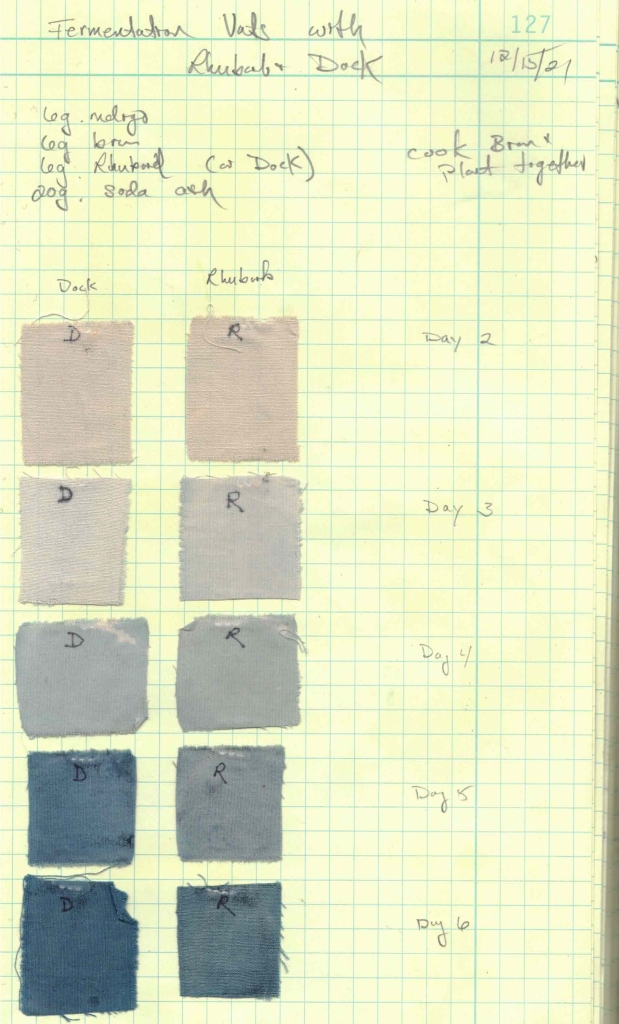
A similar test using spent dock root (Rumex crispus) and rhubarb root (Rheum palmatum). Reduction came more quickly in these vats. Perhaps this is because the plant material was a finer ground powder and more easily accessed by the vat. I source dock and rhubarb that are prepared for medicinal purposes.

Thank you for the useful info. Would you please describe how you prepare the medicinal dock root and rhubarb root that you purchase to make it “spent”? Thanks, Carolyn
I dye with it. Usually I use these as “one bath acid dyes” on wool. That process is described in The Art and Science of Natural Dyes
Okay, thanks – I’ll revisit the book to see details.
It’s so helpful to see how you document your process. I get bogged down in this area. I’m hoping to be able to get a vat going this summer even tho my dye kitchen is in a different location from where I live. In the meant time I’m studying each lesson you release and some of this is finally making sense!
Good morning! I have been saving each of these emails and can’t wait to have a moment to dig in. For some reason, I didn’t get Blog Post #4 and wonder if you can resend. Thanks so much. I so appreciate your willingness to share your experience and knowledge. Jamie Rayburn
You should be able to scroll down to previous posts at this site https://blog.ellistextiles.com
Dear Catharine, Thank you so much for sharing all your wonderful knowledge on the subject indigo dying and the fermented vats. I never had the courage to start a fermented vat – I always go with the 1-2-3- fructose, but it seems so interesting I hope to be able to try one day:-) I know you have that nice workshop next to your house and you are able to take care of your vat every day (almost). I am living in Copenhagen and have my workshop 3 hours from there, – that makes it difficult and not the best conditions for that sort of vats! I have enjoyed the Japanese fermented vat through visits to BUAISOU and Japan several times during the last years and blue has become my signature colour in the textile works I make. Thinking back, meeting you and your indigo at Oriole Mill got me started 🙂 I am sending your all my best wishes and hope to see you one day in Denmark ☀️☀️☀️☀️ Greetings from Helle – DK
>
So nice to hear from you Helle! I agee that three hours is a very long distance to maintain an indigo vat! Yes, I hope to return to Denmark again….
Hello, Catharine. I’m not understanding the difference between your mention of achieving the desired pH as 12.0 (in Note #4) and the mention of measuring pH to be in the range of 10-11 (step 10 of procedure. Does adding the amount needed to reach pH 12 result in a slightly lower pH during the procedure? Would appreciate your clarification, please.
I plan to use homemade liquid potash; can I assume that I simply need to slowly add the amount until reaching the desired pH? If so, at what point am I to initially check pH?
Many thanks for your gift of these blogs, SallyB
Ah, Sally, you have identified the challenges of consistent recipe writing! The truth is that anywhere in the vanicinty of 10-12 is just fine. This is not an exact sience and it’s a real challenge to reach a specific pH and maintain it. Homemade potash? Do you mean wood ash lye? If so, wait for my next blog post which very specifically talks about making and using wood ash lye for the vat.
Thanks for the pH clarification. And yes, I did mean wood ash lye, so will await your next blog post!
Catharine,
I have spent madder (rubia tinctorum) which I had fermented to extract the alizarin. Would this fermentation of the madder root affect its ability to be used in the indigo vat?
Also, can spent rubia cordefolia be used? If you mentioned this, I missed it.
Thanks, SallyB
Sally, I am quite sure that the rubia cordifolia would work – but I don’t think I have ever used it in my vats. Regards to the fermented root, I’m guessing that would work as well but, once again, I have not used it. Why don’t you isolate both of these madders and make small, 1 liter test vats. Than report to us…. Catharine
Thanks… My homework is cut out for me!
Catharine,
I am just getting to the point that I’m ready to try a comparison of small vats. I plan 4 test vats: two of rubia cordefolia and two of rubia tinctoria…….comparing fermented vs non-fermented roots of each.
Question: I am wanting to use quart canning jars……is there any problem in scaling the vat amount down to 800 mls rather than a liter? For that matter (no pun intended), what would you consider the minimal size for a fair trial?
Thanks, SallyB
A long time ago I made the converstion to metric for all of my dyeing….but in this case a quart jar is perfectly fine. It’s what I use for all of my own testing of vats as the jars are available and easily sourced. I simply treat it as a “liter” when making the small vats. In fact, just this morning I made three 2-quart vats in preparation for the class at the JCC Folk School. Catharine
Hi Catherine. My fermented vat is now up to 3 gallons and very soon will be five, or I should say 20 l. It is dyeing well.I am incrementally making vats that I will combine with the goal of a 80 l.You mention using spent dock and/ or rhubarb root in place of madder. Have you tried henna?
I have NOT tried henna. I used henna for a long while in a quick reduction vat with lime. But it is my understanding that henna requires a higher pH. But that is just what I have heard. I have not done it. Let me know if you try it. Catharine
Hi Catharine, I have a couple of questions about the use of fresh Indigofera leaves in the fermented vat re: notes 3 and 5 of this blog post. I have a constant supply of Indigofera suffriticosa in my yard. Where I live it is a perennial. Is there any reason why the leaves should be dried before using in the fermentation vat ? I was wondering if I could use fresh leaves blended up in a blender. Thank you again for your work and your unselfish willingness to share with the dyeing community. You are appreciated. Candace Strong
Lucky you, to have indigofera suffruticosa as a perennial! I honestly do not know the answer to that question. I have only been able to access dried leaves. And whether or not the chemistry of the leaves change in the drying, is an unknown to me. The way I learn most things is to test and observe. So I would suggest making a couple small test vats, use the ground, dried leaves, and also the fresh. I would guess that grinding them would release more of the sugars, starches, etc. And of course the weight of the leaves necessary would be greater, allowing for all the water in the fresh leave. Please do report back. I think that I mentioned I often make small indigo balls/patties with freshly ground leaves and then use them in addition to the ground leaves (or madder). It seems like them more types of active bacteria you can create in the vat, the better for the health of the vat. Thanks for checking in! Catharine
Catharine, thank you so much for this series of posts! I first began experimenting with fermentation bats about eight years ago. In my newbie eagerness, I ambitiously started a thirty gallon trash can vat using matter bran and lime. In our subtropical climate of Charleston, South Carolina, that finally remem partially fermented over a several month period but was never particularly productive, no doubt due to my lack of understanding.
I gave up for a couple of years and returned to experimenting in 2019 with a smaller twenty liter vat, again with limited success. My lack of record keeping and spontaneous/anxious fiddling with the vat, no doubt, didn’t help.
About two years ago, I began again, with two twenty liter vats. One of these I began with madder, bran, and soda ash. The other I began with pot liquor from a walnut vat in place of the matter liquid. These did fairly well for about a year or until the weather was so cold that I couldn’t use them, and when I tried to revive them, it didn’t work well. I began again this summer with limited results. The vat began with walnuts, seemed to be dying better than the matter at the long term. I’ll start a new VAT again in September. This time, i’m dedicated to keeping records!
My question for you is regarding the use of lime. Is it absolutely necessary, or is it possible to use soda ash entirely?
Hi Heather. I am assuming you are speaking of vats made with “madder” – and not “matter”…spell check arg!
The truth is I have never tried using only soda ash to maintain the vat. It is not as highly alkaline as the lime (calcium hydroxide) but I do use soda ash initially, (well dissolved) to top up the vat. It might be worth giving it a shot – but this is where careful record keeping does play a big part. The walnuts are an interesting twist here. What form were they in? Had you used them first for dyeing brown? I successfully made a walnut vat a few years ago. It was a quick reduction vat with plenty of lime. The chemistry of the juglone in walnut is very similar to henna. That is why Joy and I thought it might work. I did not keep it going for long though and have never used it with a fermentation vat. Henna requires a very high pH – that is why it works with the quick reduction but not fermentation. Oh, there is so much to learn! Keep us posted! Catharine