A Visit to Green Matters Natural Dye Company

We headed out recently for, what has become, our annual trip to New England. I always try to include a stop at a “place of interest”. Last year I contacted Winona Quigley at Green Matters Natural Dye Company in Pennsylvania. She was very welcoming and I was pretty much in “awe” of what she was doing there and, as a result, didn’t make a single note, or take a single picture. 

This year, I arranged to stop by again, with the idea of documenting her operation a bit and sharing her story. 

Green Matters Natural Dye Company is a small scale dye house that uses natural dyes exclusively to dye garments for their customers.  

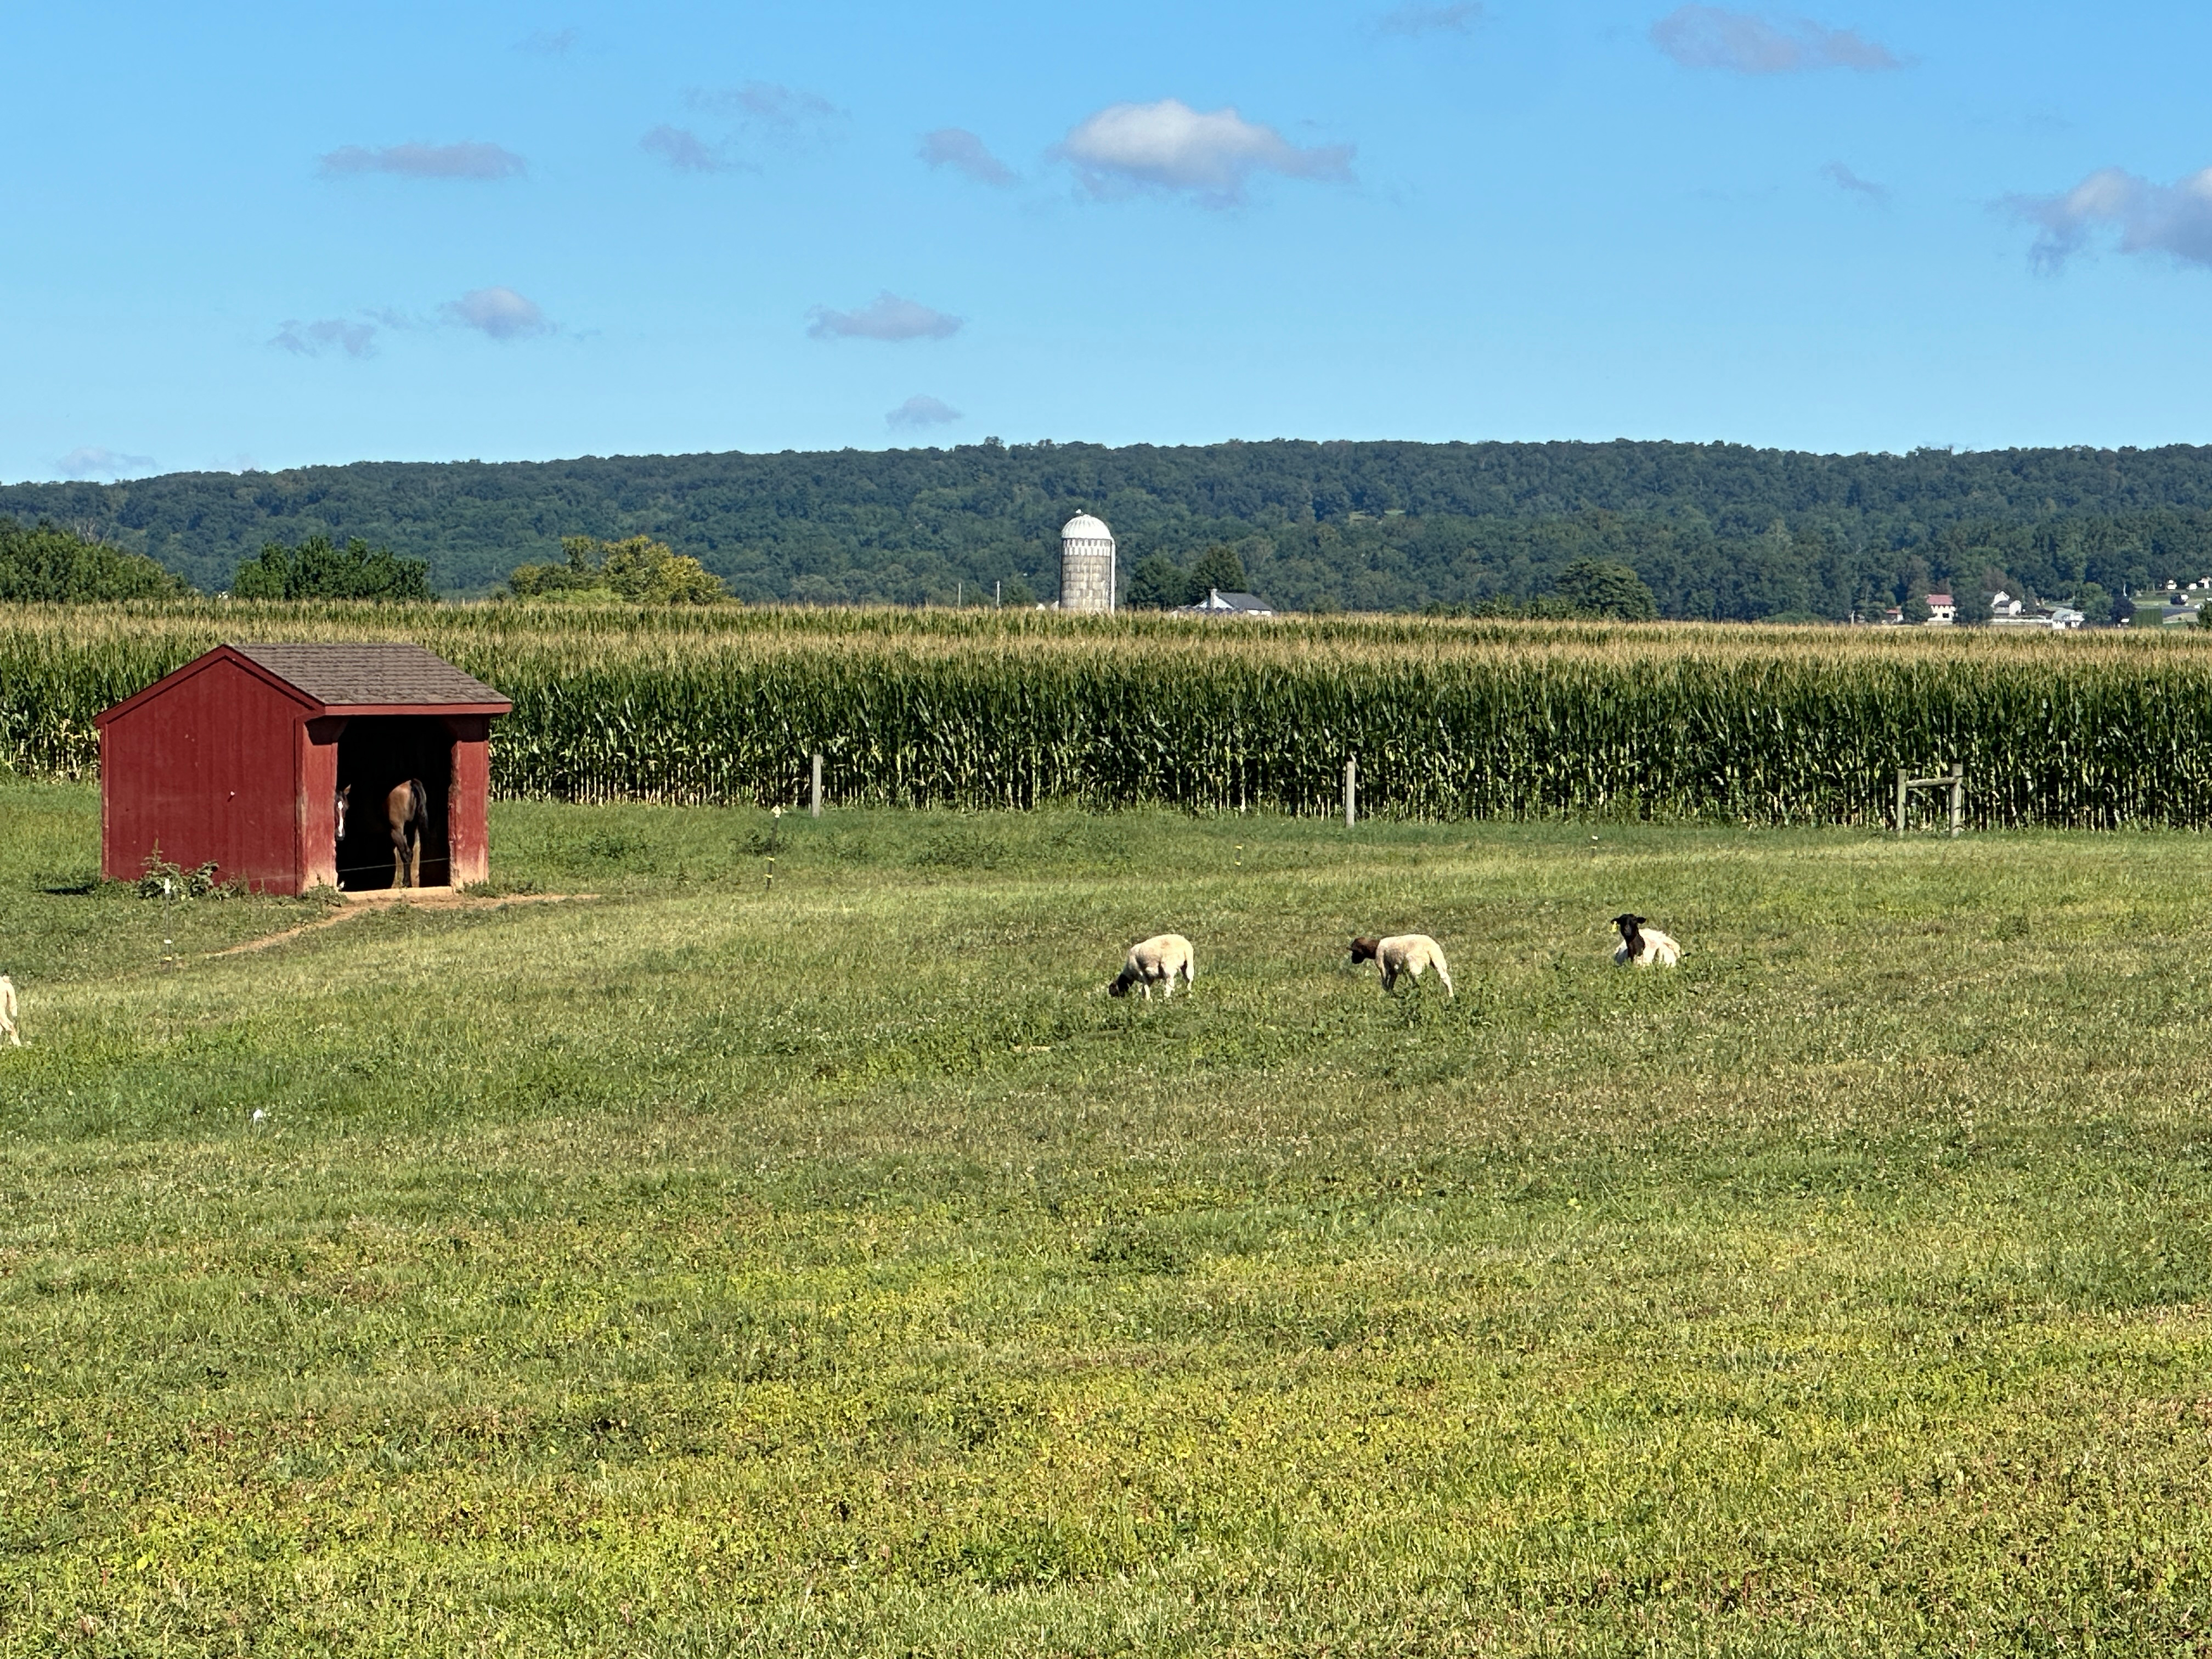
Winona Quigley, founder and owner of the company, studied fashion at Parsons but she has been thinking about sustainability and natural dyeing for a long time. When it came time for her to do a “capstone” project, she wanted to design a line of naturally dyed clothing. This eventually evolved into The Green Matters Natural Dye Company, which began its first dyeing in pots at Winona’s mother’s house in Lancaster County PA 10 years ago. The current location of the dyeworks is still in Lancaster PA, an area known for its beautiful farms and agriculture,  and where a horse and buggy is a common site on the road. But the dyeing here is all small scale industrial. 

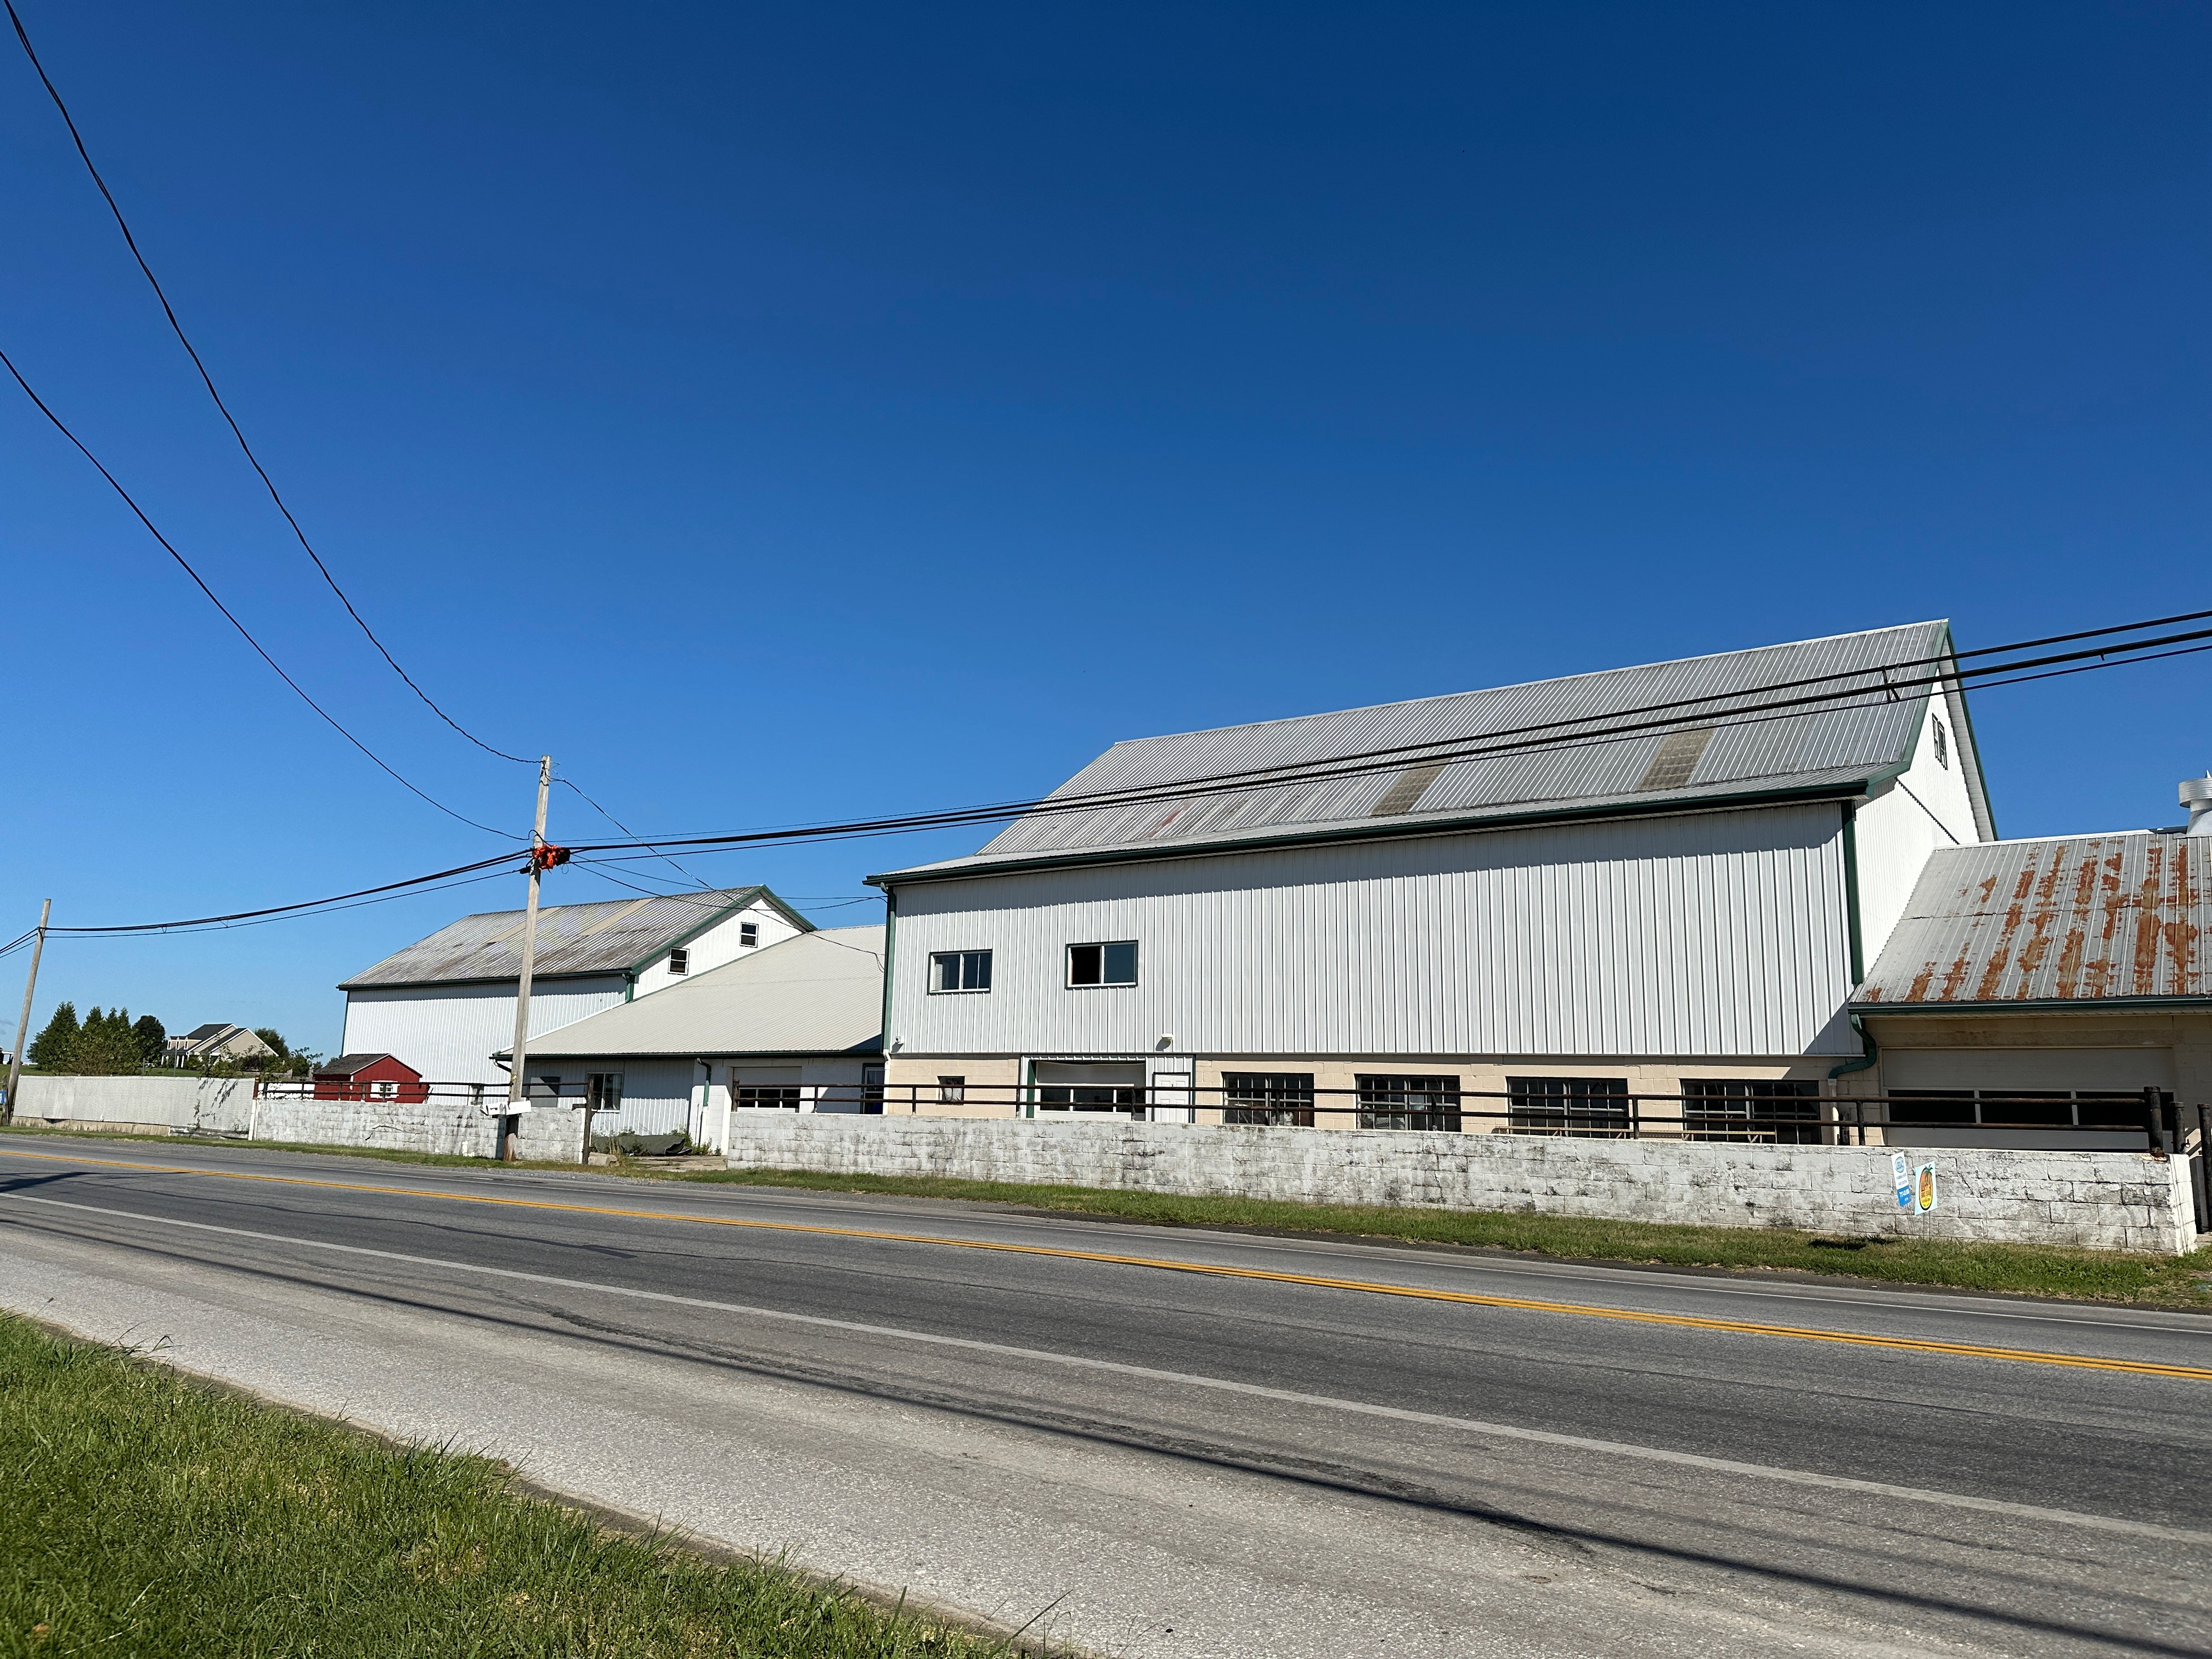
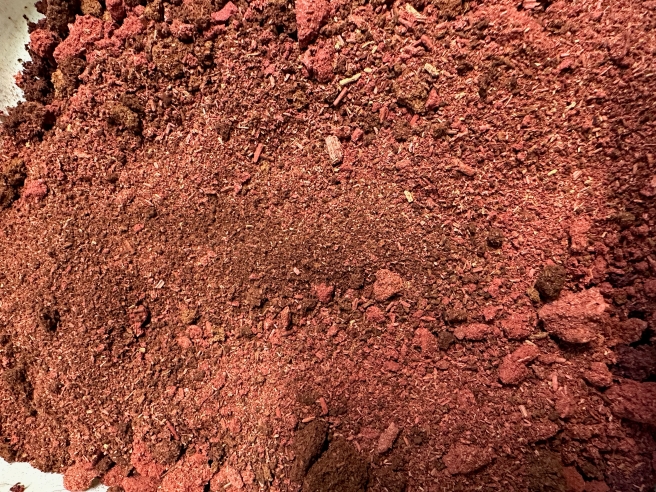
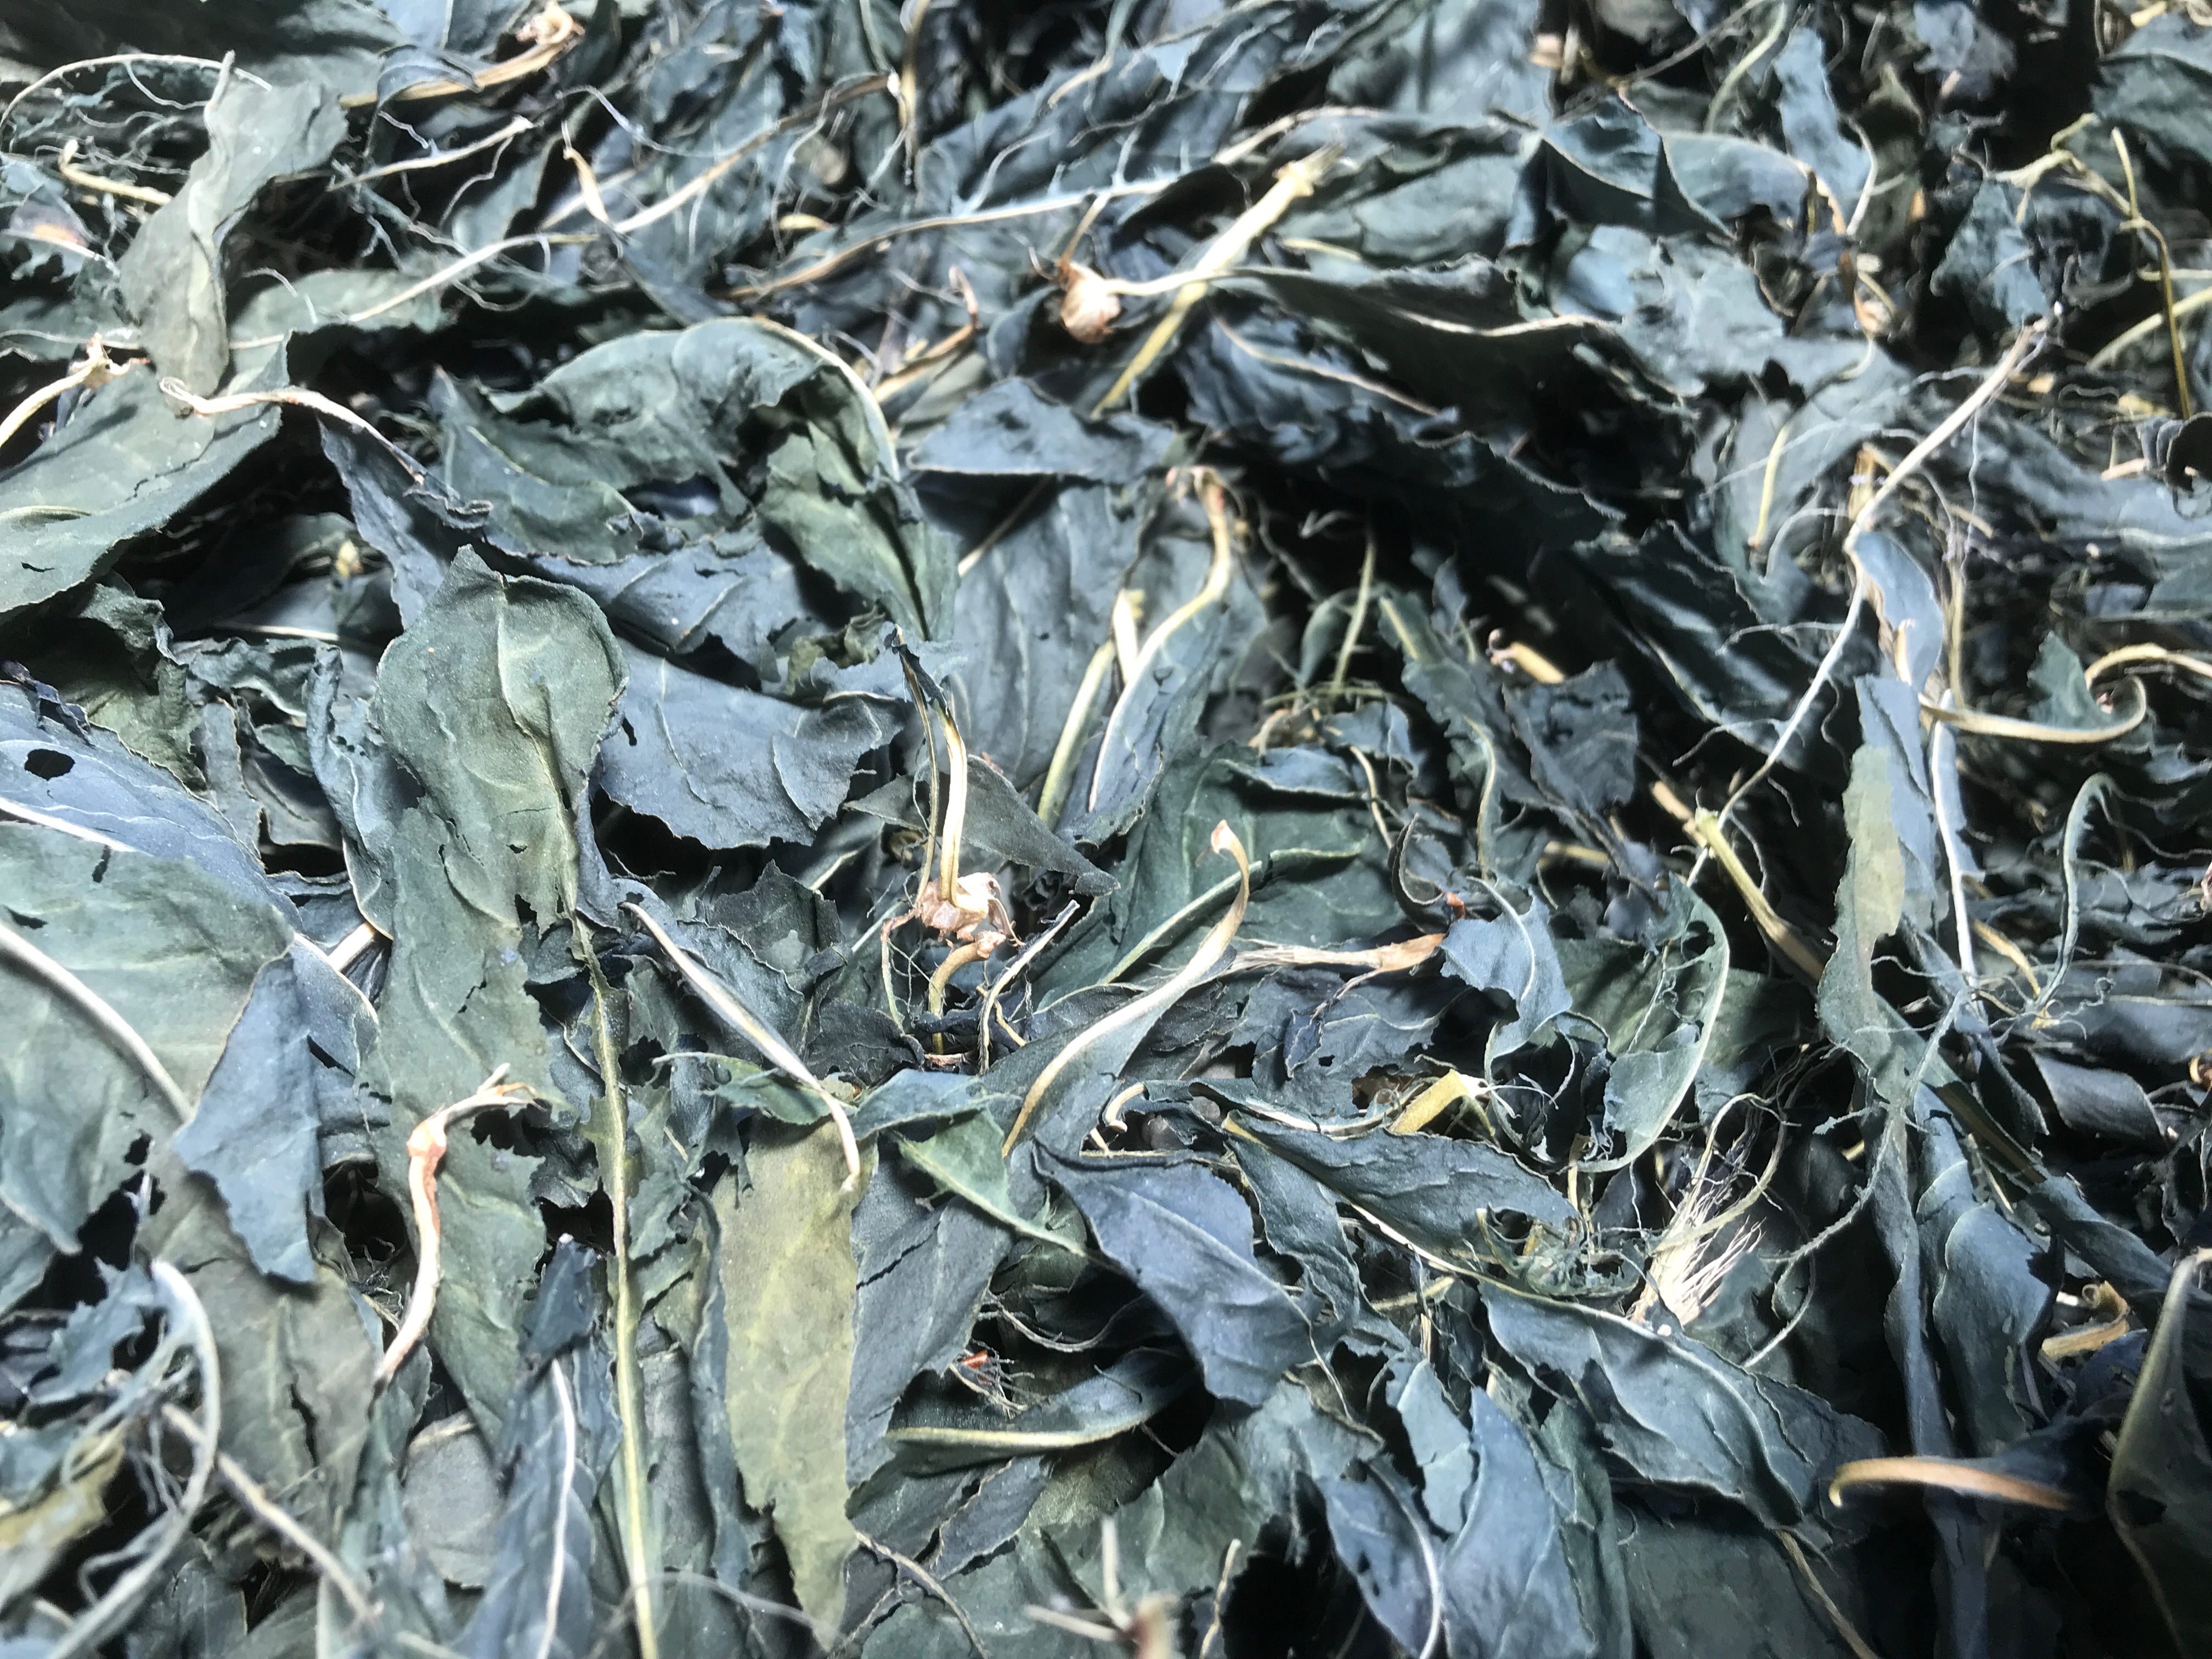
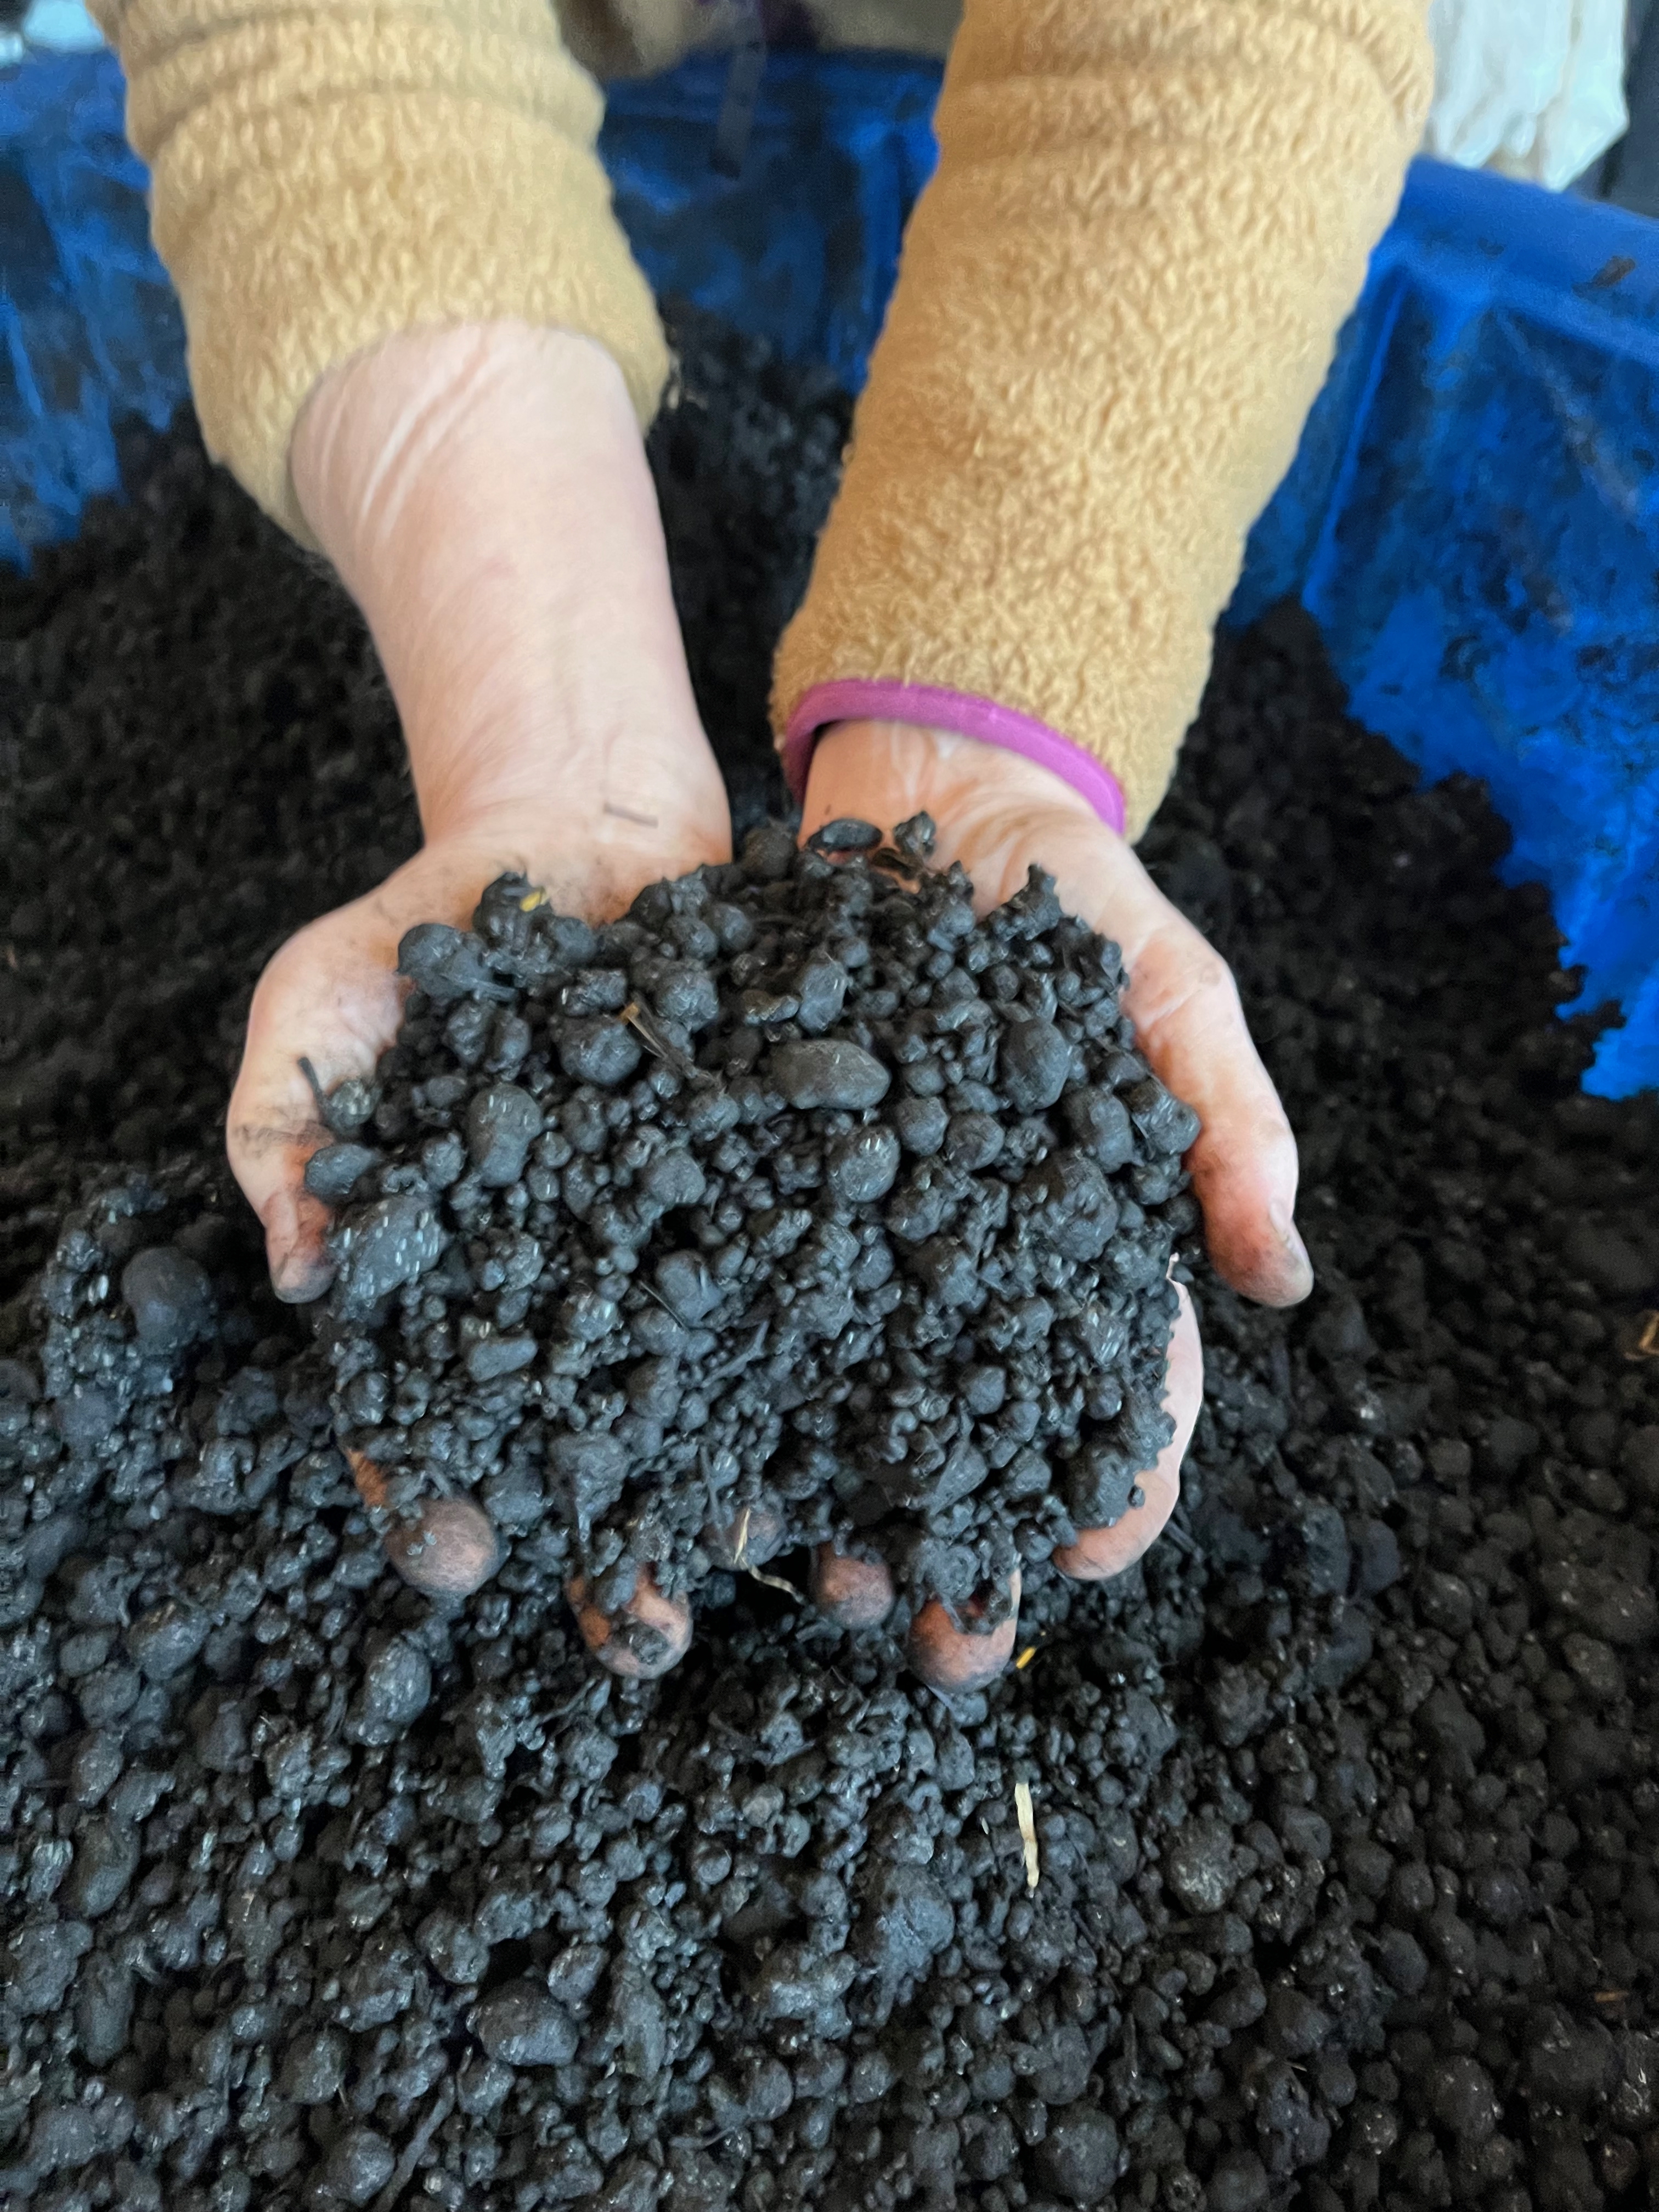
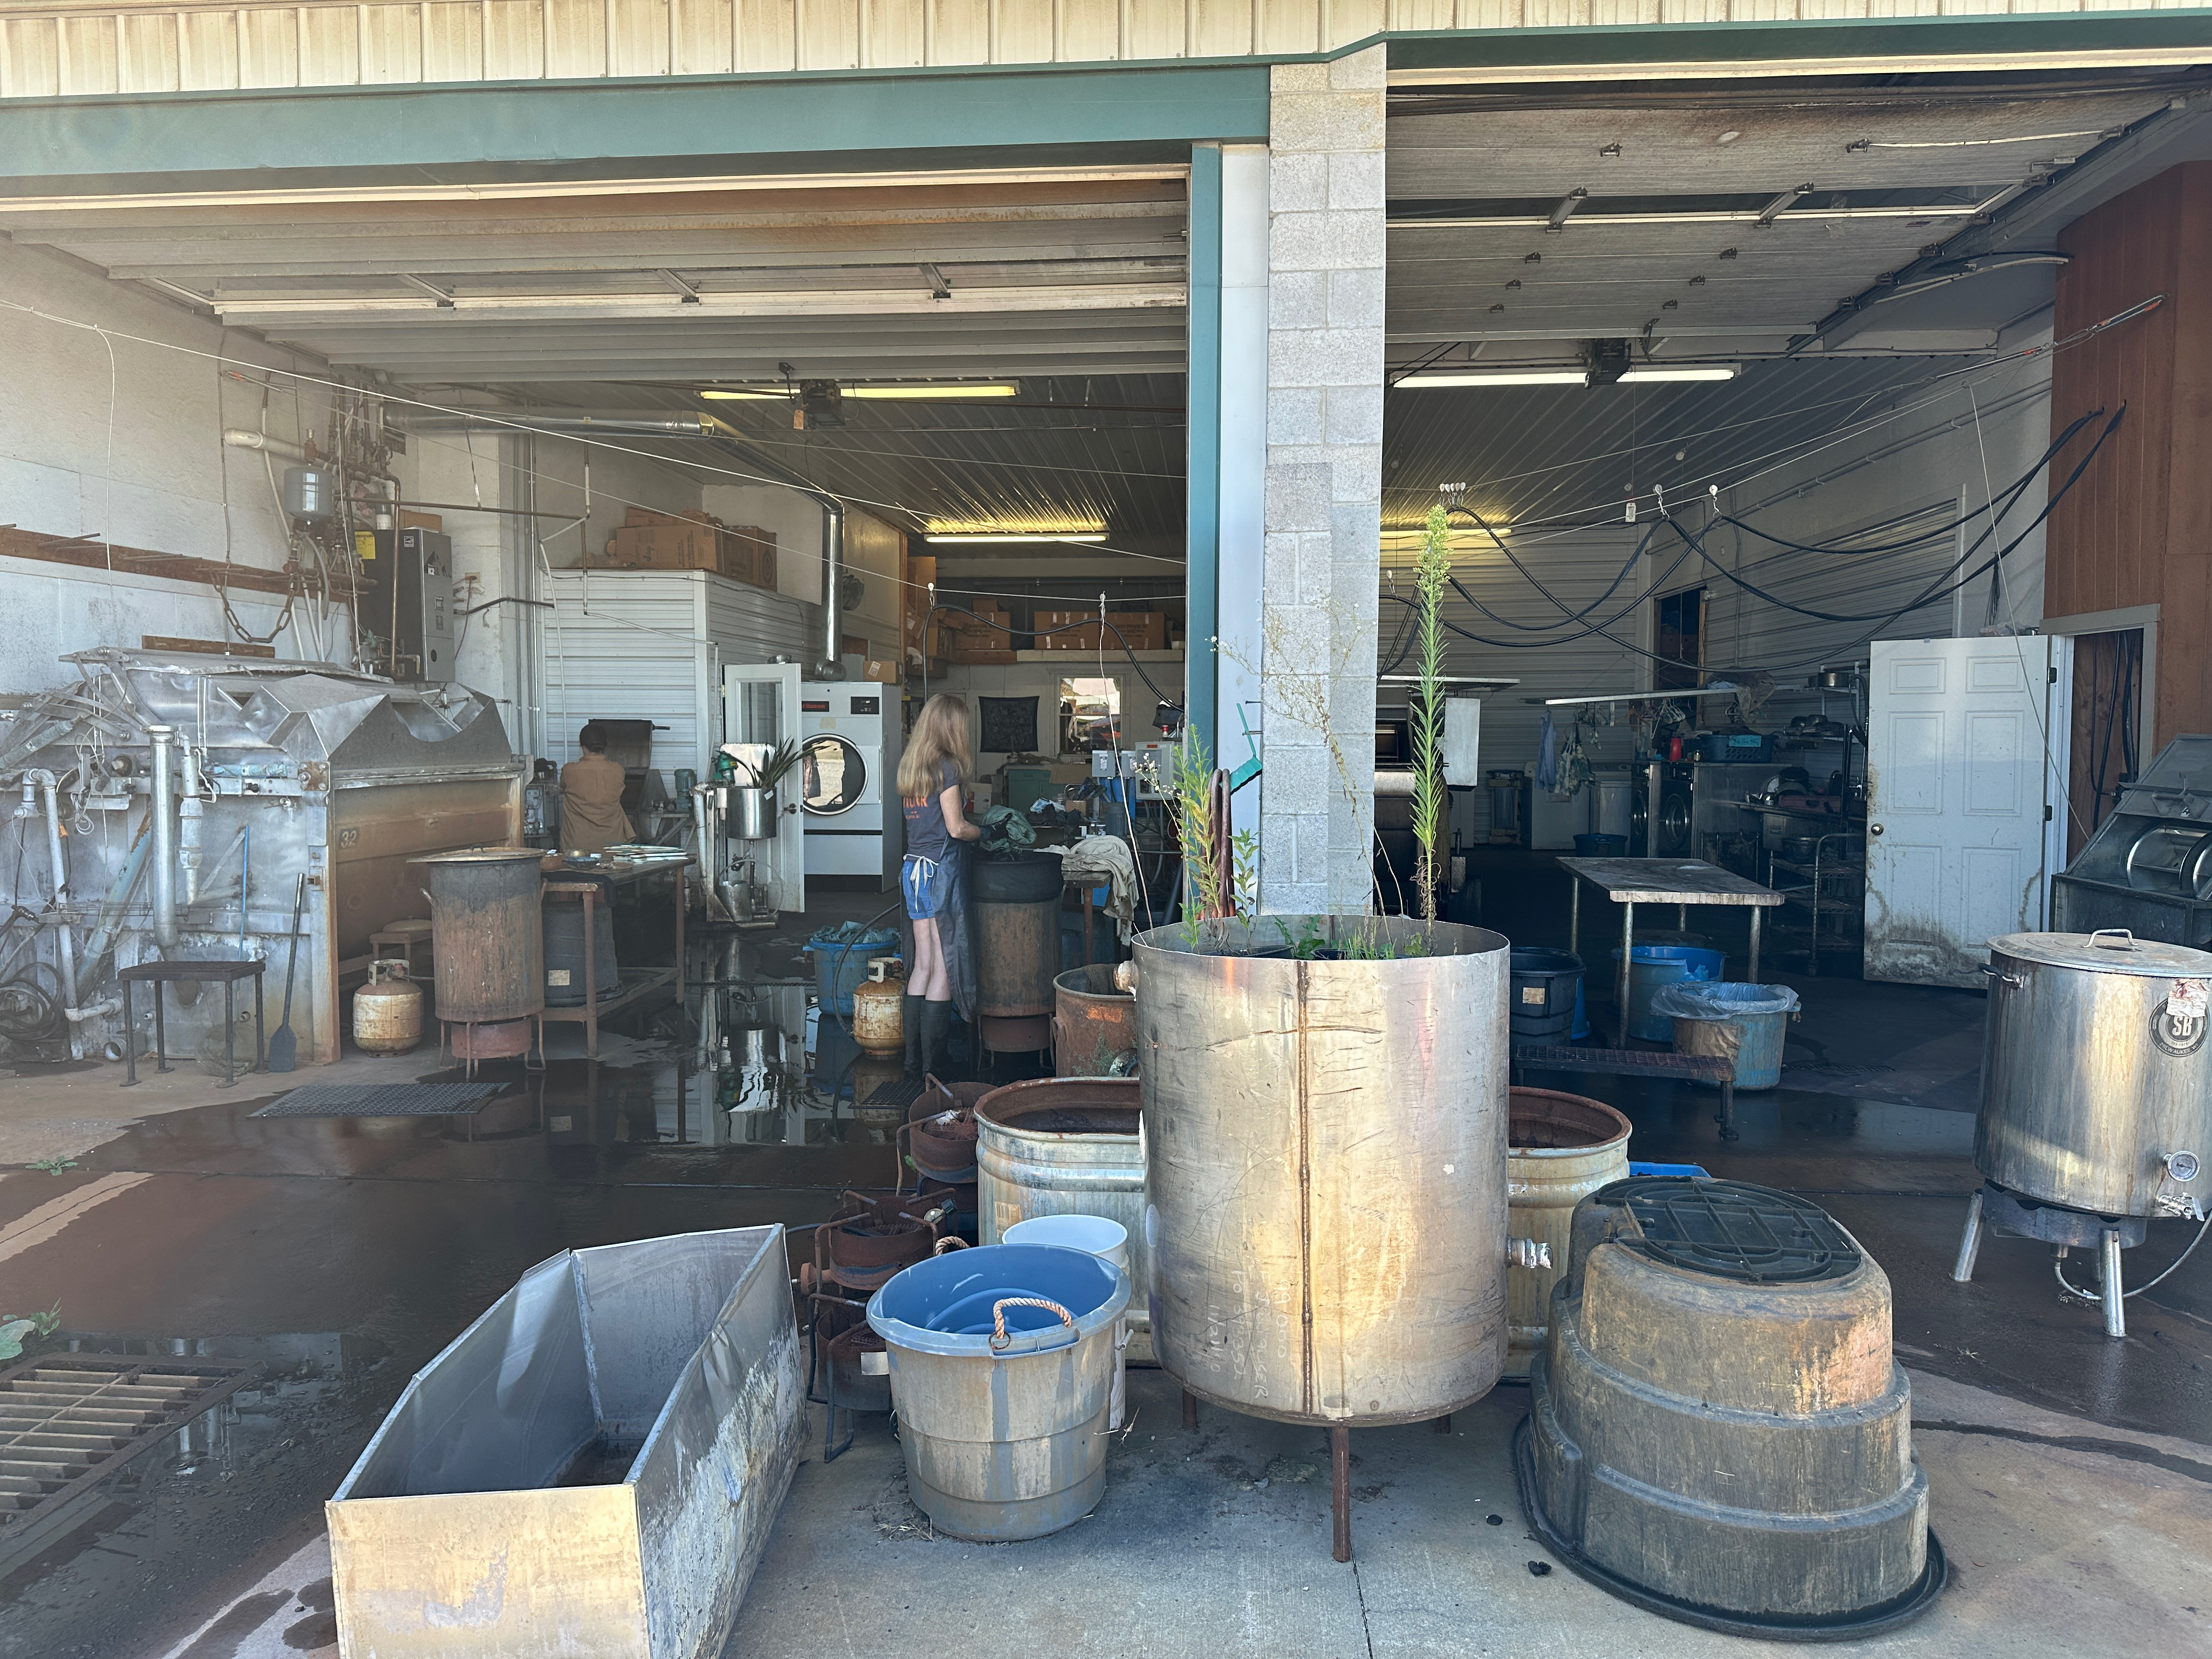
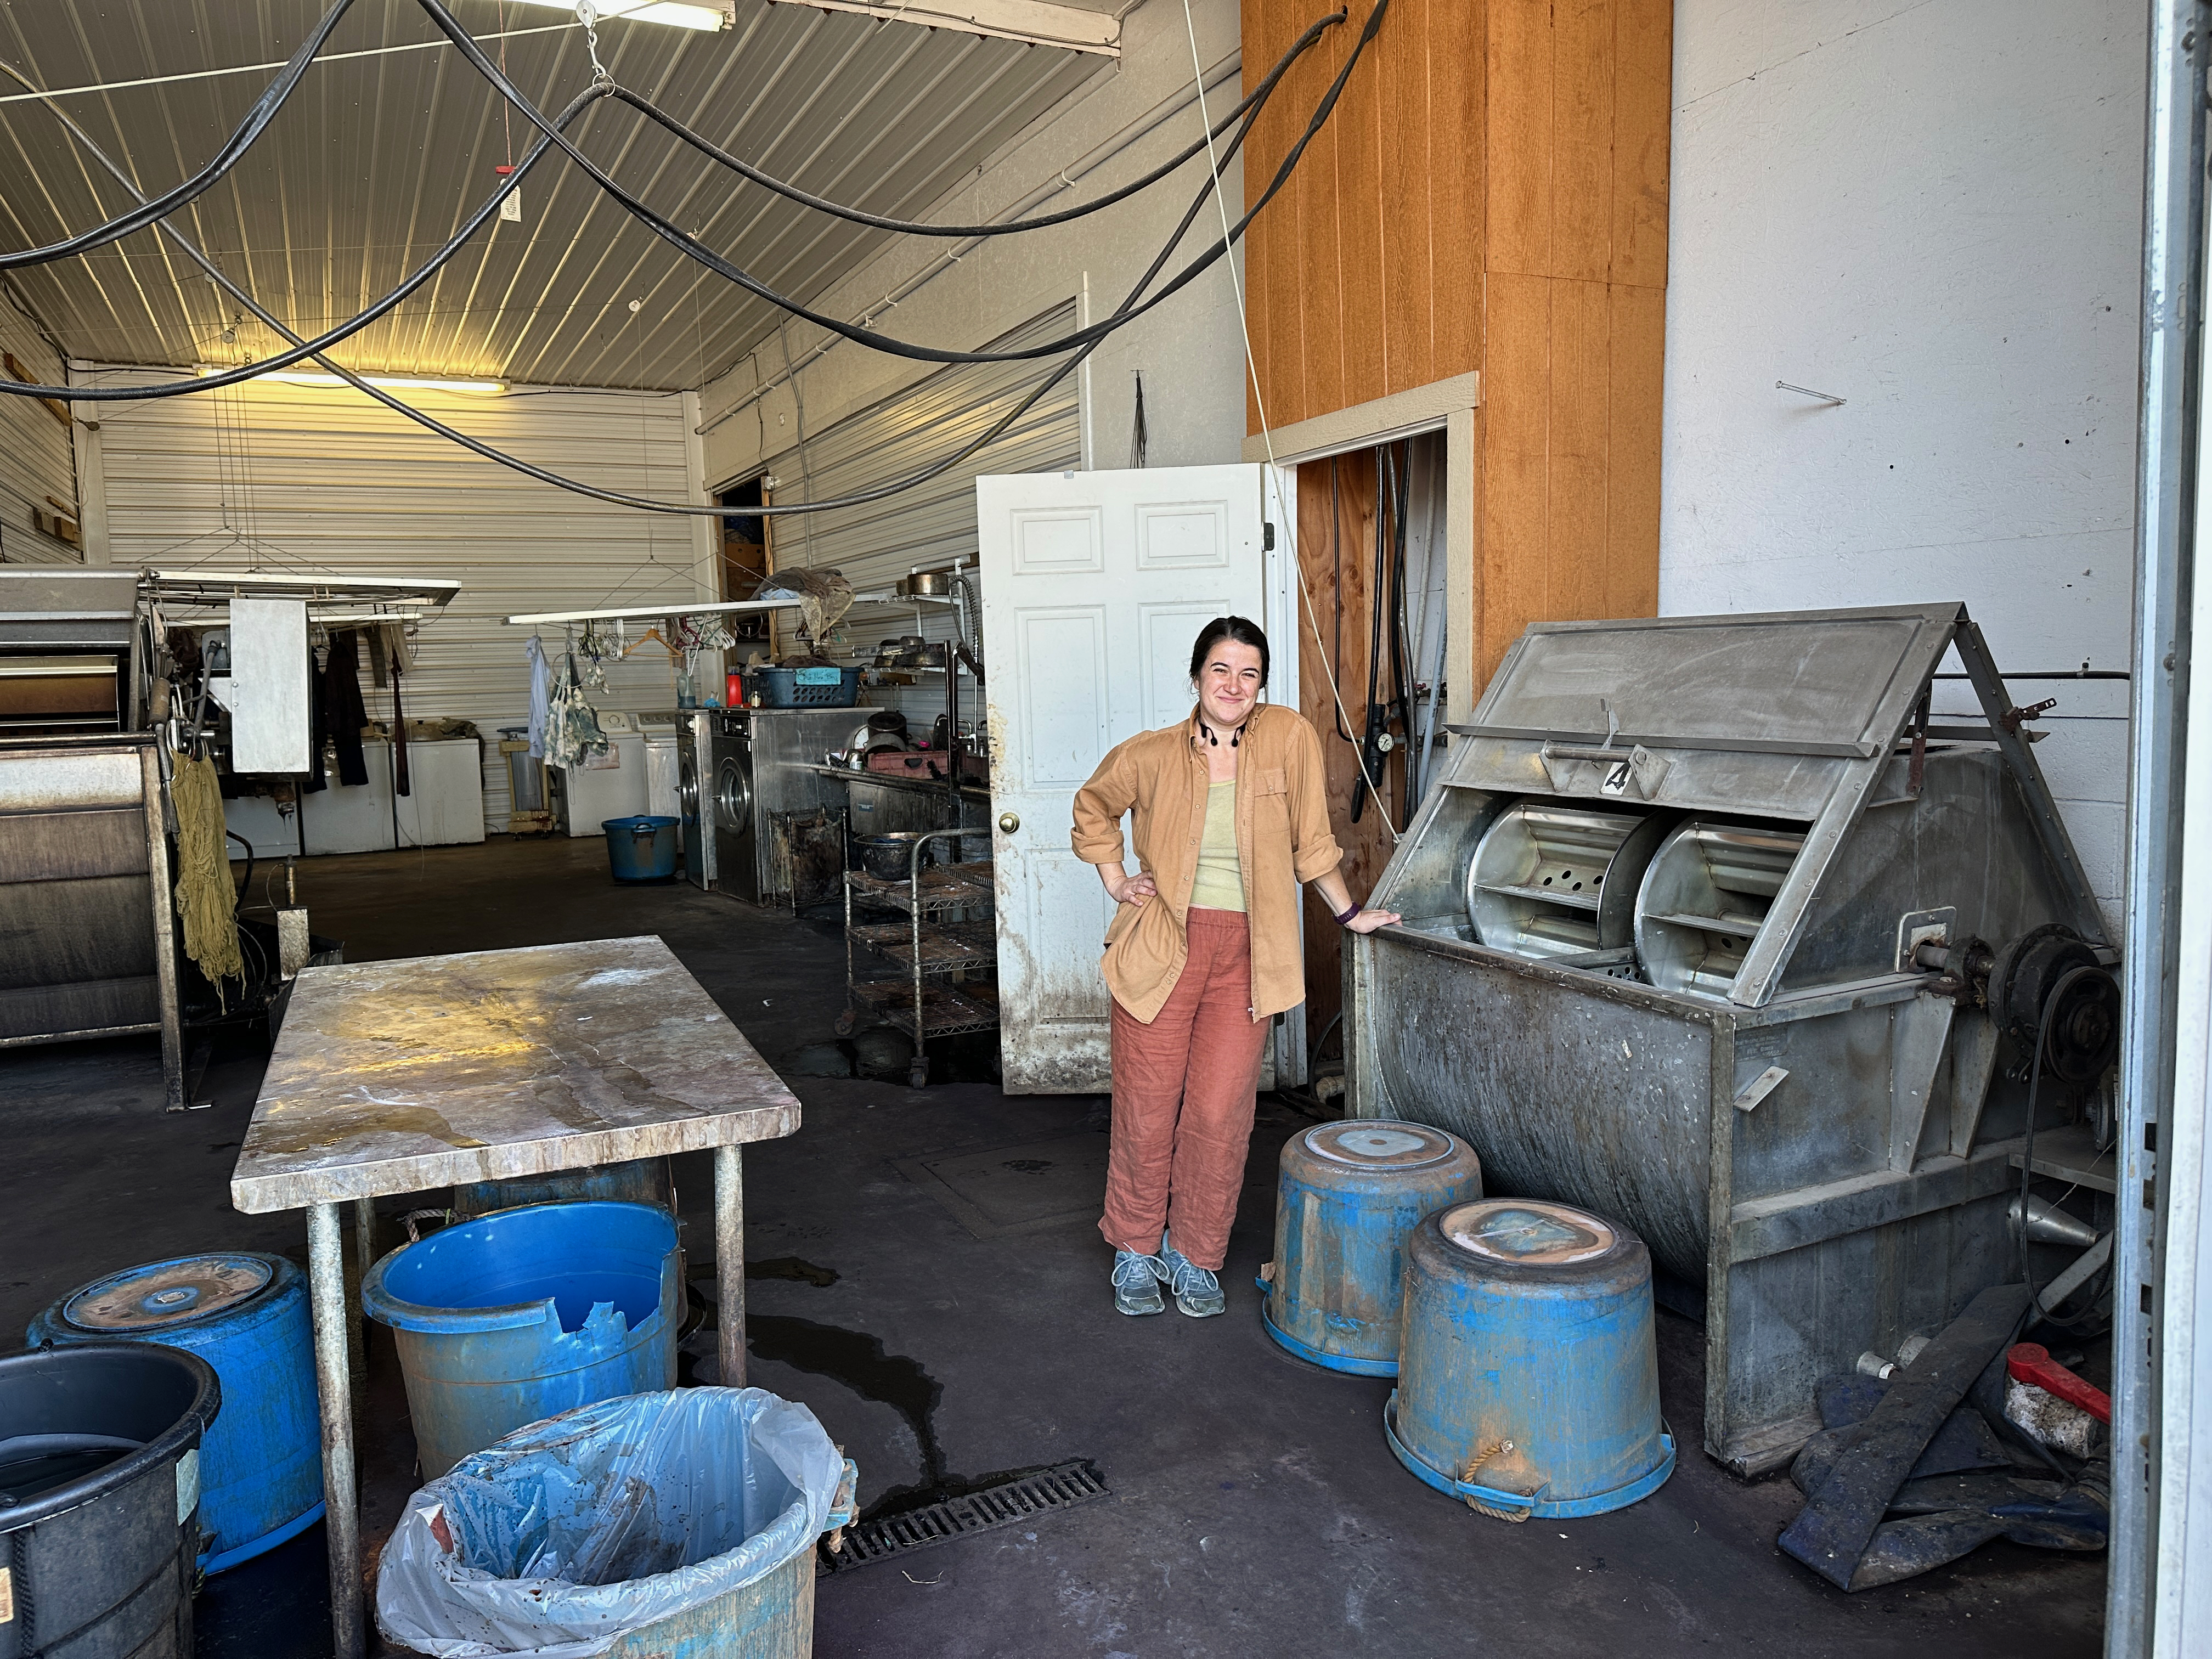
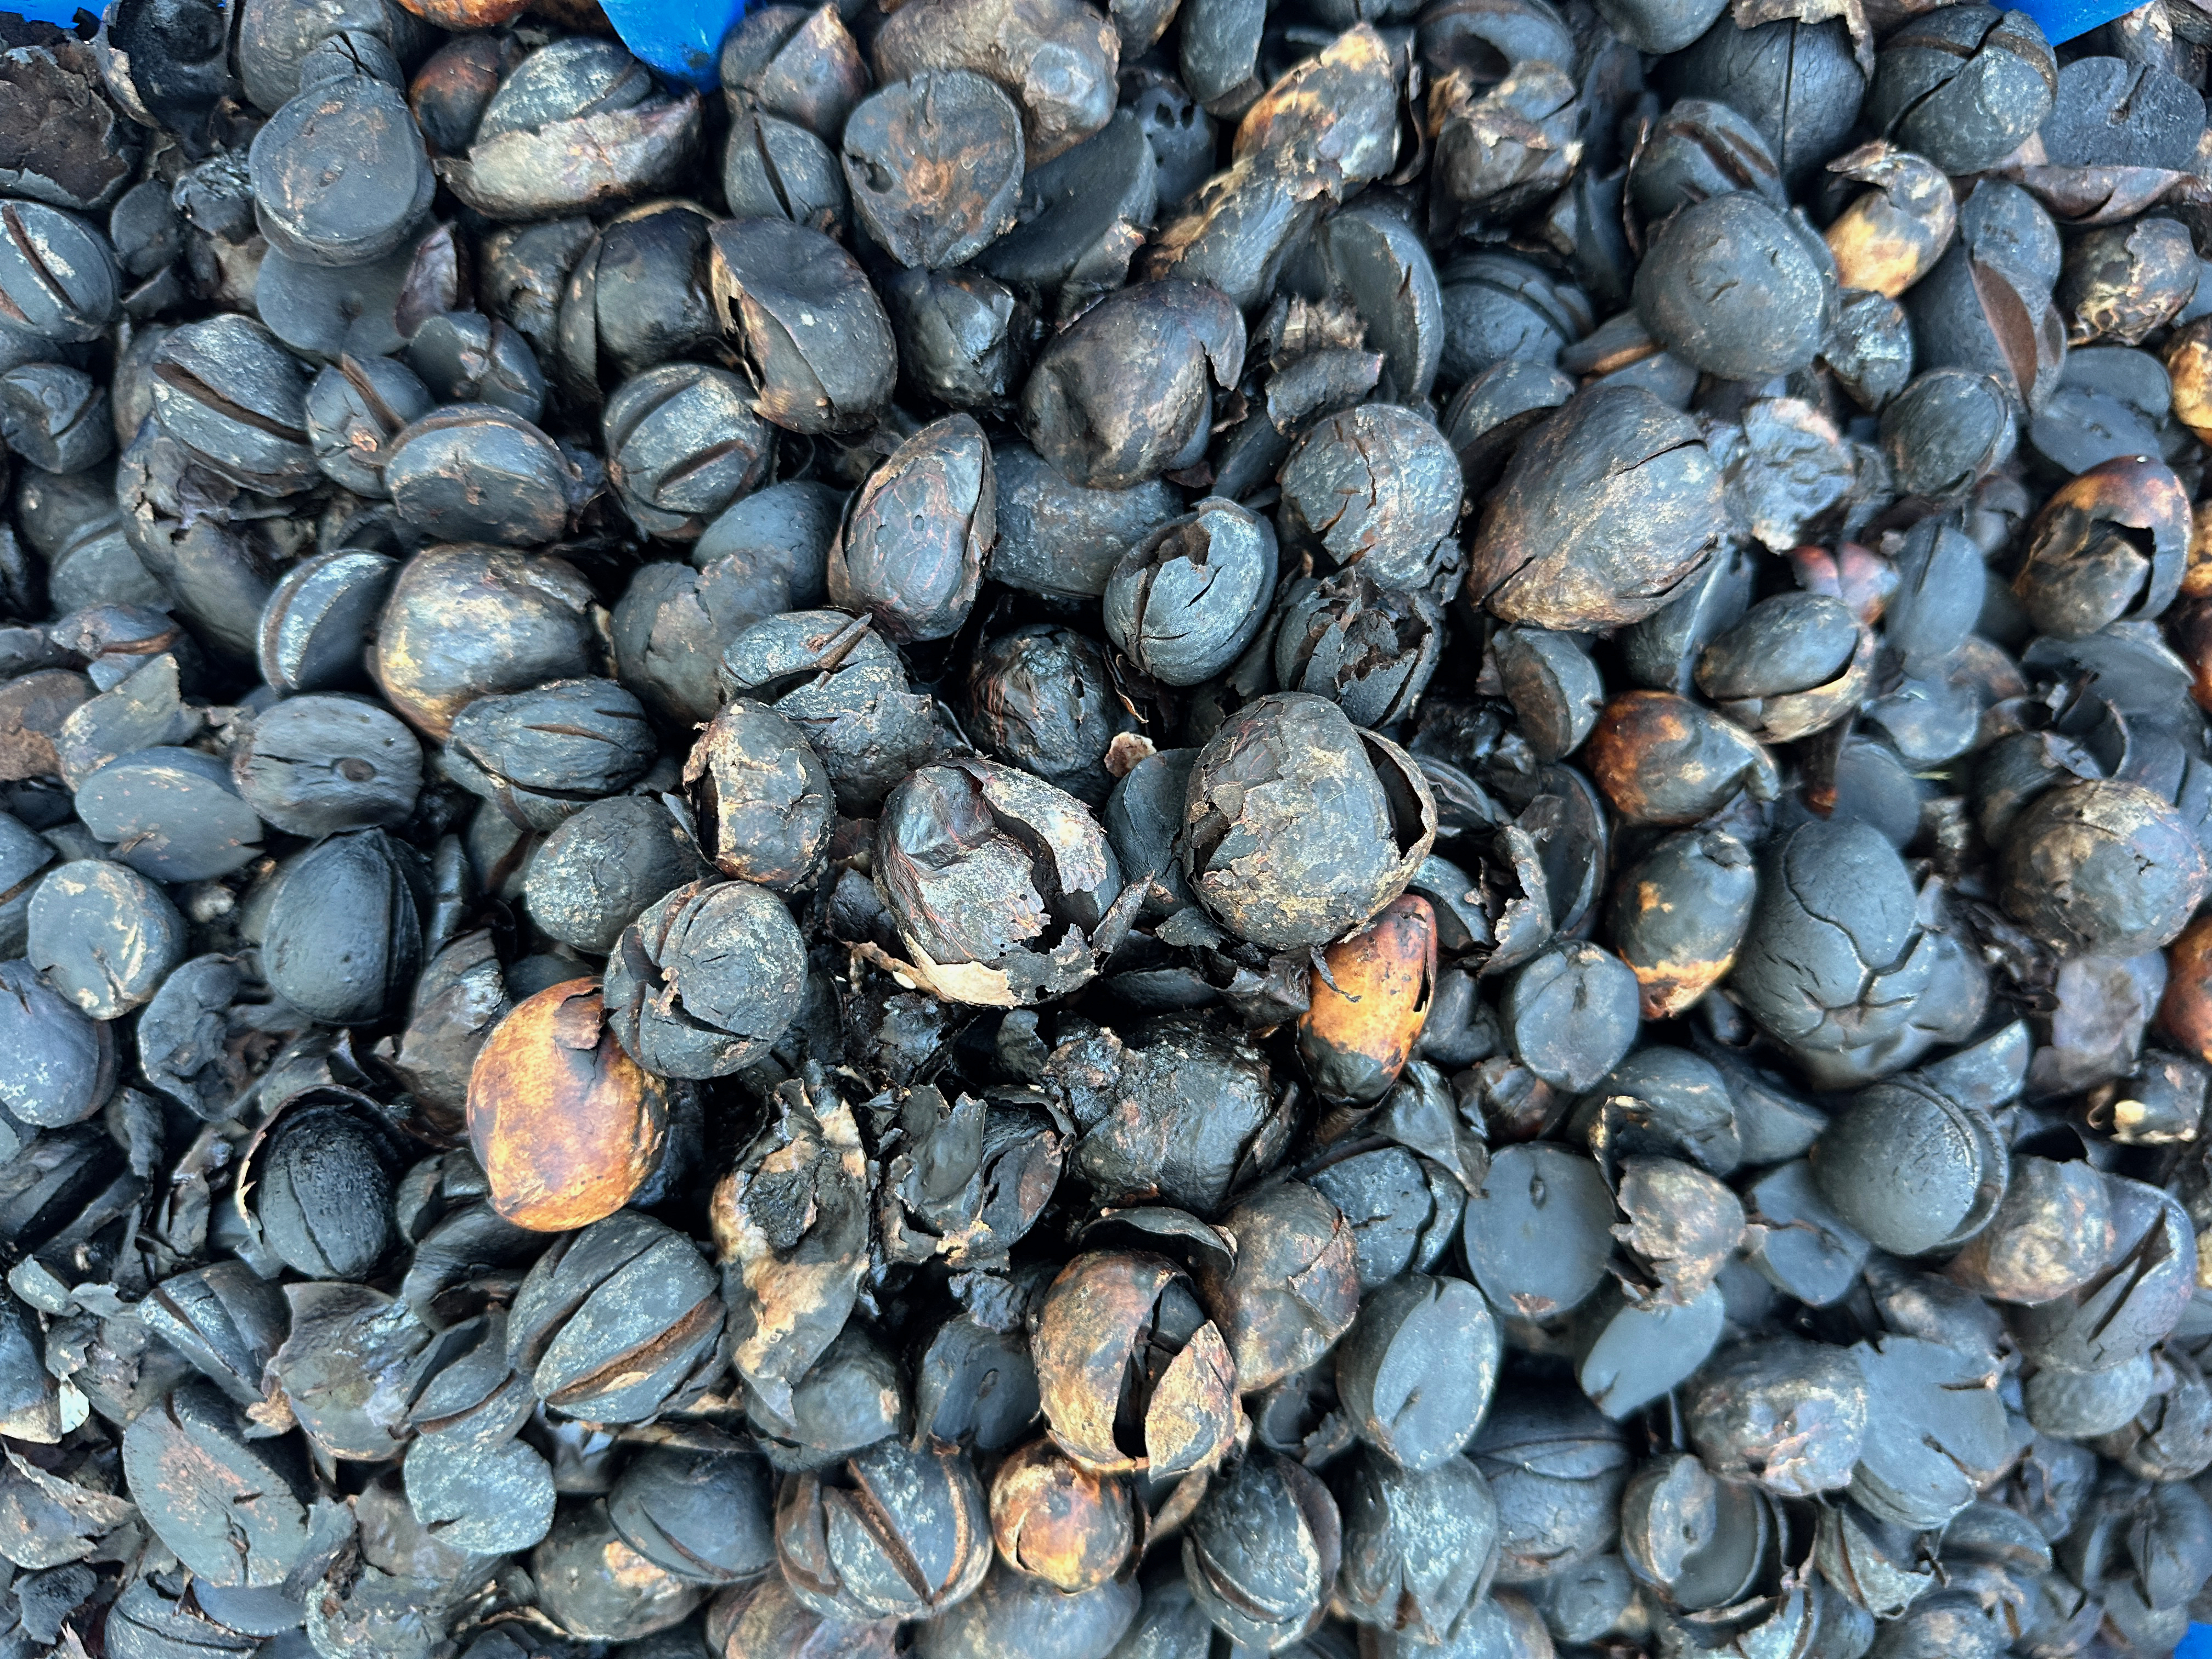
The Dye Works operation is approached from the back of the building and truly looks like a small industry.  The telltale sign that we had found the right place was the buckets of avocado pits, which looked like they’s been cooked to extract their color. 

Entrance to Green Matters Natural Dye Company

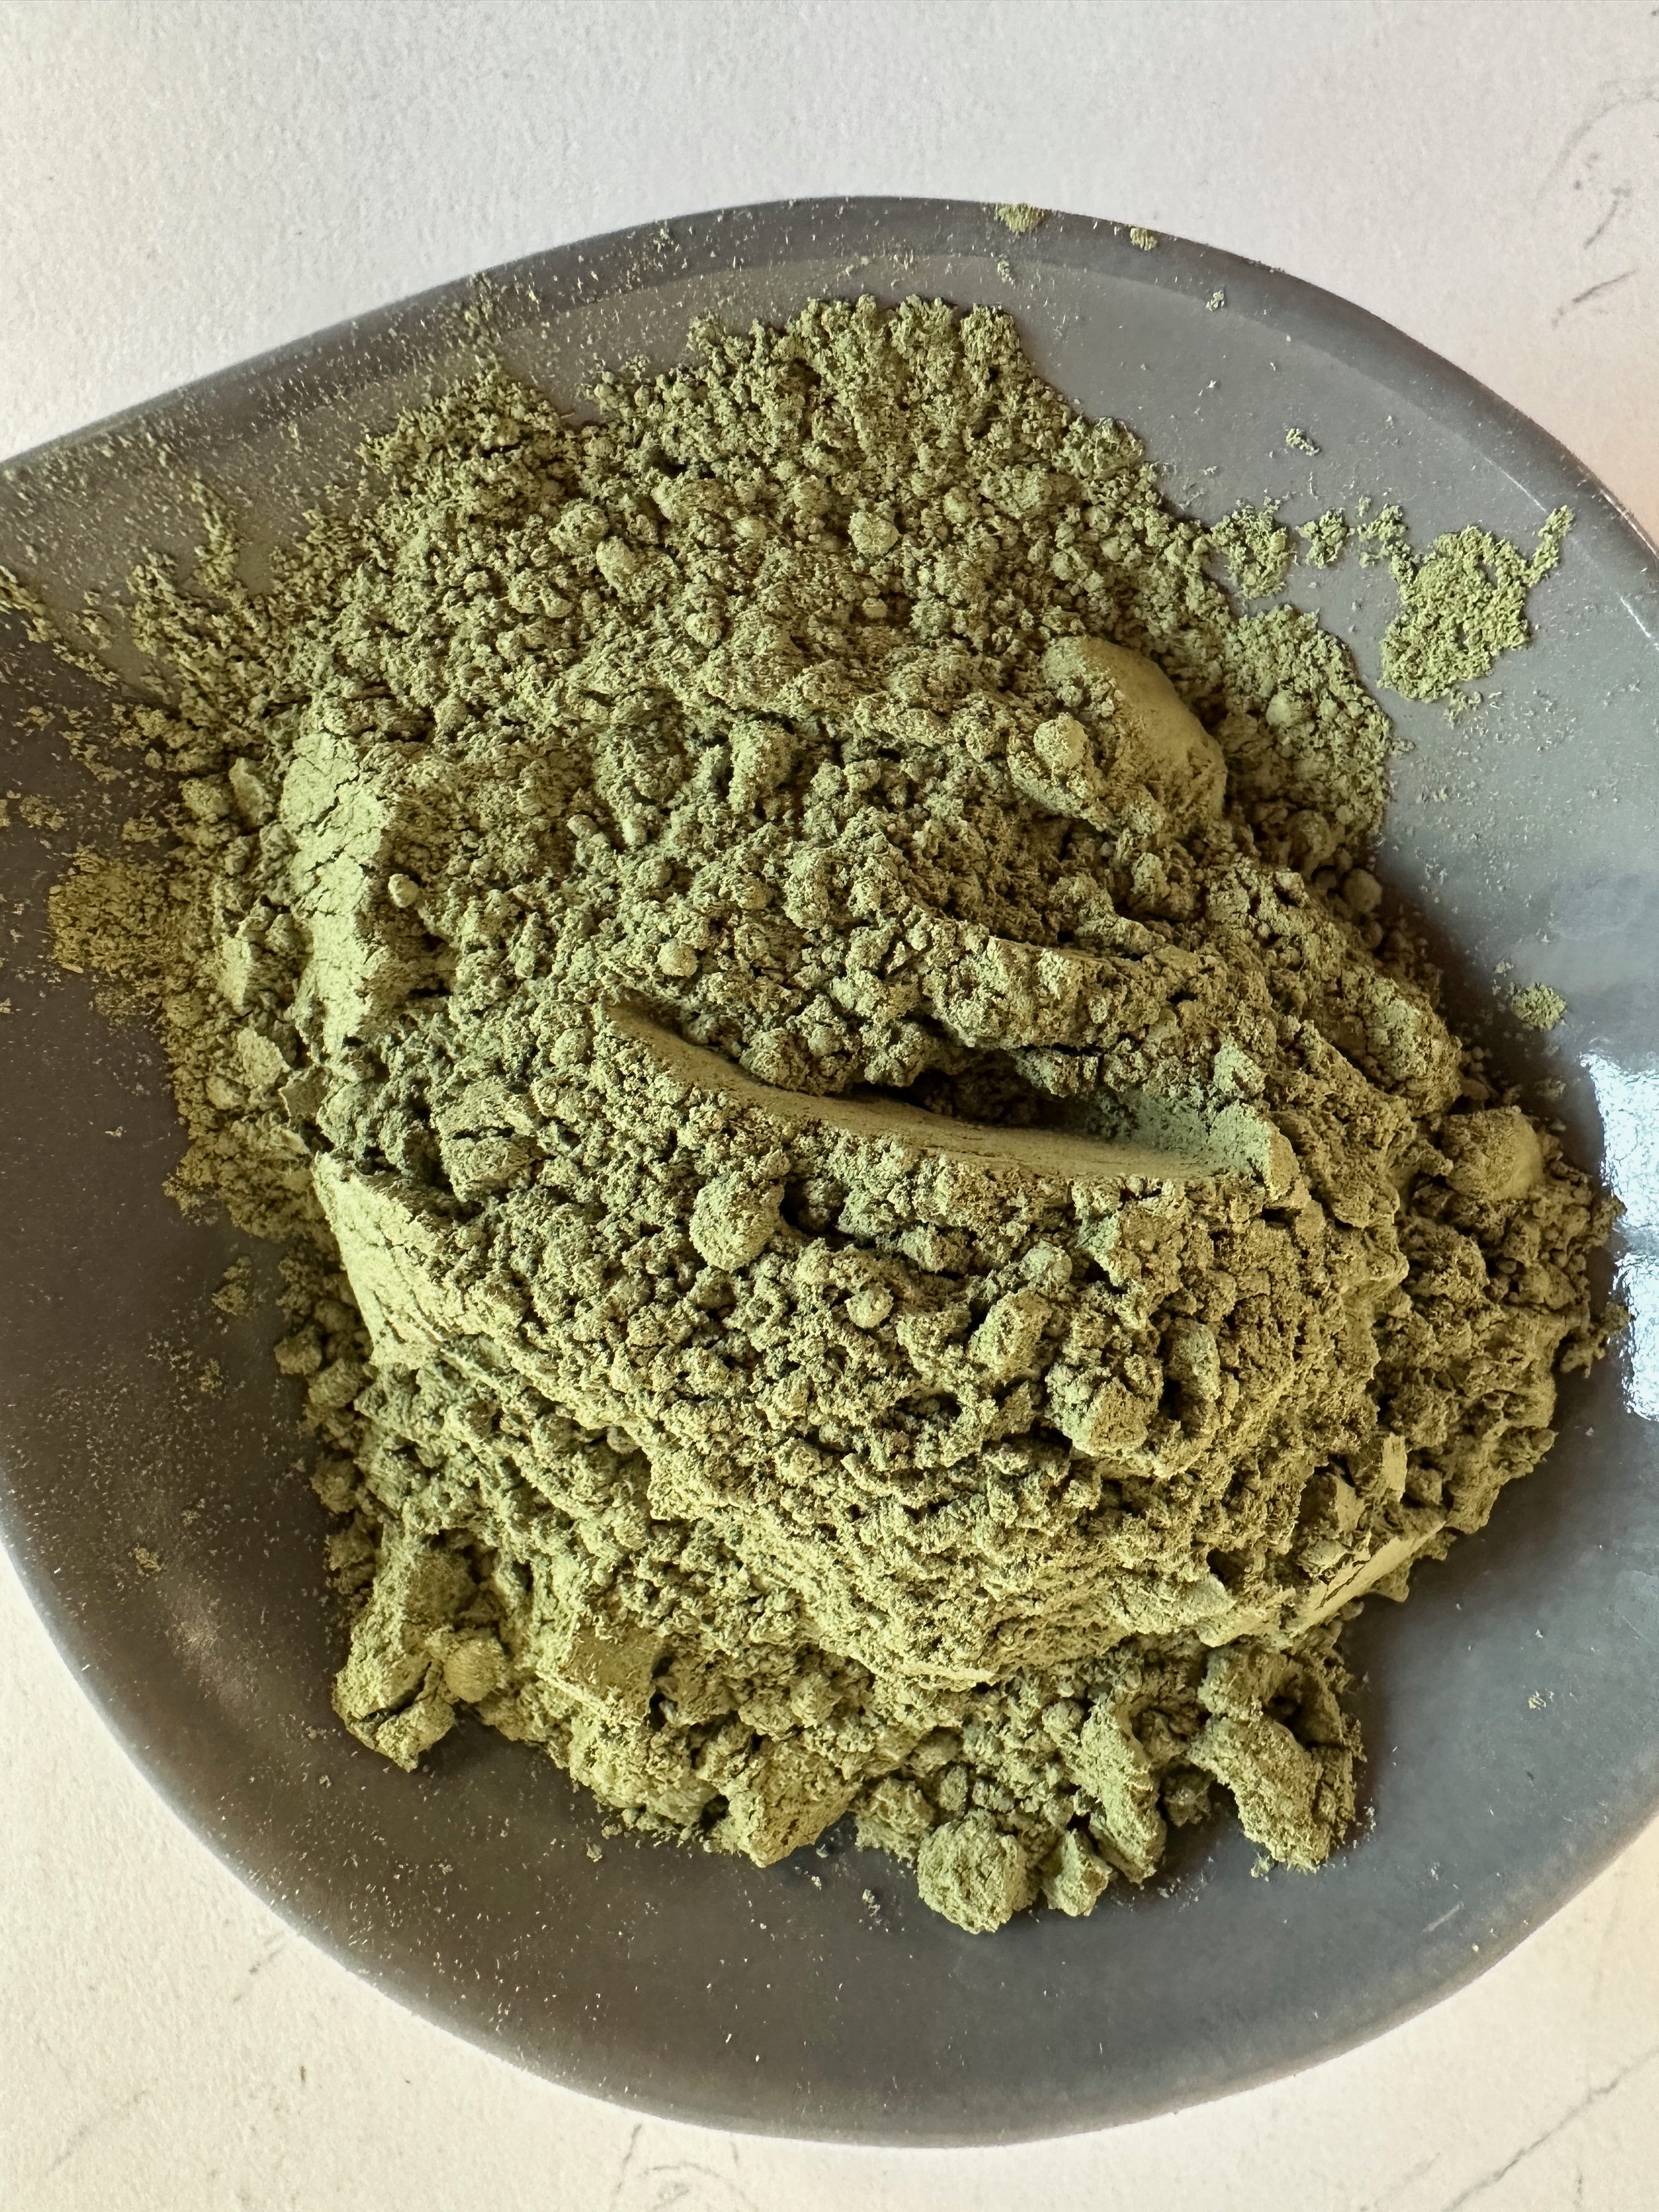
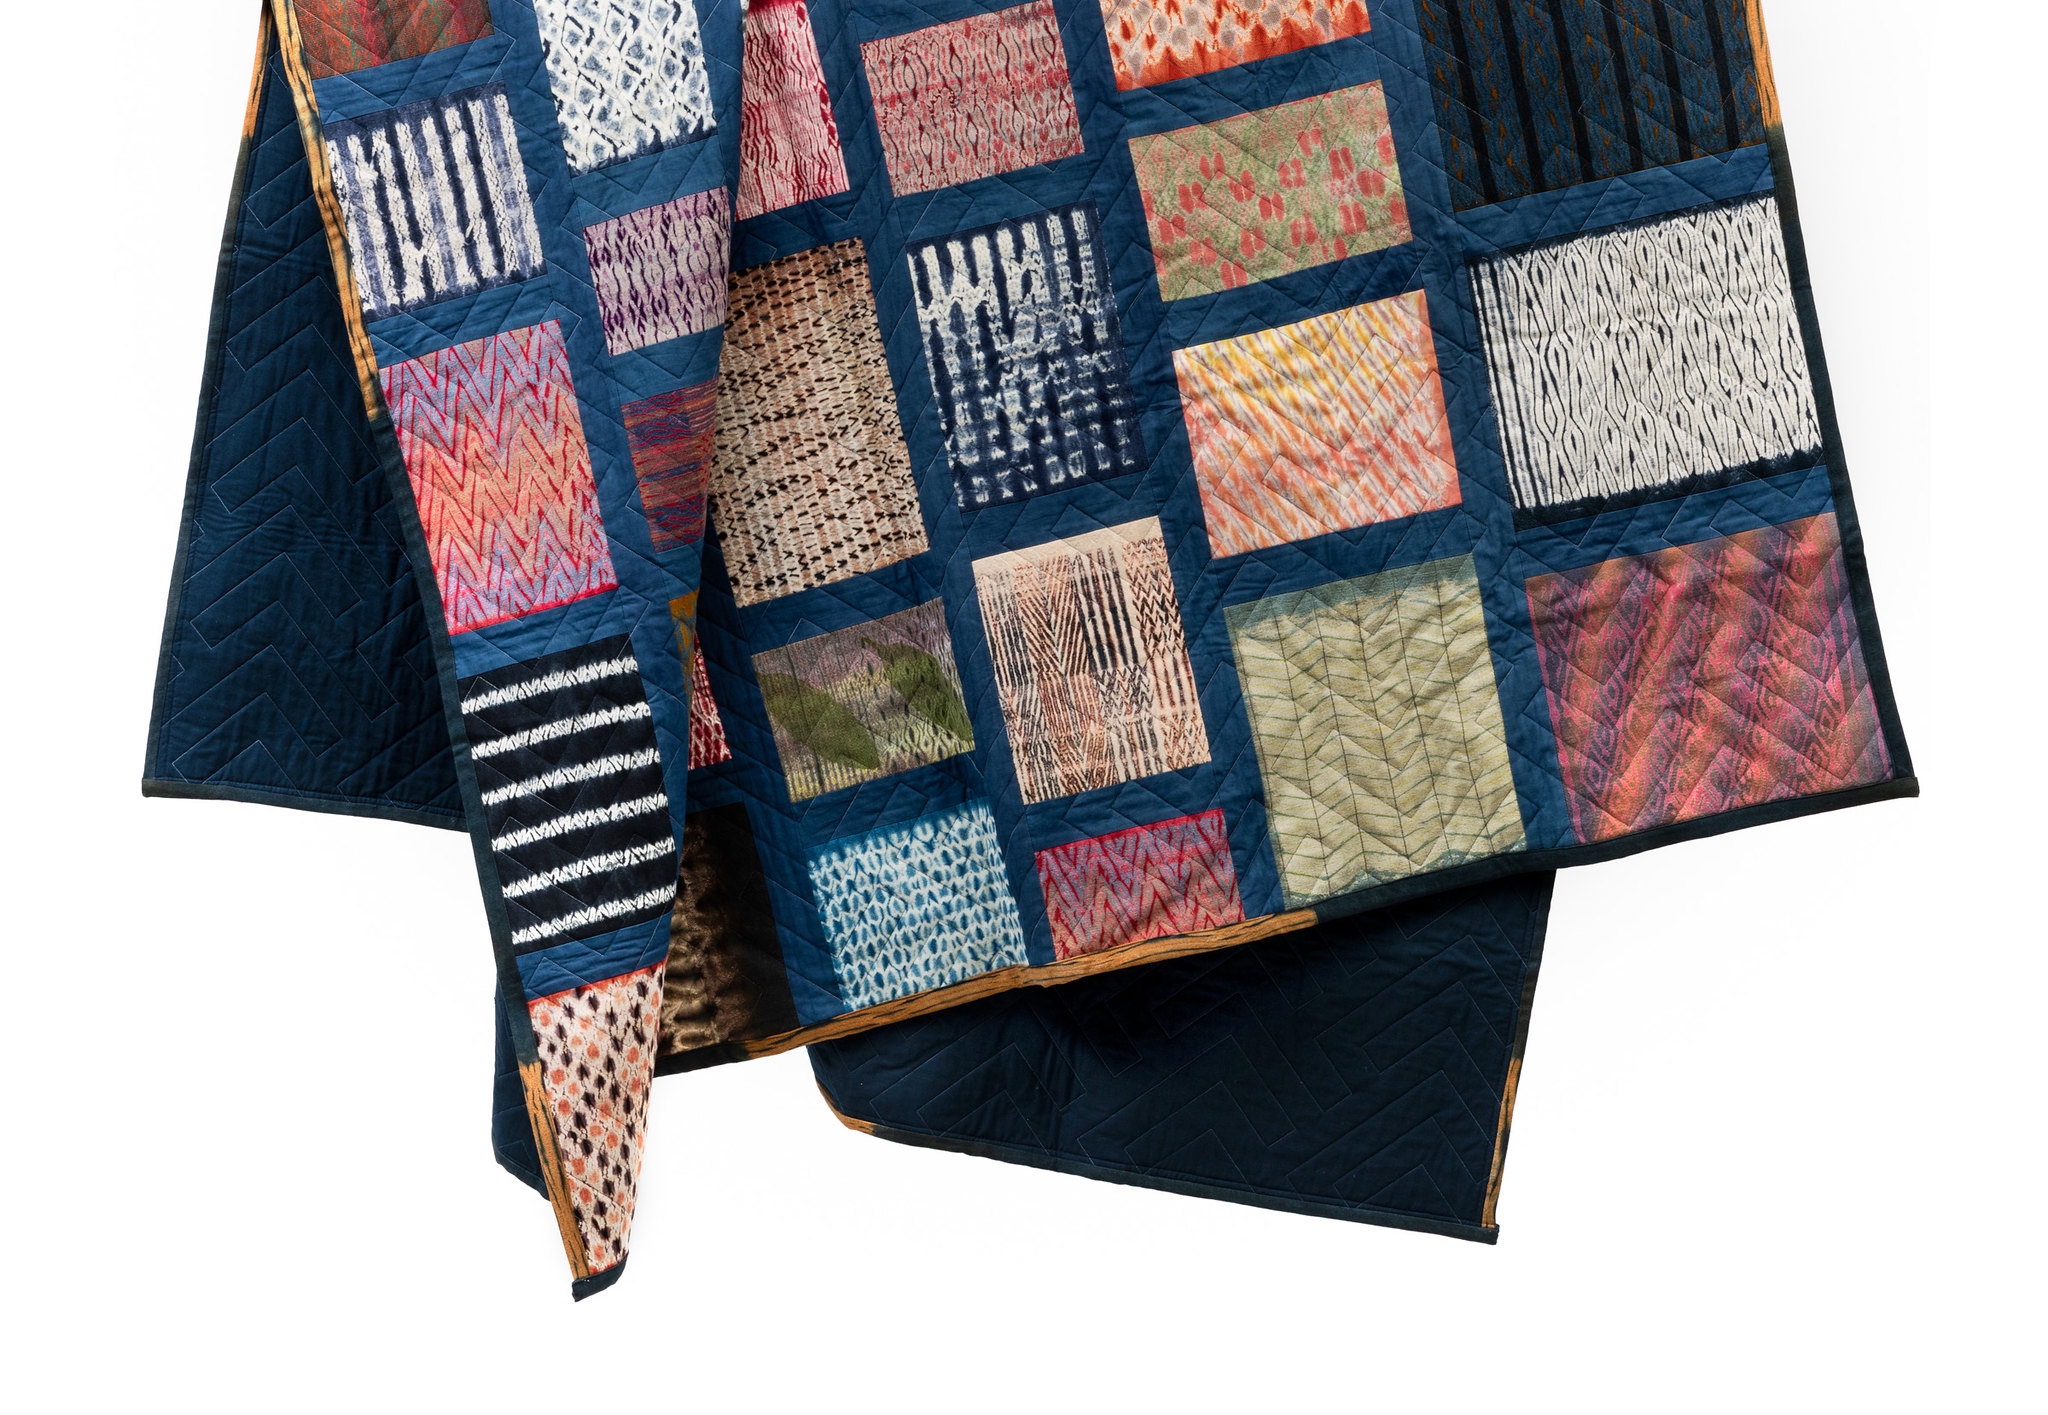
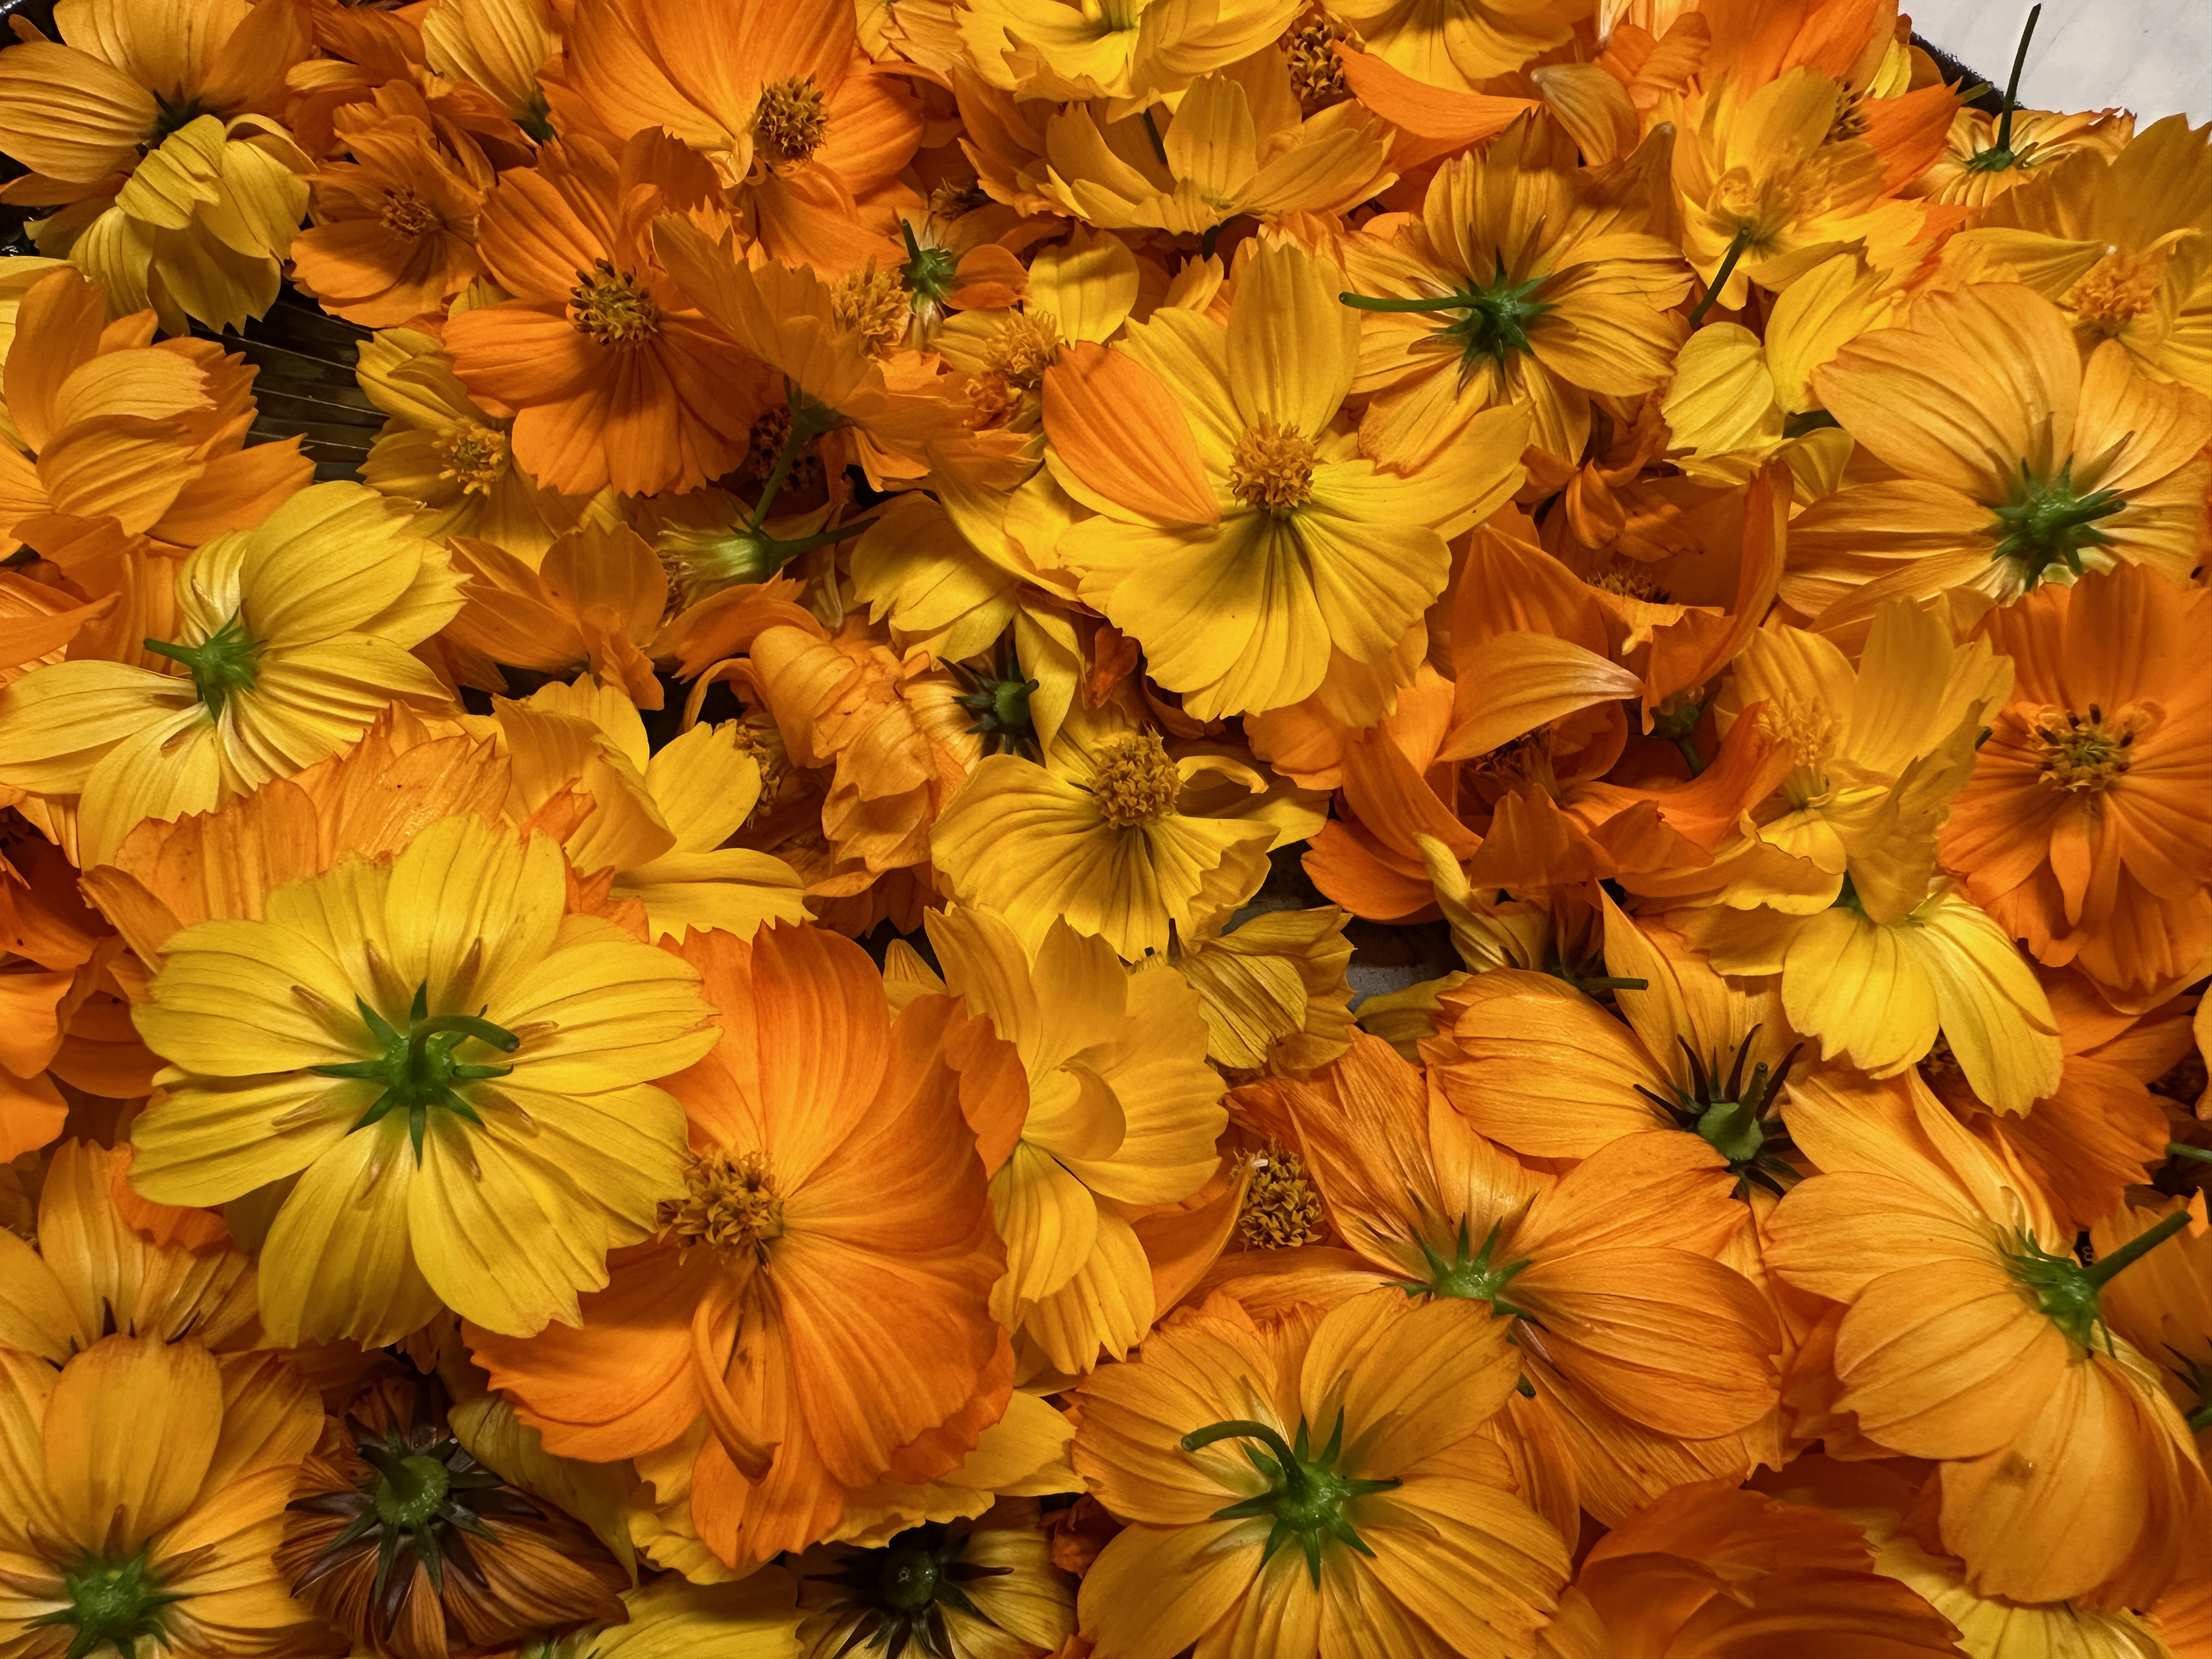
The company does some work with designers to develop small lines of custom natural colored garments but a very popular and important focus is the “Dye Color of the Month” program. Dye color blends are developed by the dye team and are most often an interesting mix of more than one dye plant (such as “rum raisin” made from cutch and madder or “ochre made from cutch and weld). Customers send in their own clothing (and even bed linens) which can be given a renewed life with a fresh, naturally sourced color. The dye team will unpack the garment, mordant when needed, and then apply the chosen dye color(s). Colors are sourced from both plant materials and natural dye extracts. Tie-dyeing is also an option, either in the initial garment dyeing, or as a more subtle post dye process. 

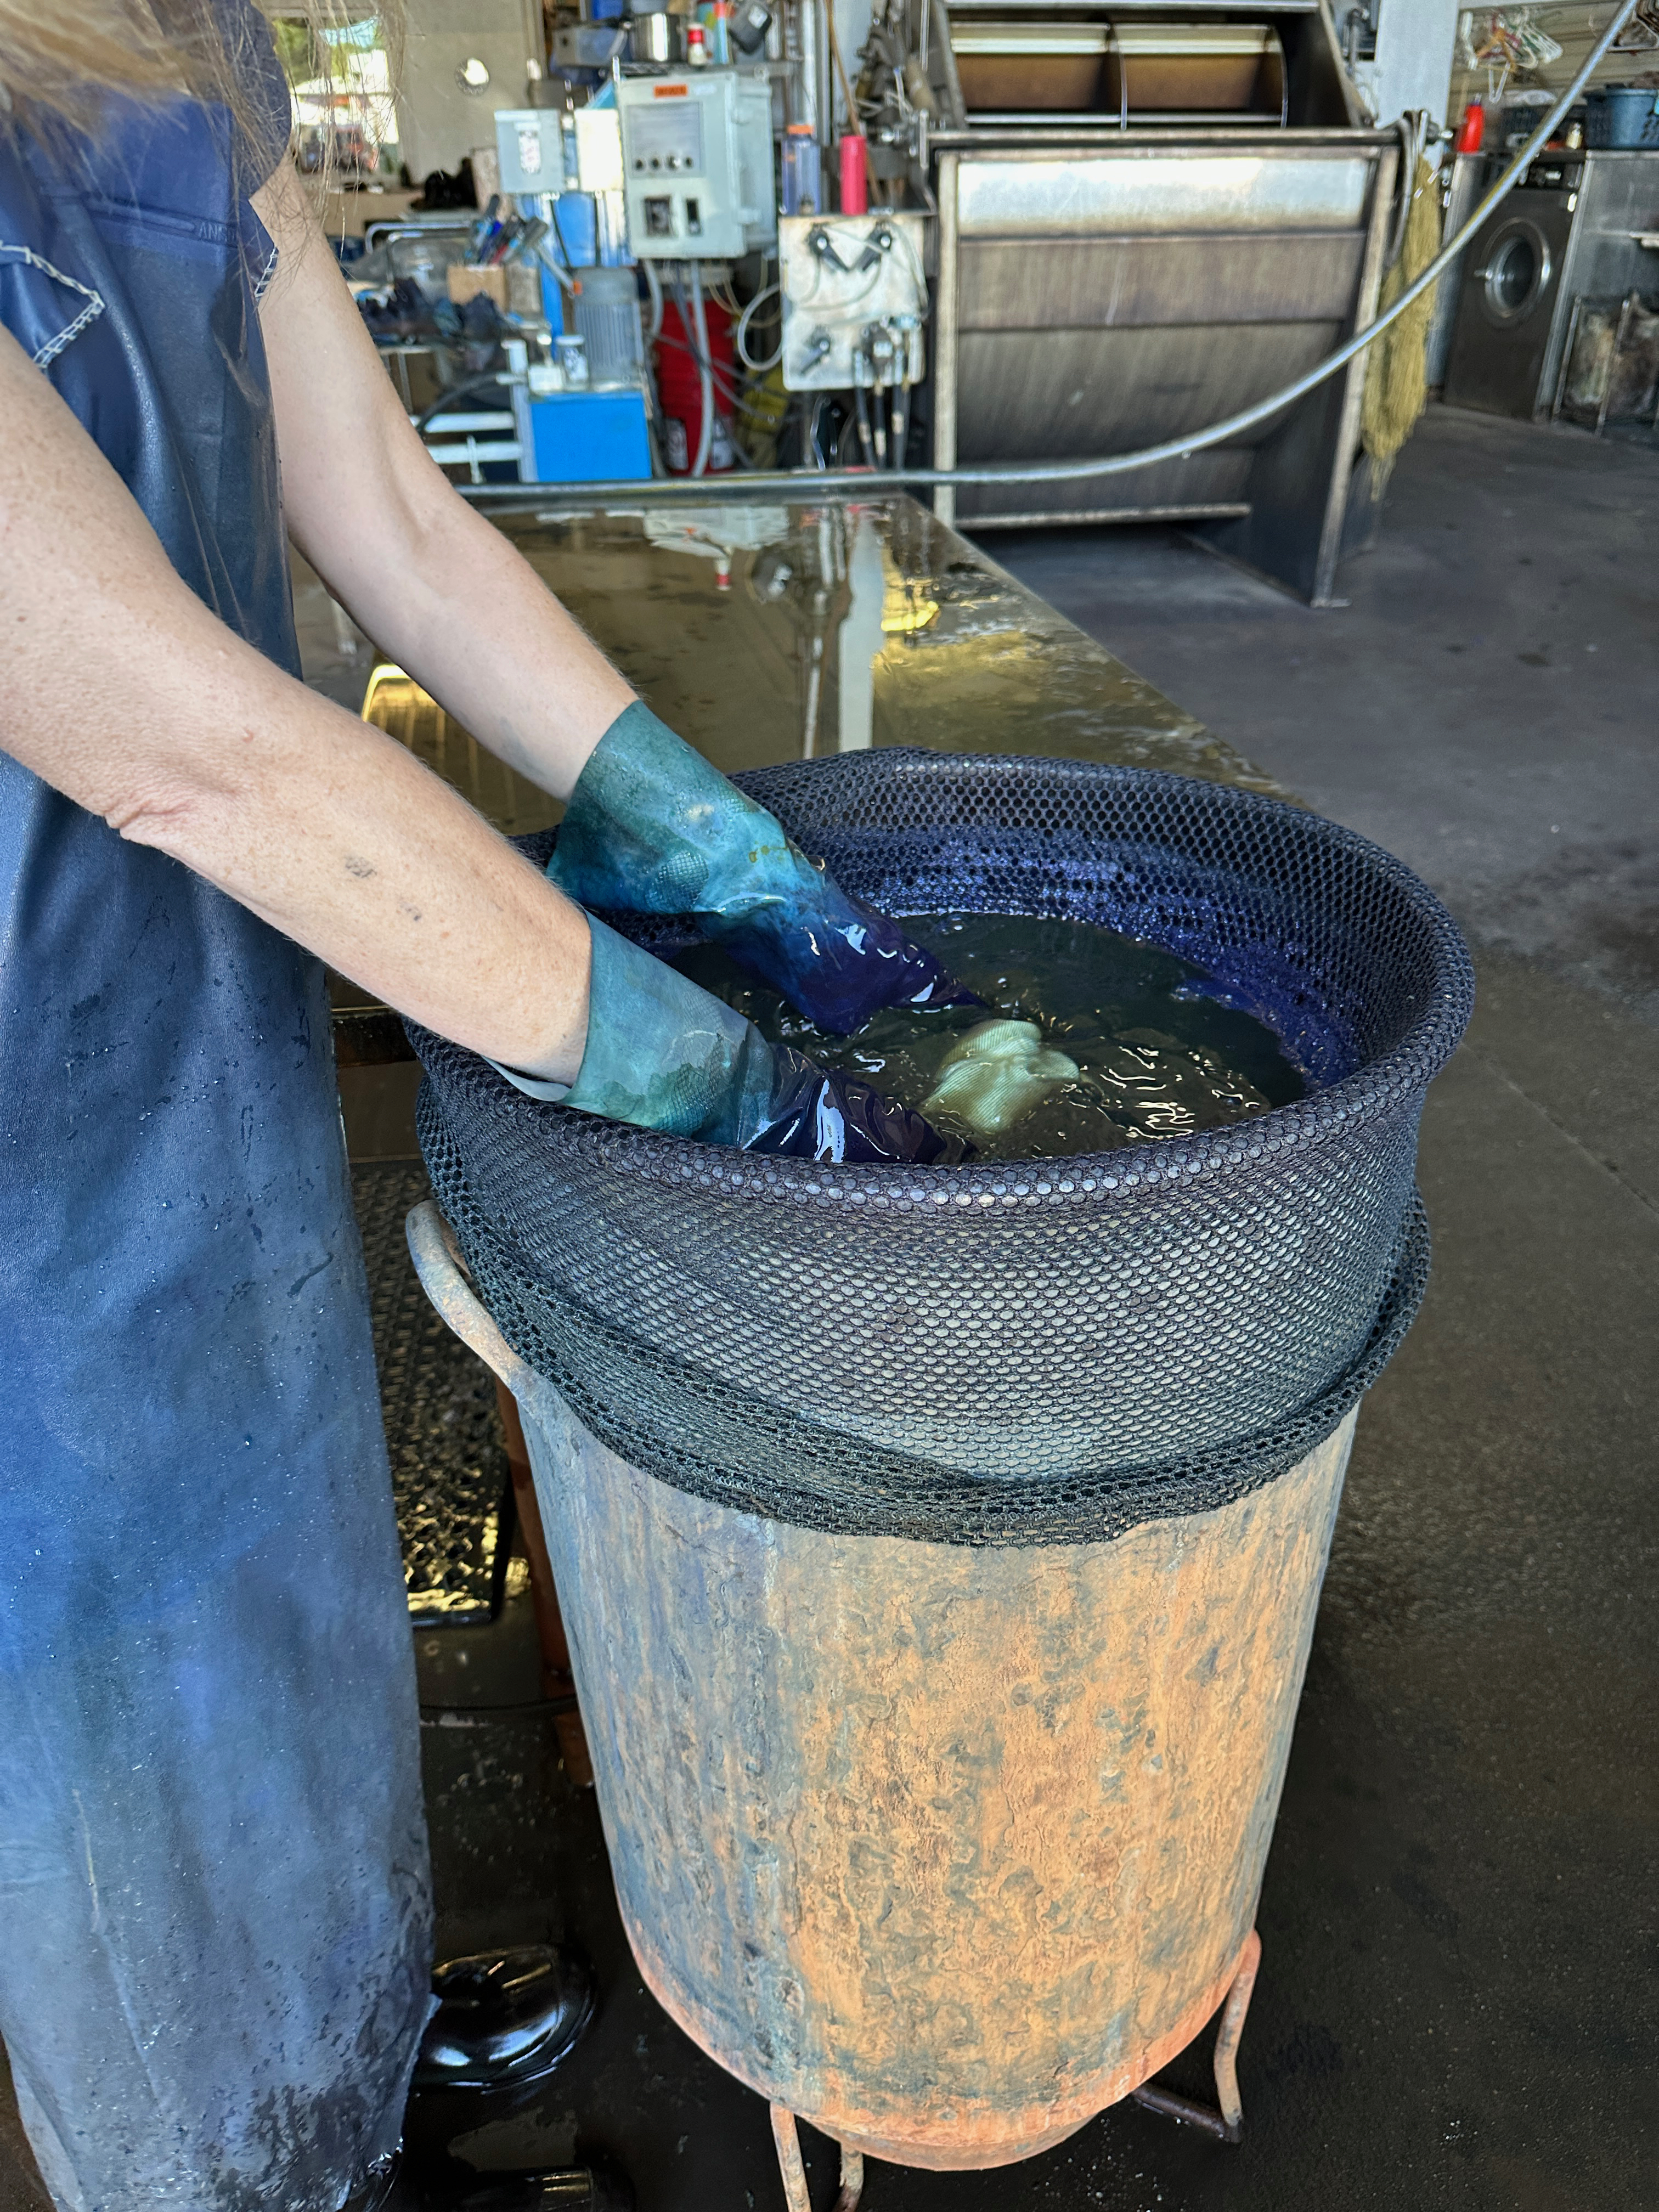
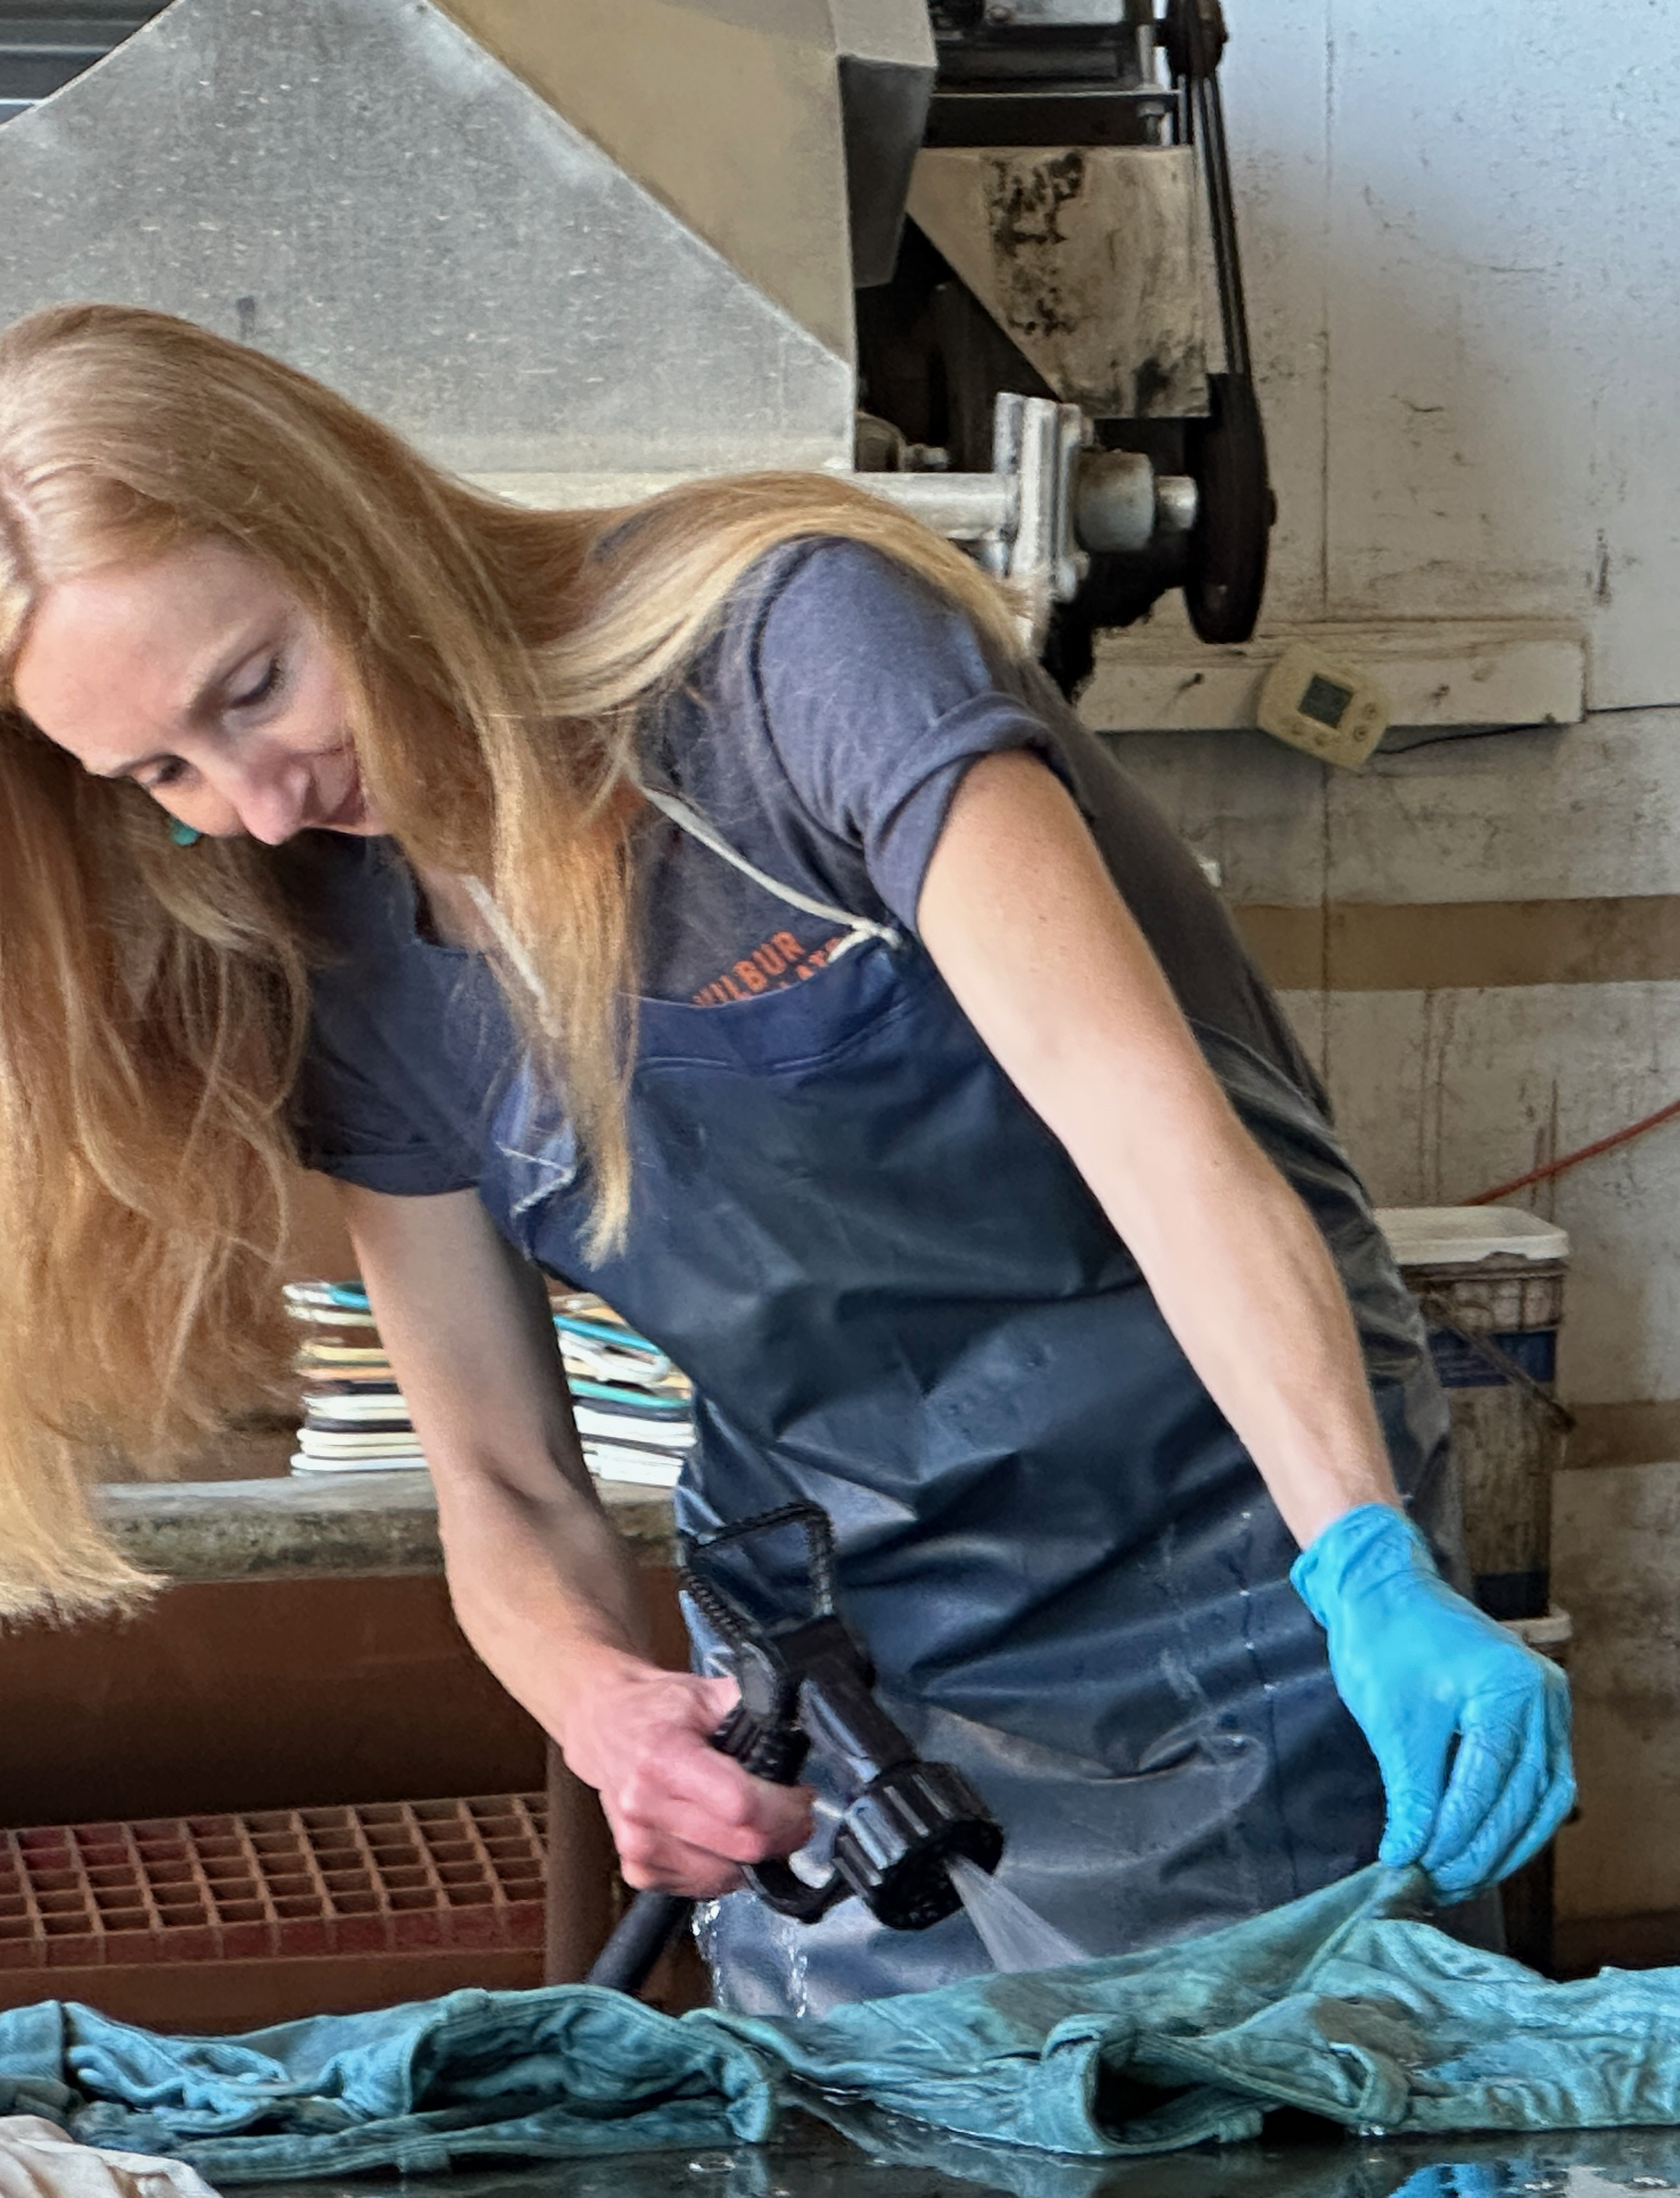
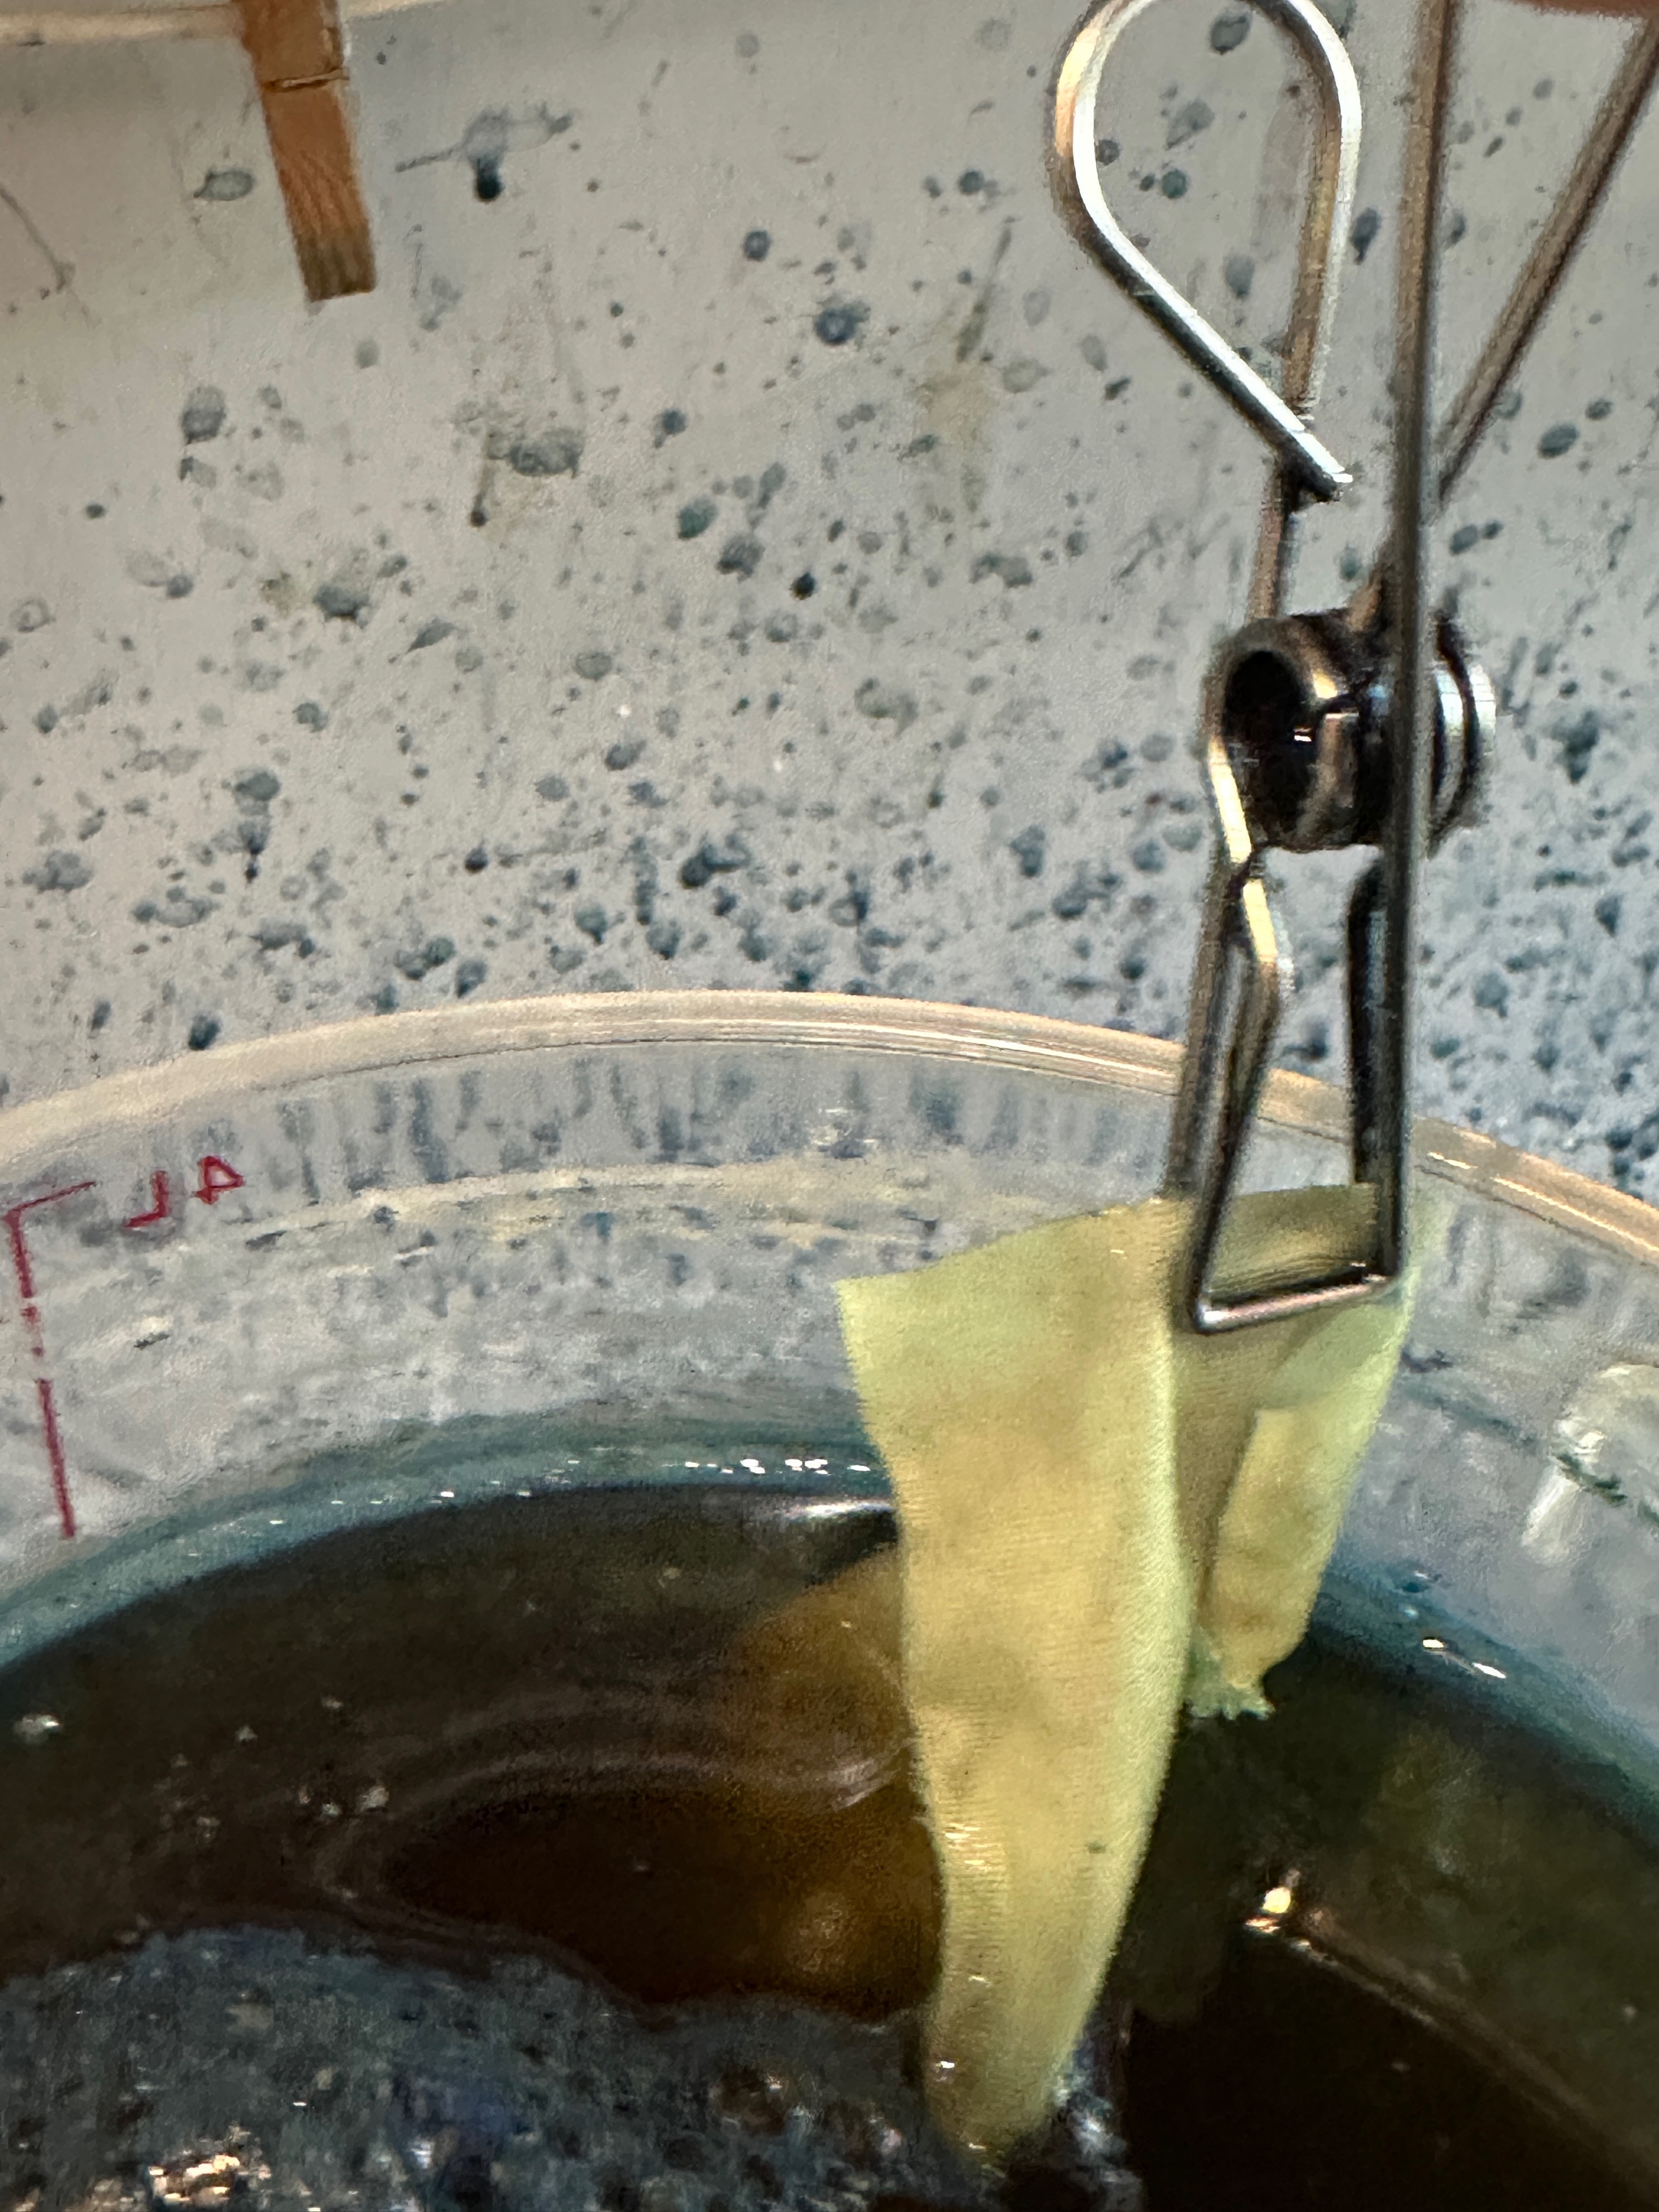
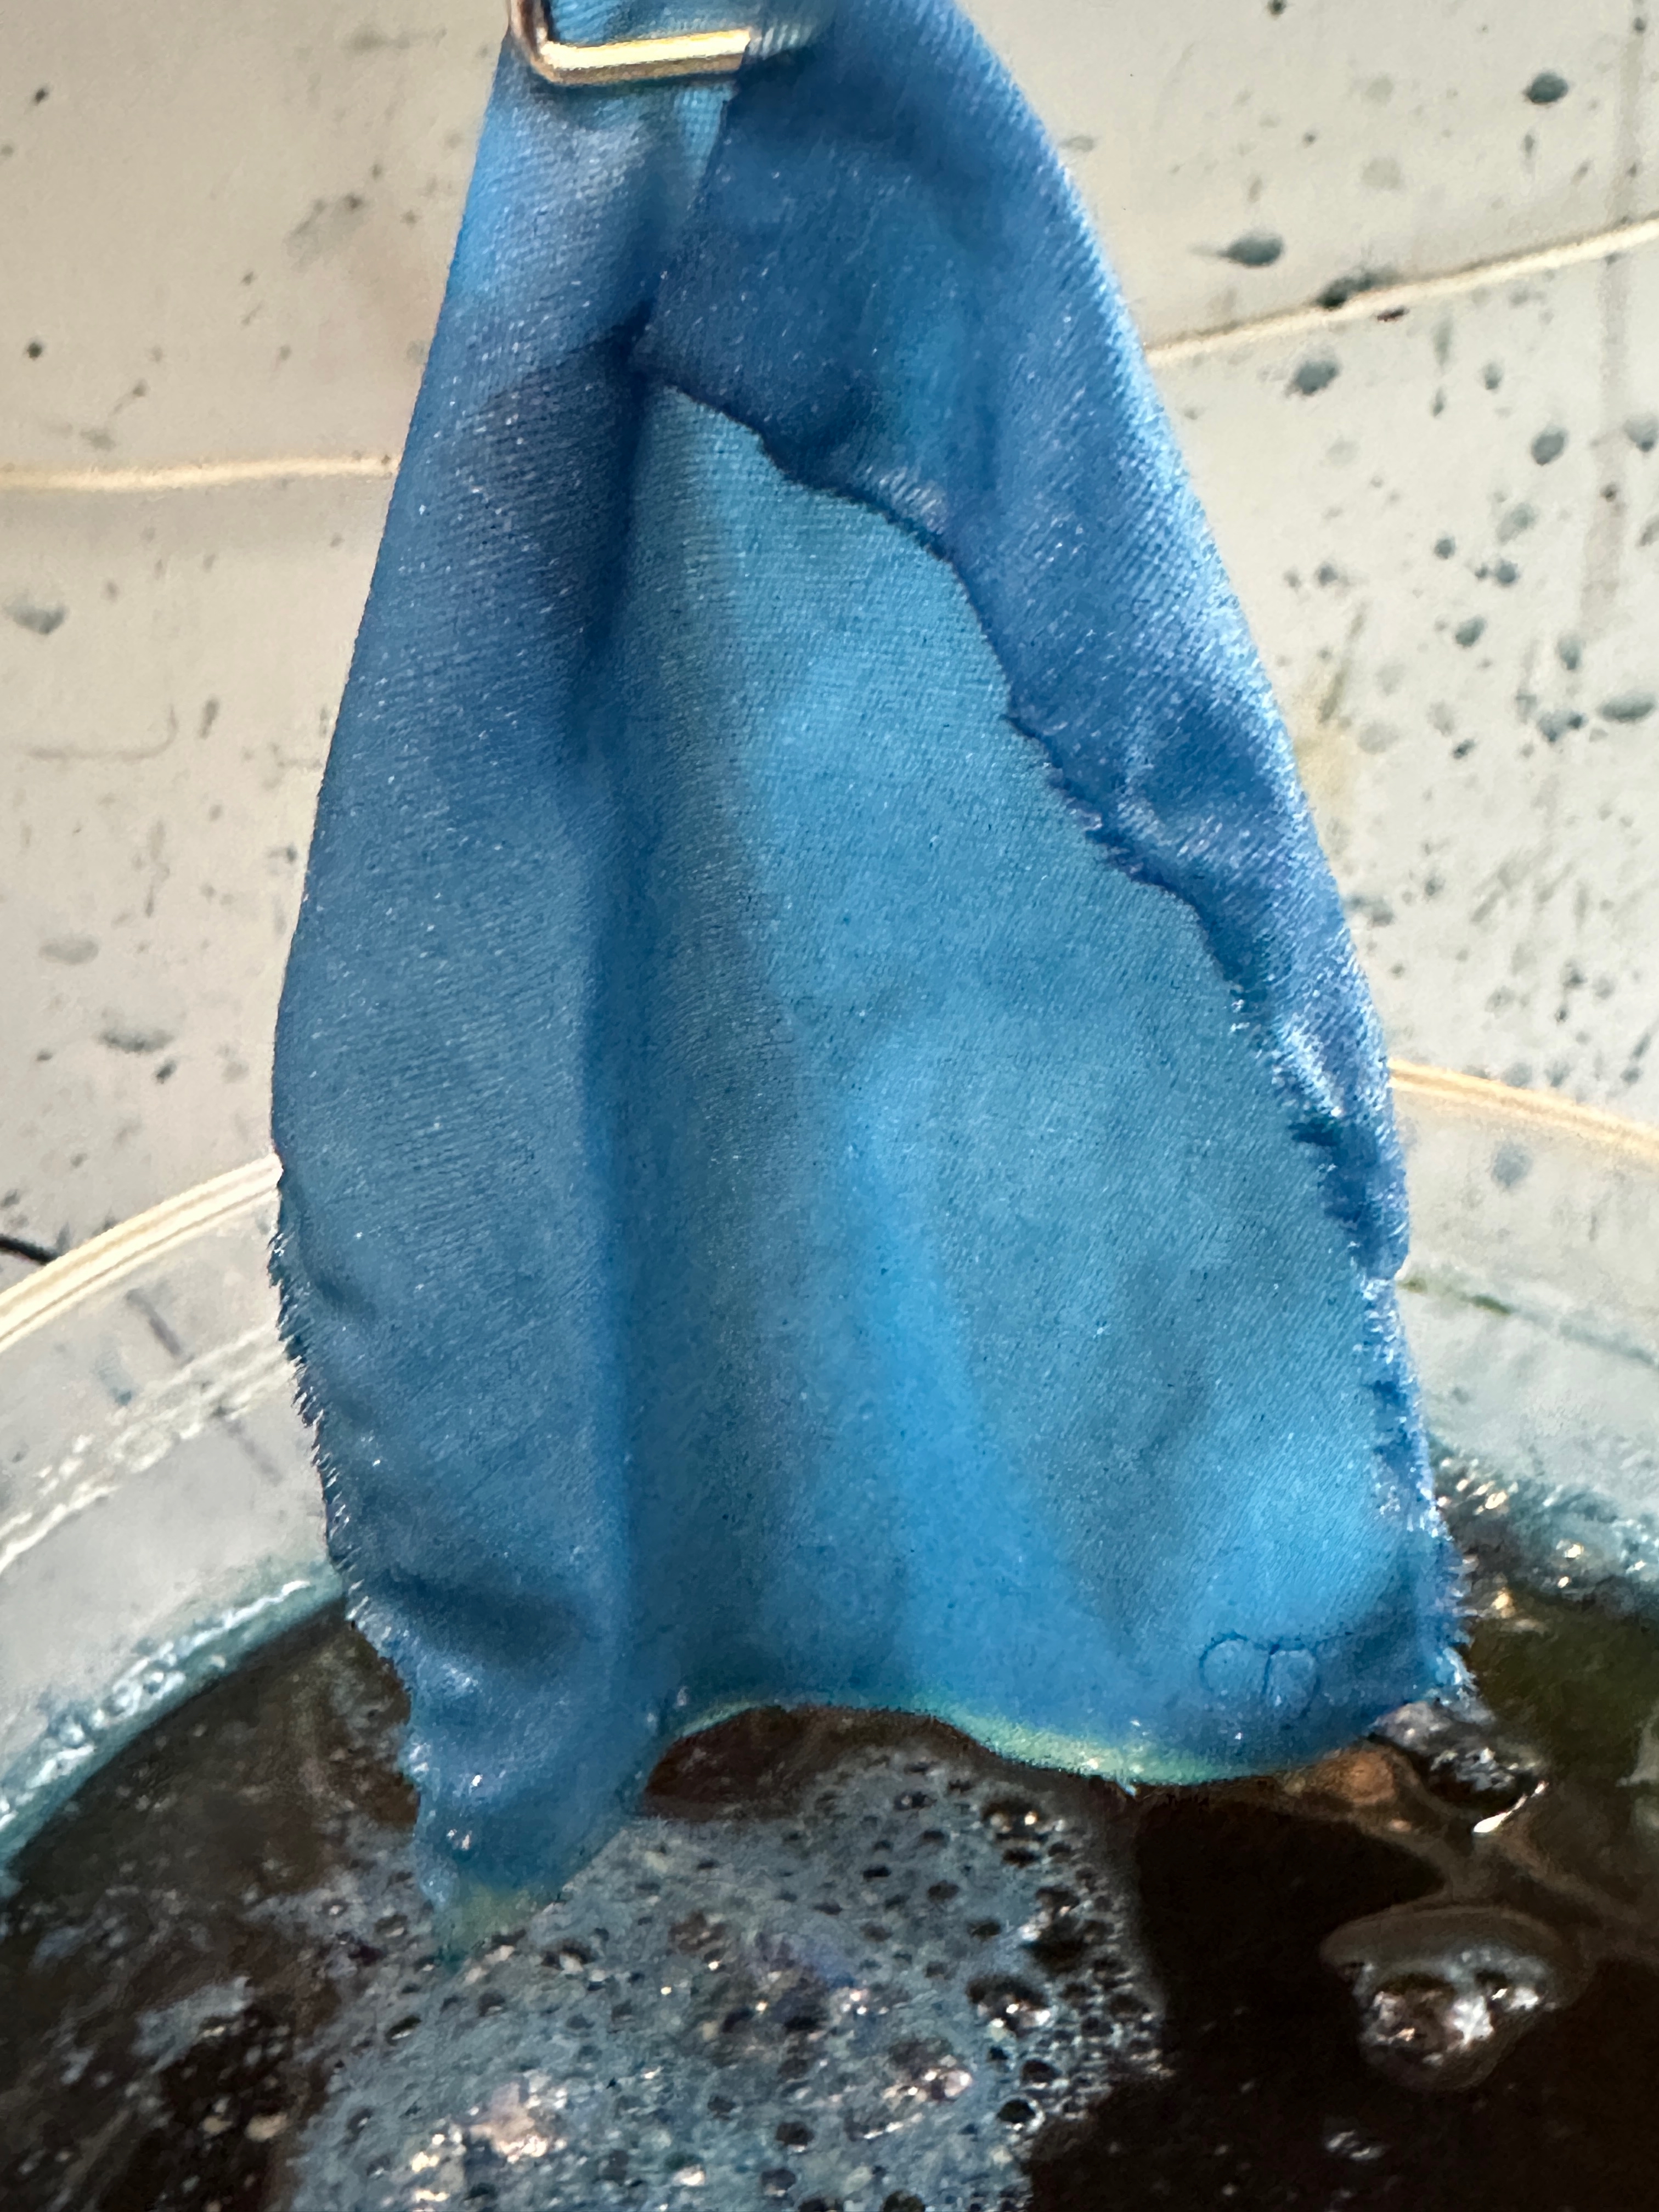
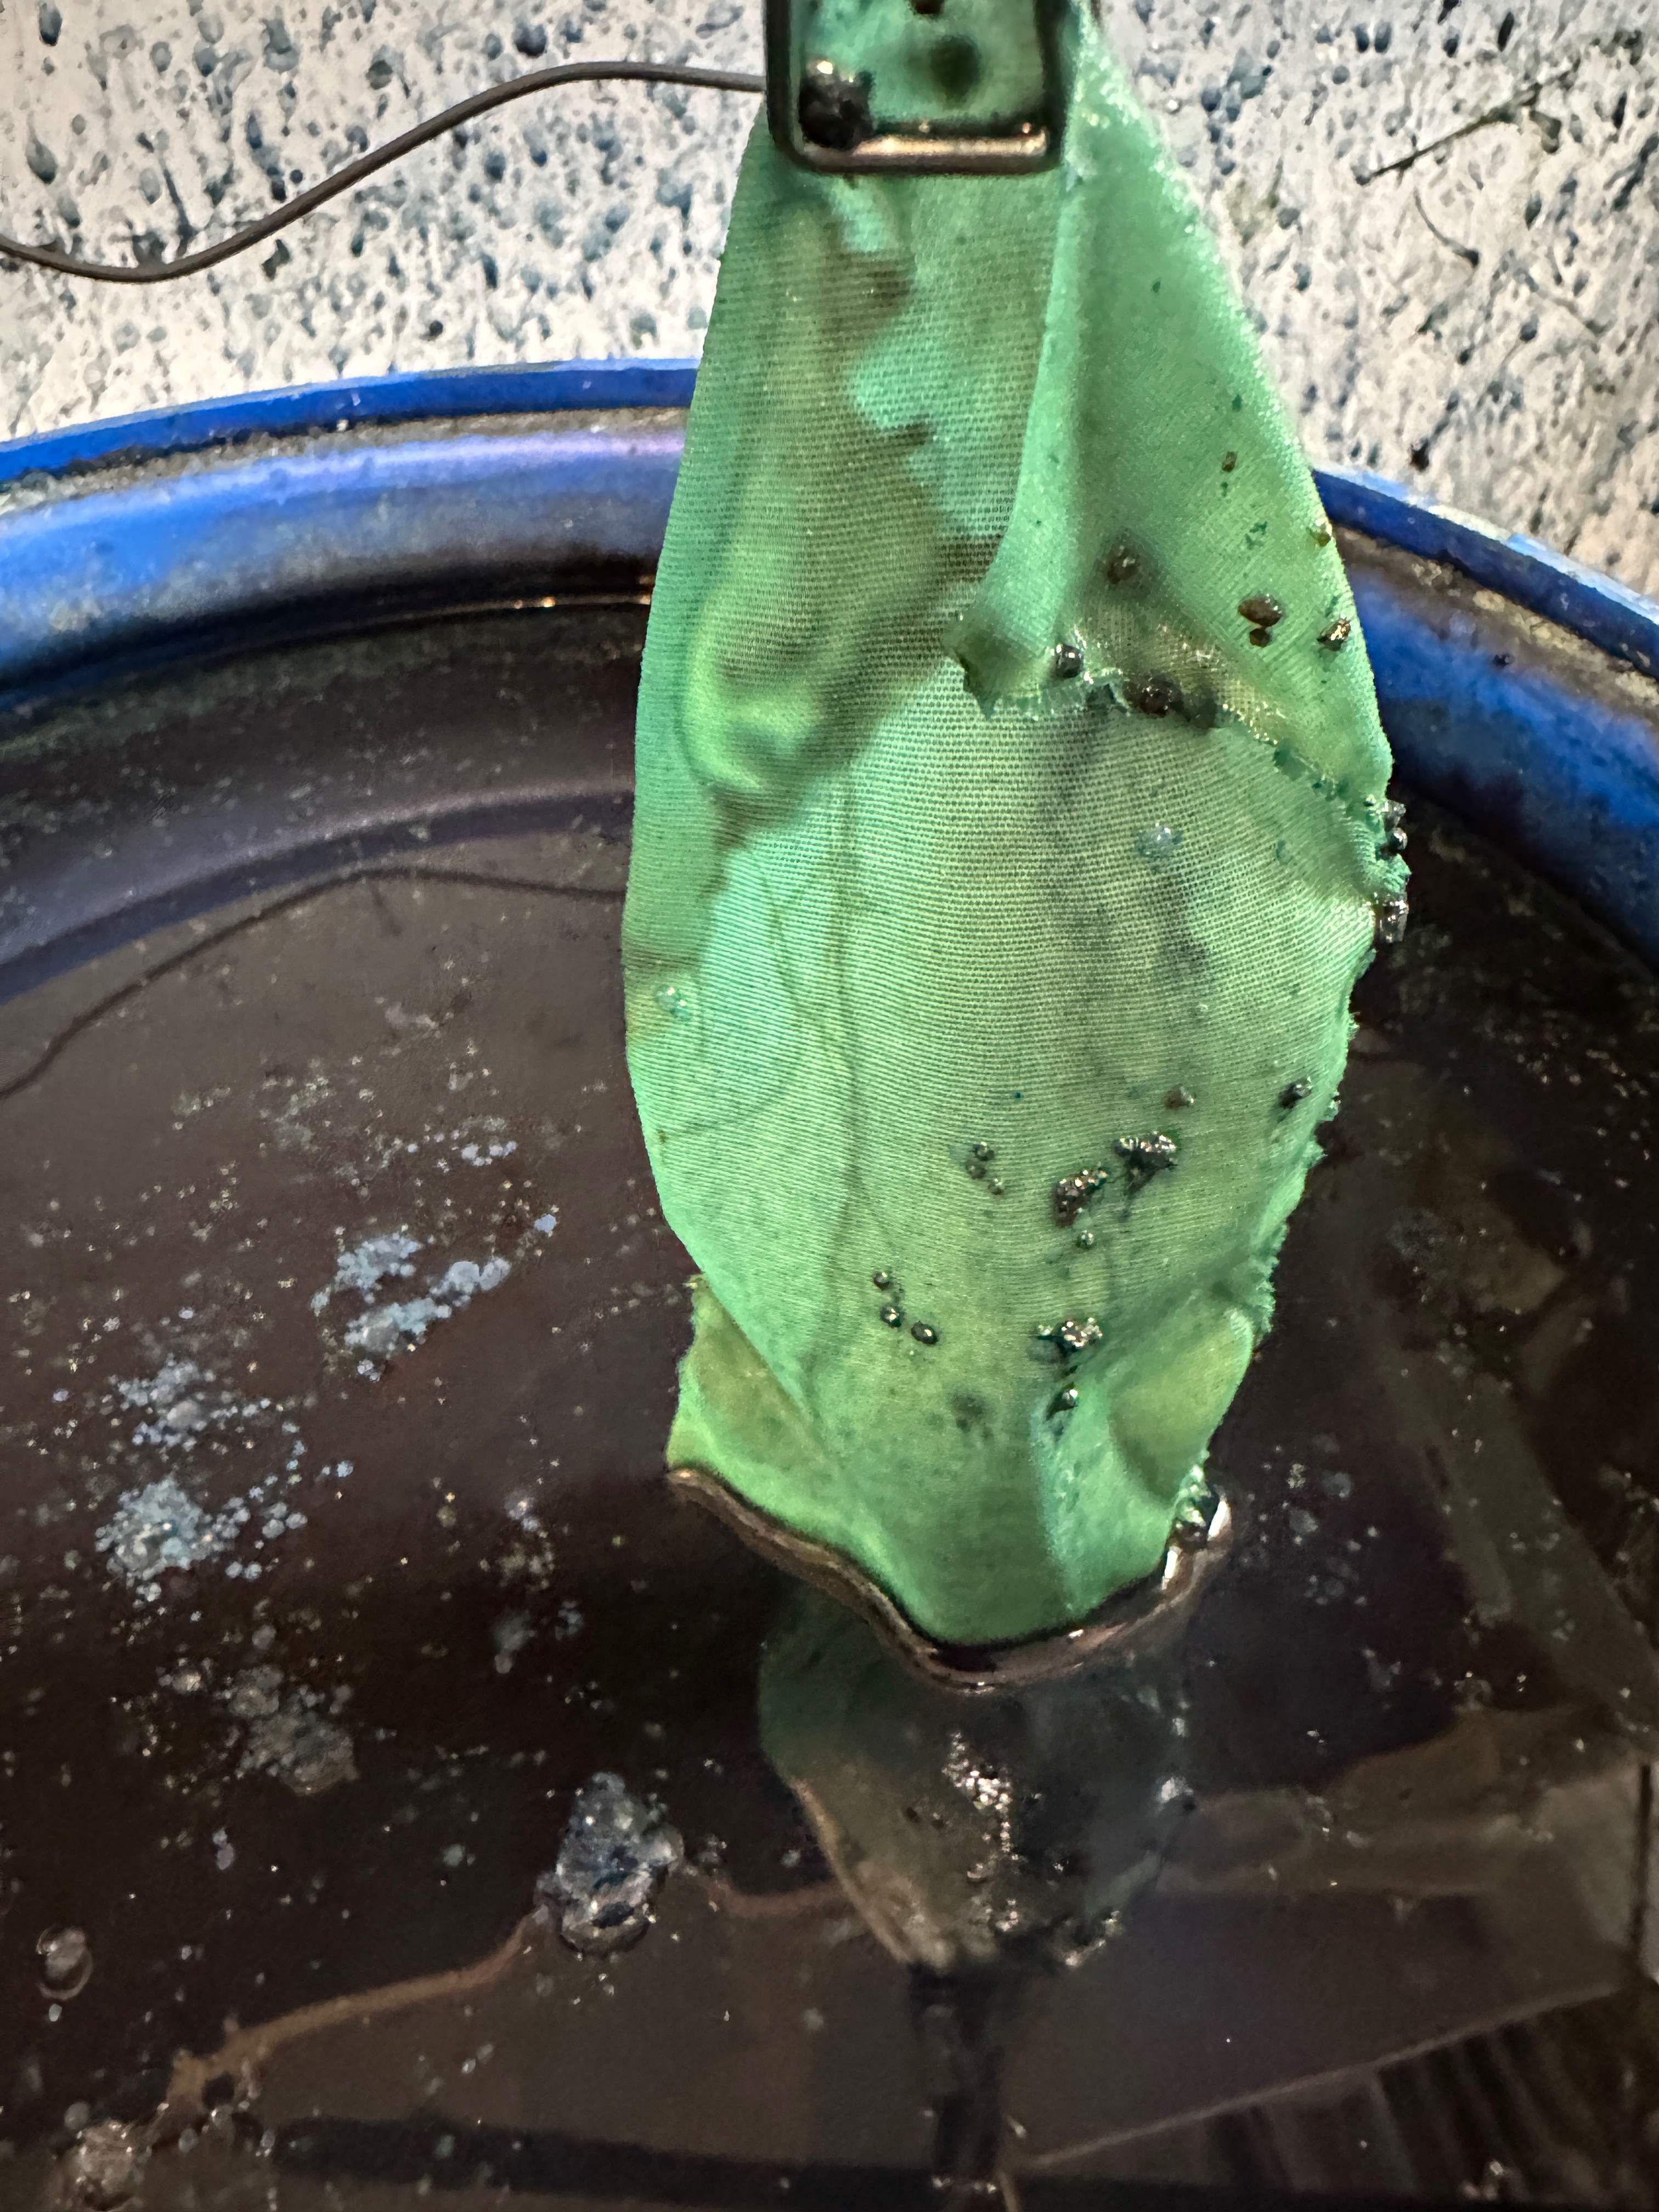
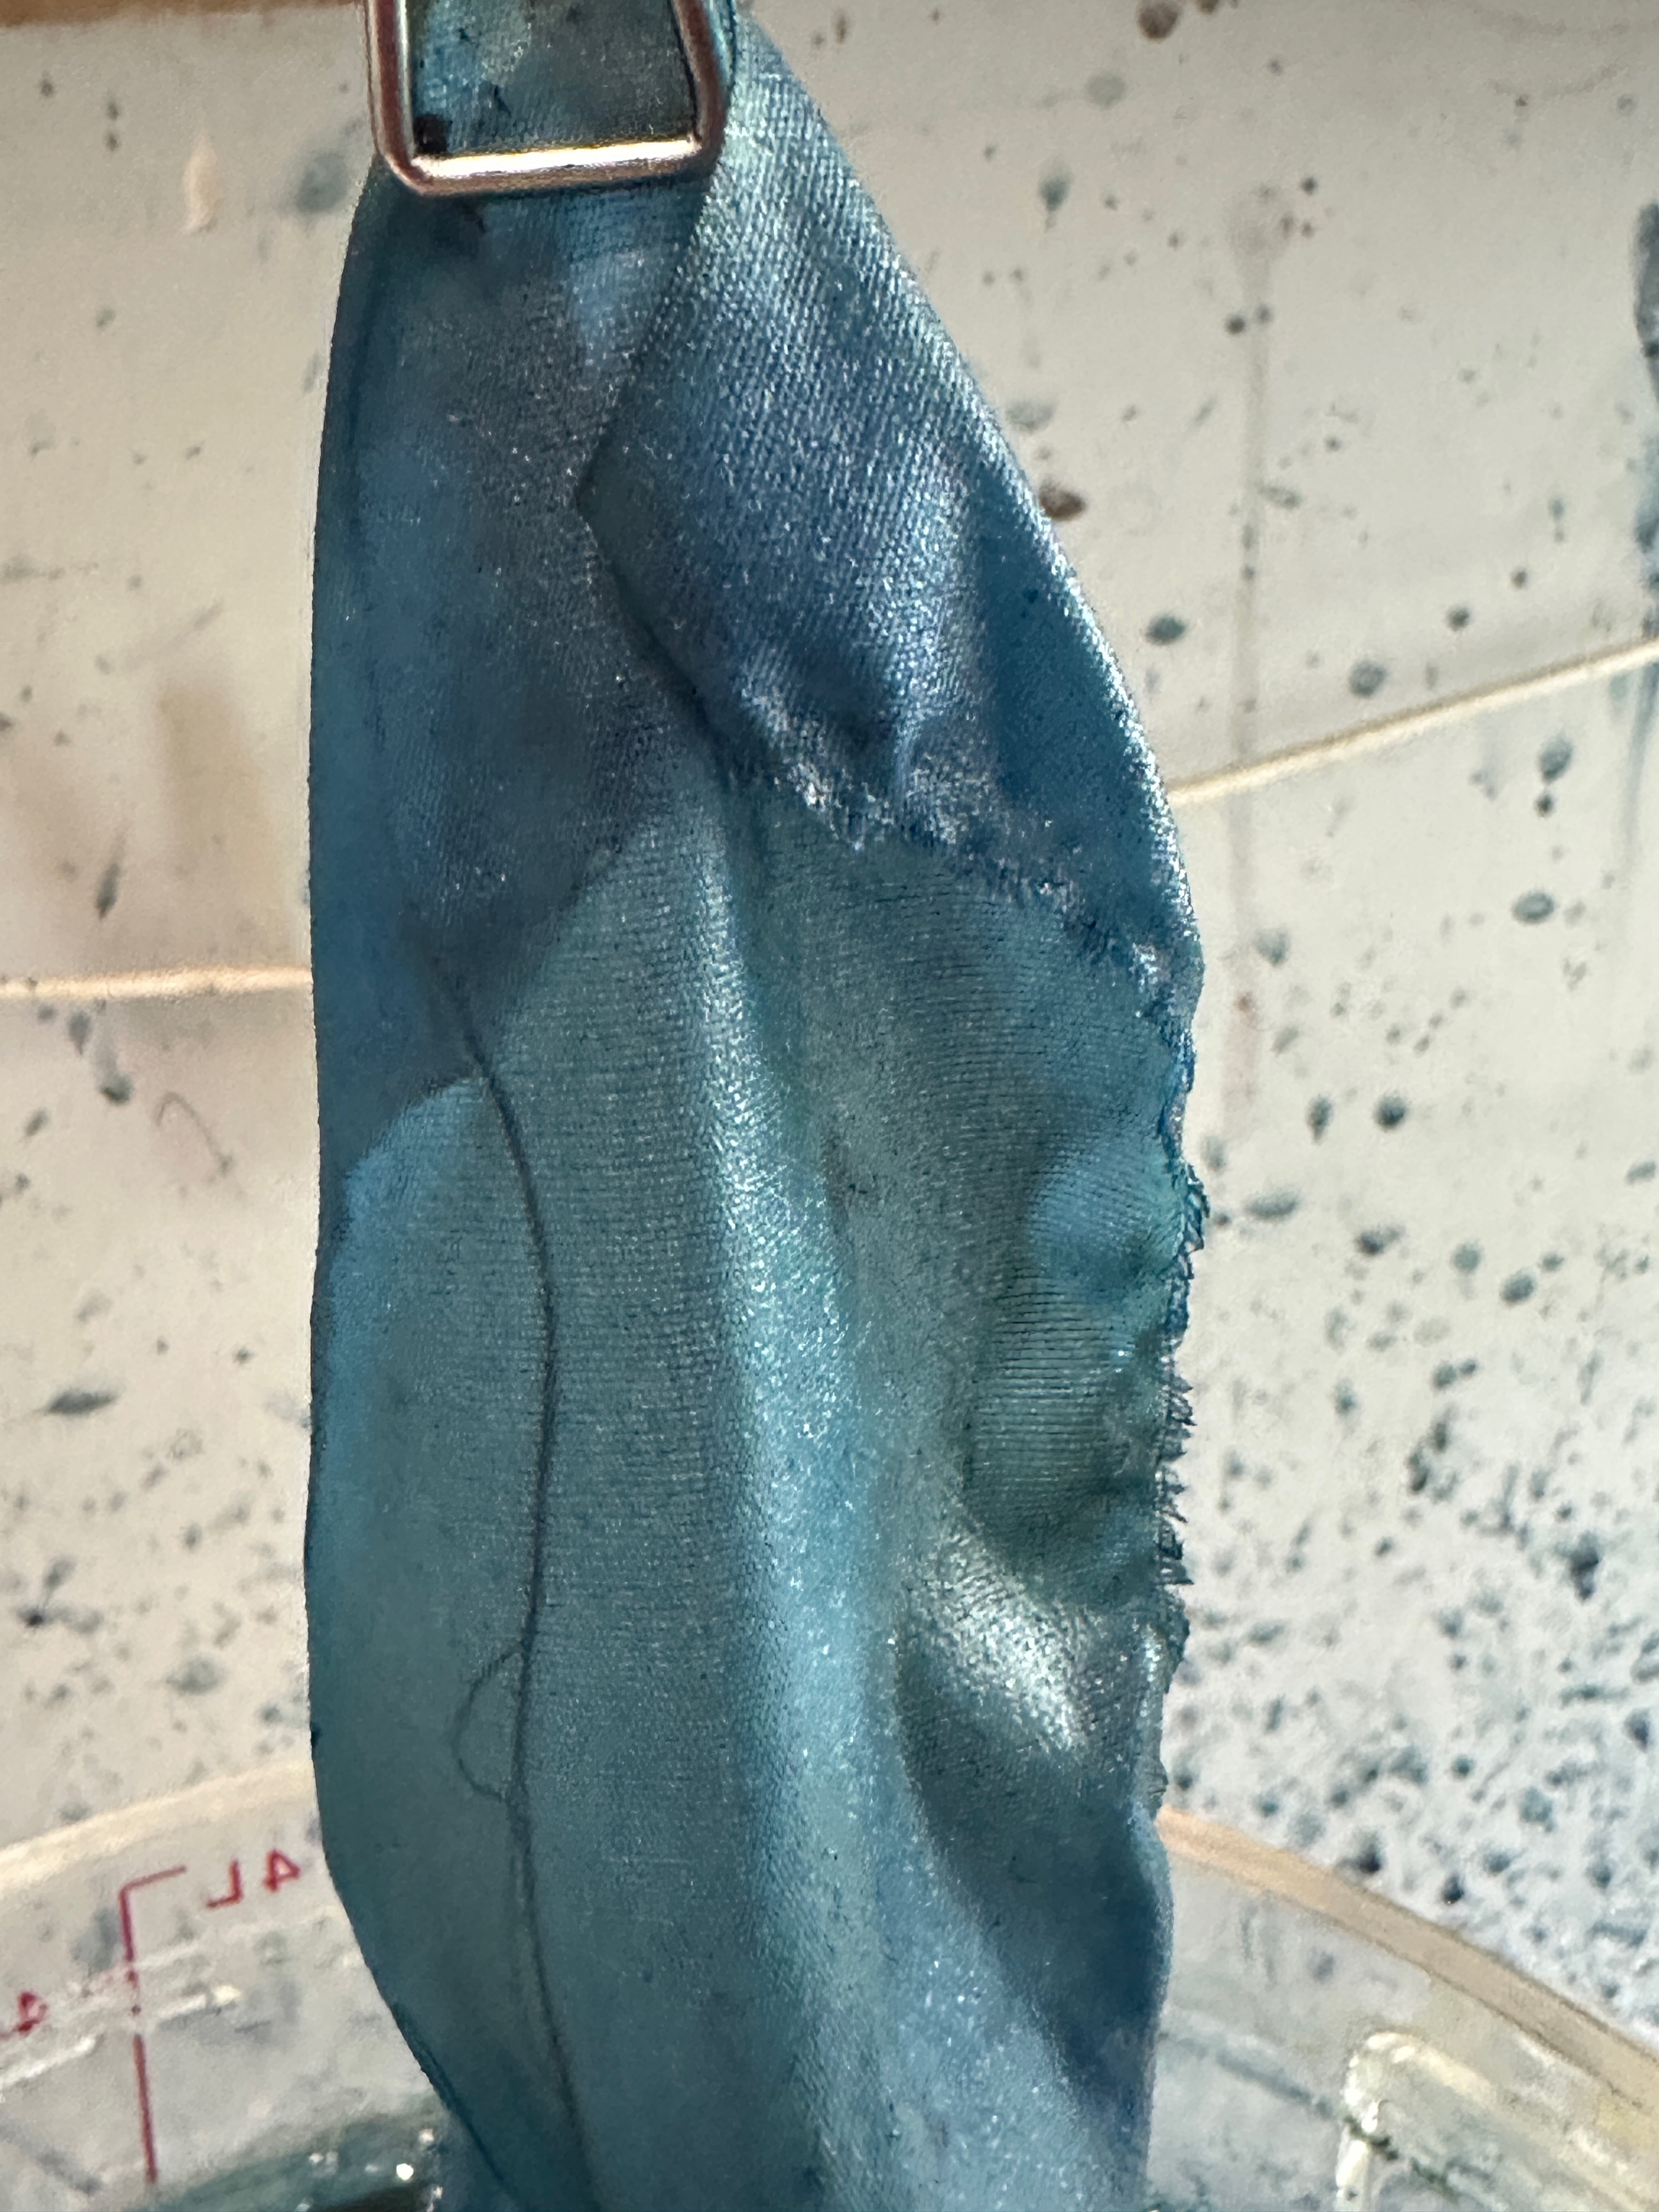
Each garment is dyed individually in indigo by Cara in an iron vat, and then carefully hosed off (with rain water) to rinse between immersions in the vat.  Color mixes often include very carefully dyed shades of indigo, followed by mordanting and subsequent dyeing.

Mordants and mordant dyes are applied in small dyeing “machines,” like open top washing machines. These particular machines were custom fabricated for a small industry but were never used. Green Matters located them in storage when they were ready to expand from using dyepots at Winona’s mother’s home to their current location. The machines keep the garments in continuous motion, assuring the most even mordanting and dyeing possible. This kind of piece dyeing is impossible to do well in a studio dye pot. Much more sophisticated machines are used in industry today but these older machines do the job well. 

Winona Quiqley with one of the larger of the dye machines. The two paddles in the machine keep garments separated and moving evenly during the dying.

The concept of refreshing our old garments with color is smart. If you are like me, we all have too many clothes. Some of them are loved, and will continue to serve us with a little “tweaking”. You may have a well-made and cherished garment, but it’s faded, sun bleached, stained, etc. Perhaps its light color is not practical for gardening, farming, or working in the studio. Vintage garments can be given a new life with a contemporary color. Re-dyeing is making a conscious choice by countering the pervasiveness of fast fashion. I often re-dye garments myself but am always plagued by the issue of uneven dyeing, as I am limited to dyeing in pots.


As I was leaving, Winona was getting ready to make some electrical repairs to the small dyeing machine. We learn to do EVERYTHING in our studios!

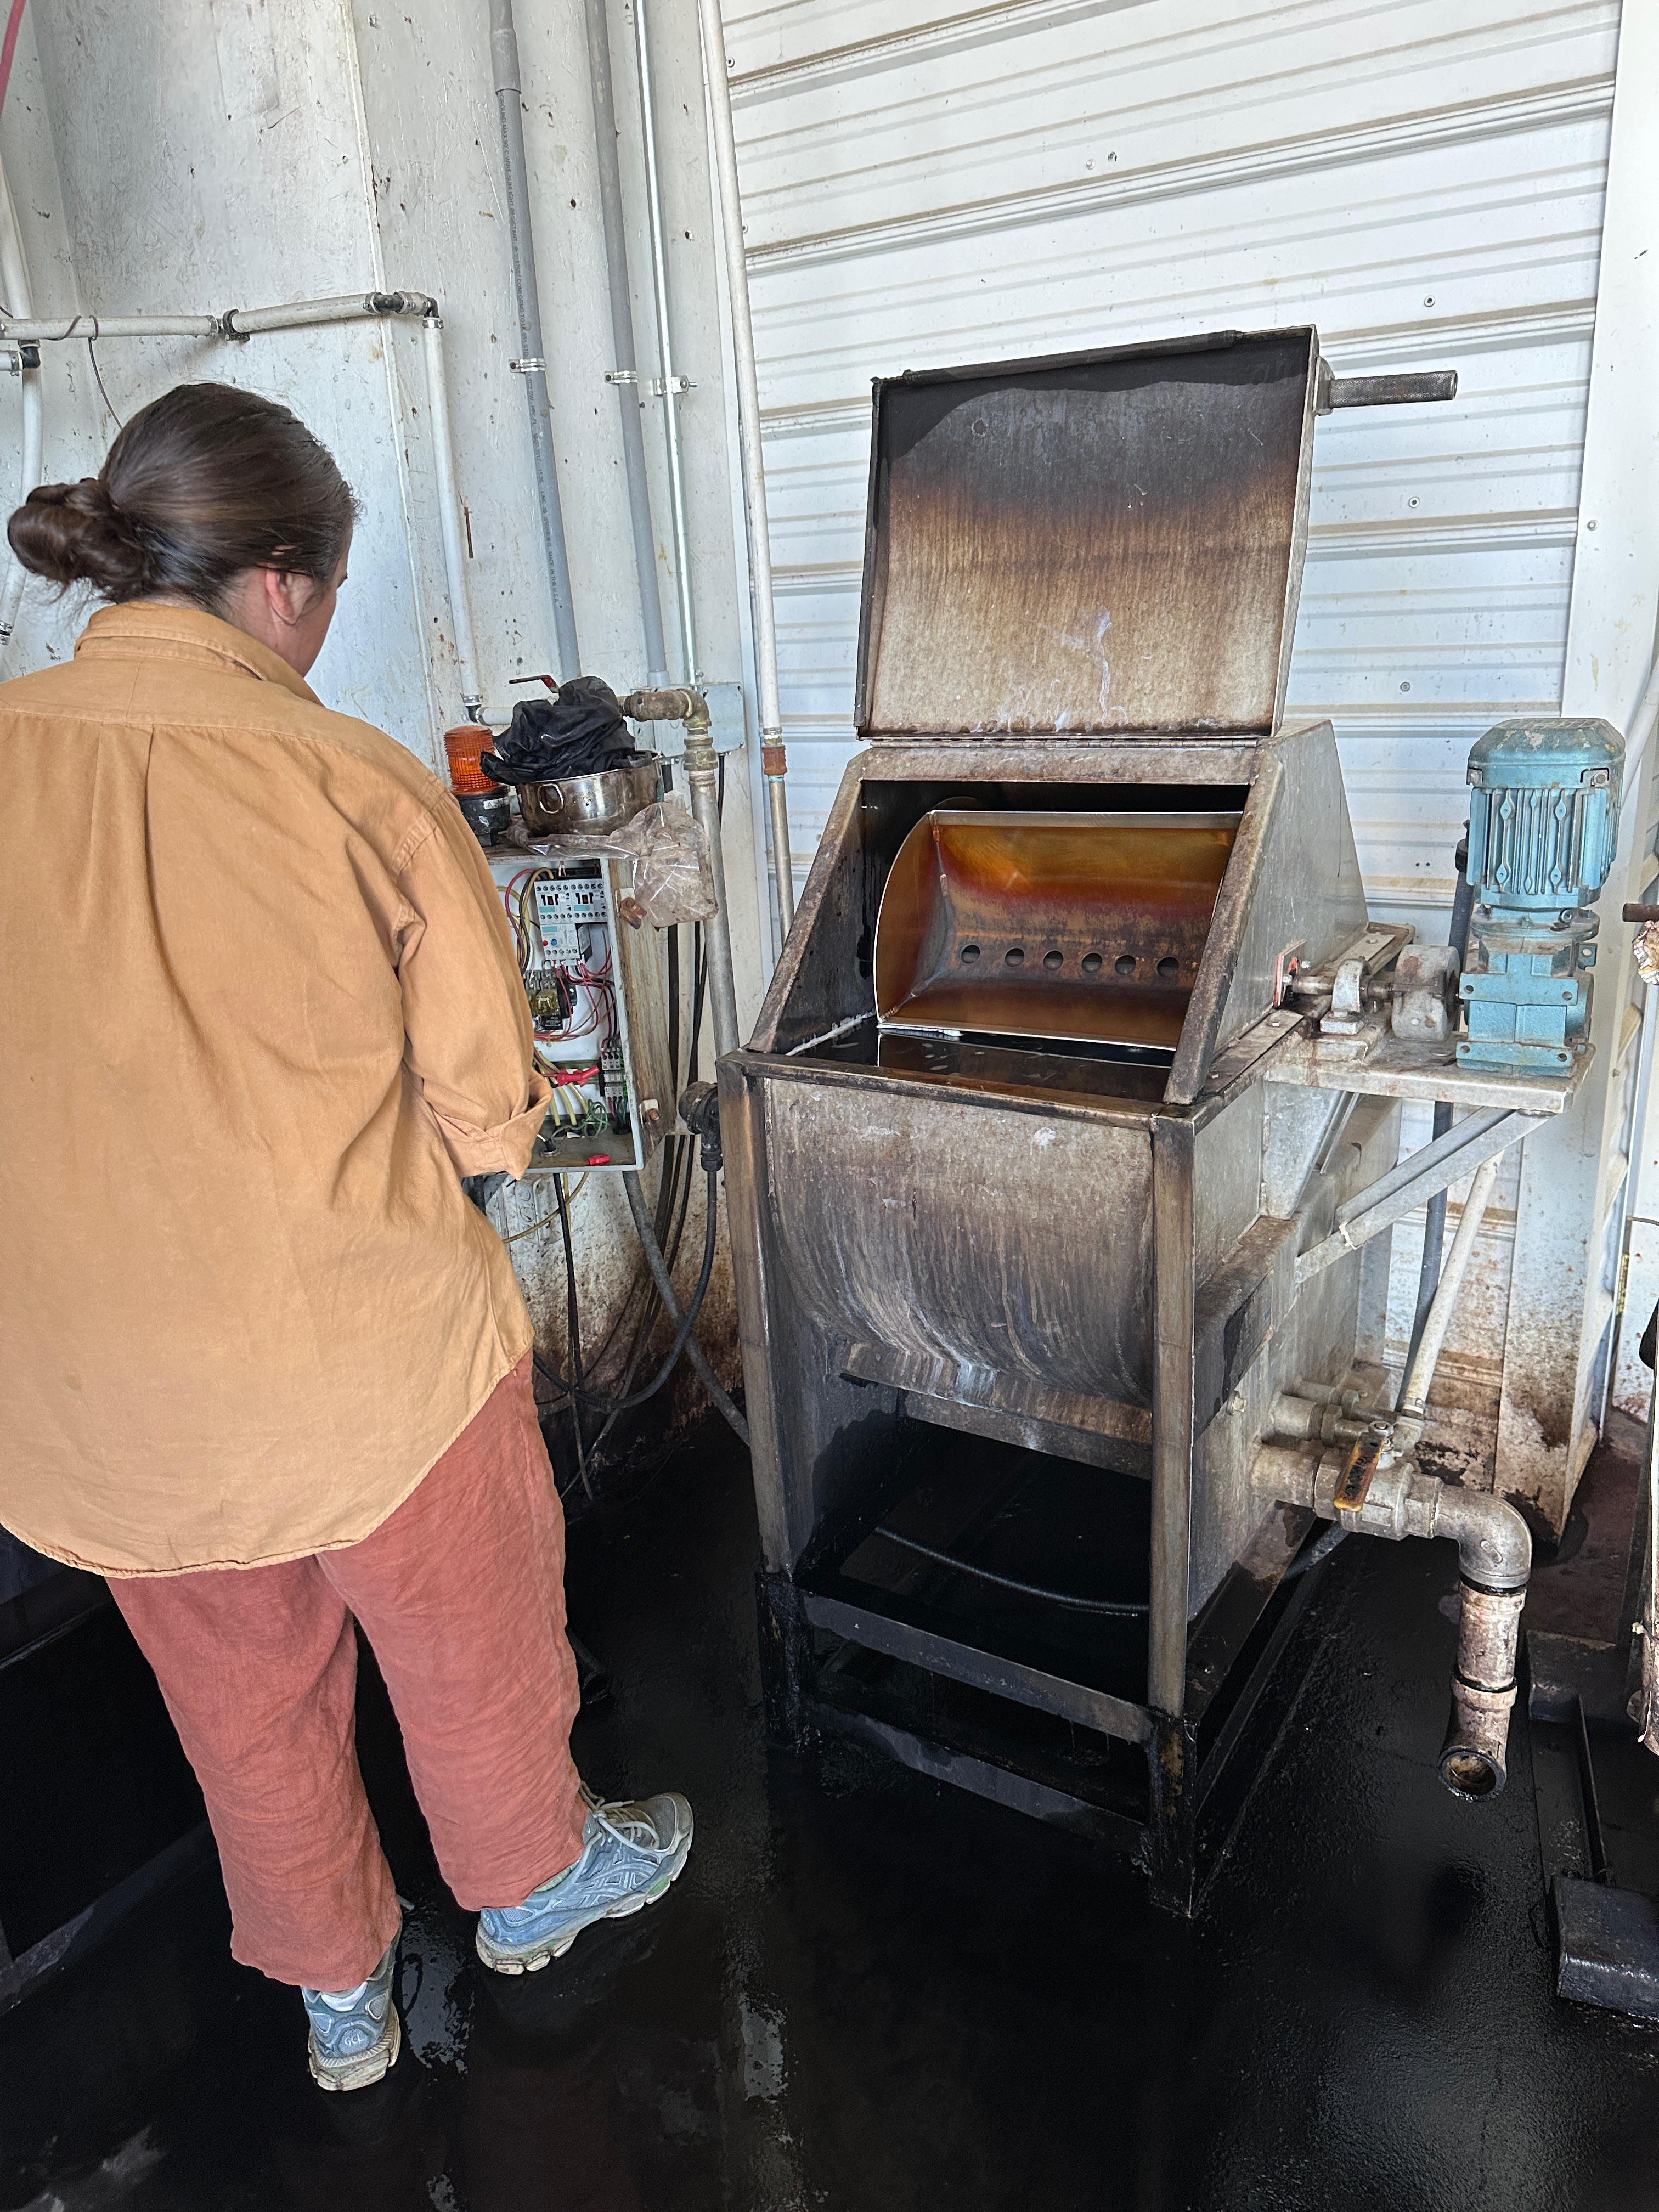
Water used for dyeing is all rain water, collected in cisterns underneath the building. The dye machines, which are energy efficient, use the same motor as a dairy mixer, and are easily maintained in a farming community.  

Several things that truly impressed me:

  • Choice of dyes. Green Matters seems to consistently make good choices about which dyes to use for the most long lasting colors. And they are combined in beautiful ways.
  • The use of rain water. We all know that dyeing requires LOTS of water at every step. Doing this using a renewable resource not only saves $$ but is just smart!
  • The re-purposing of dye machines and the ability to keep them maintained and working. 

So, do consider sending a favorite natural fiber garment to Green Matters for a “facelift”. Far better that we promote a company such as this, than purchase yet another garment. Here is where to learn everything you need to know. Invest in a new color for yourself! The ordering process is easy, the choices are clear, and they will send you a mailing label to ship off your garment. And occasionally, Green Matters hold in-person classes, where perhaps you can dye your own clothing.

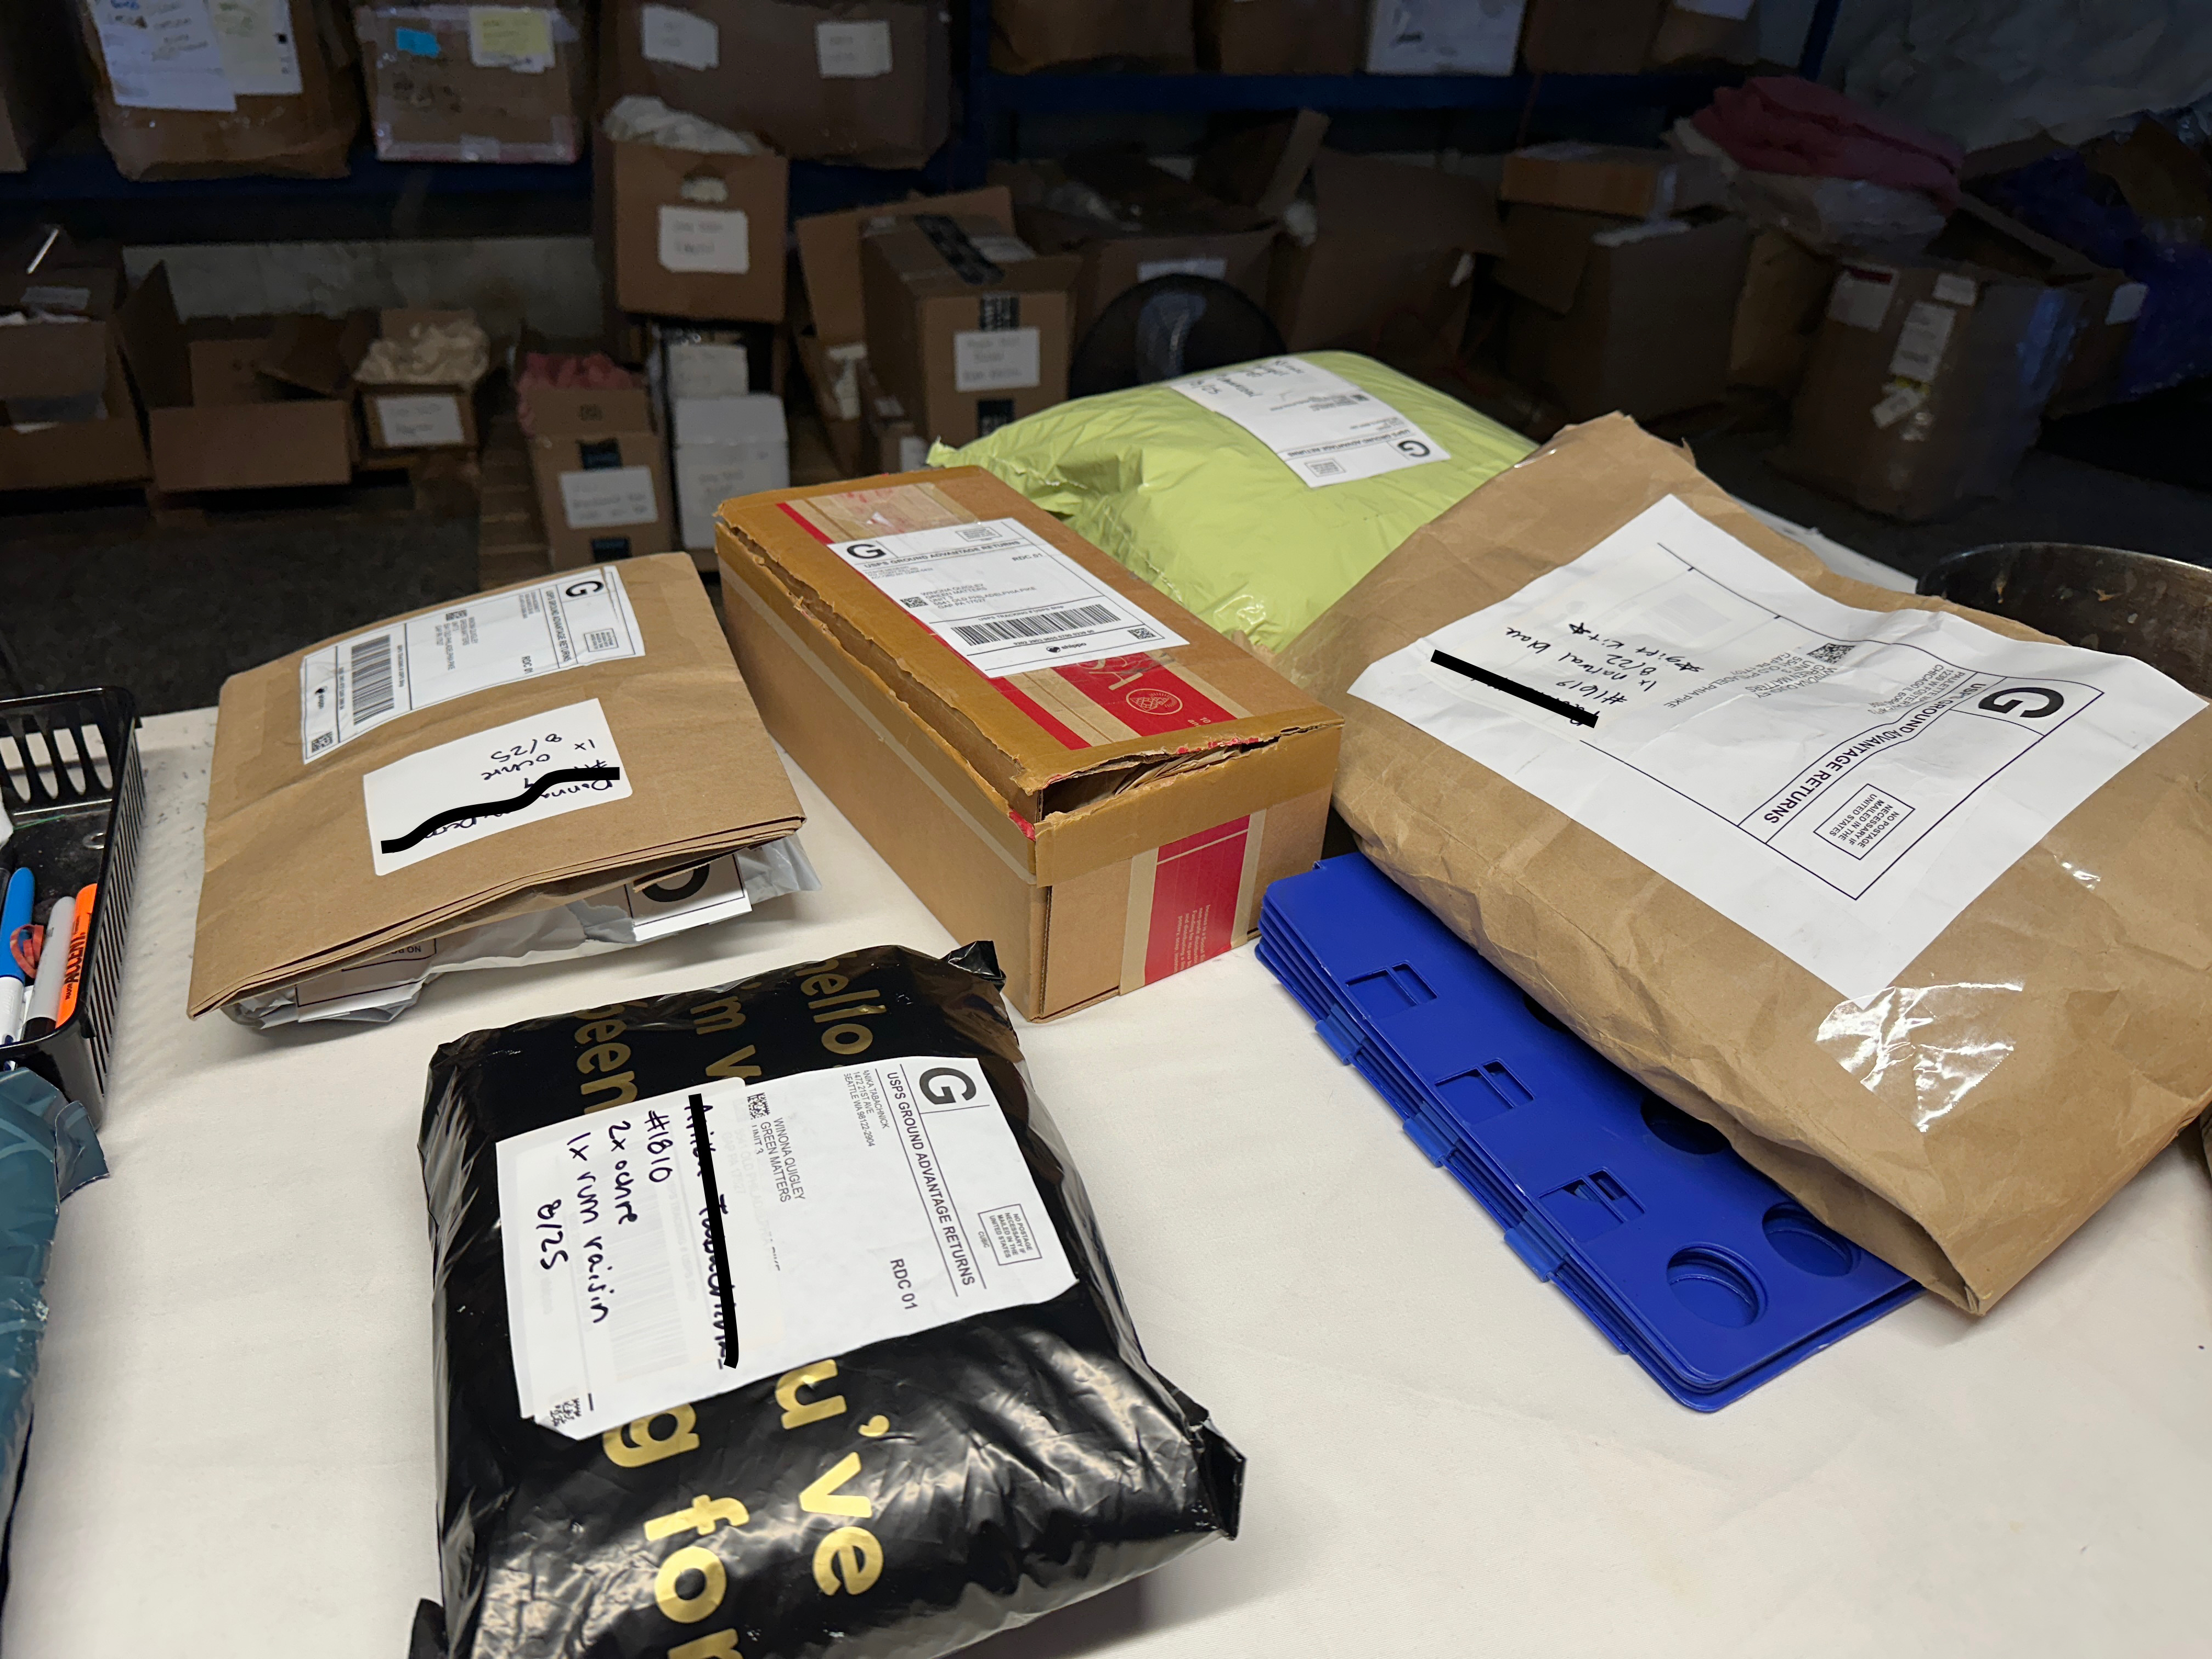
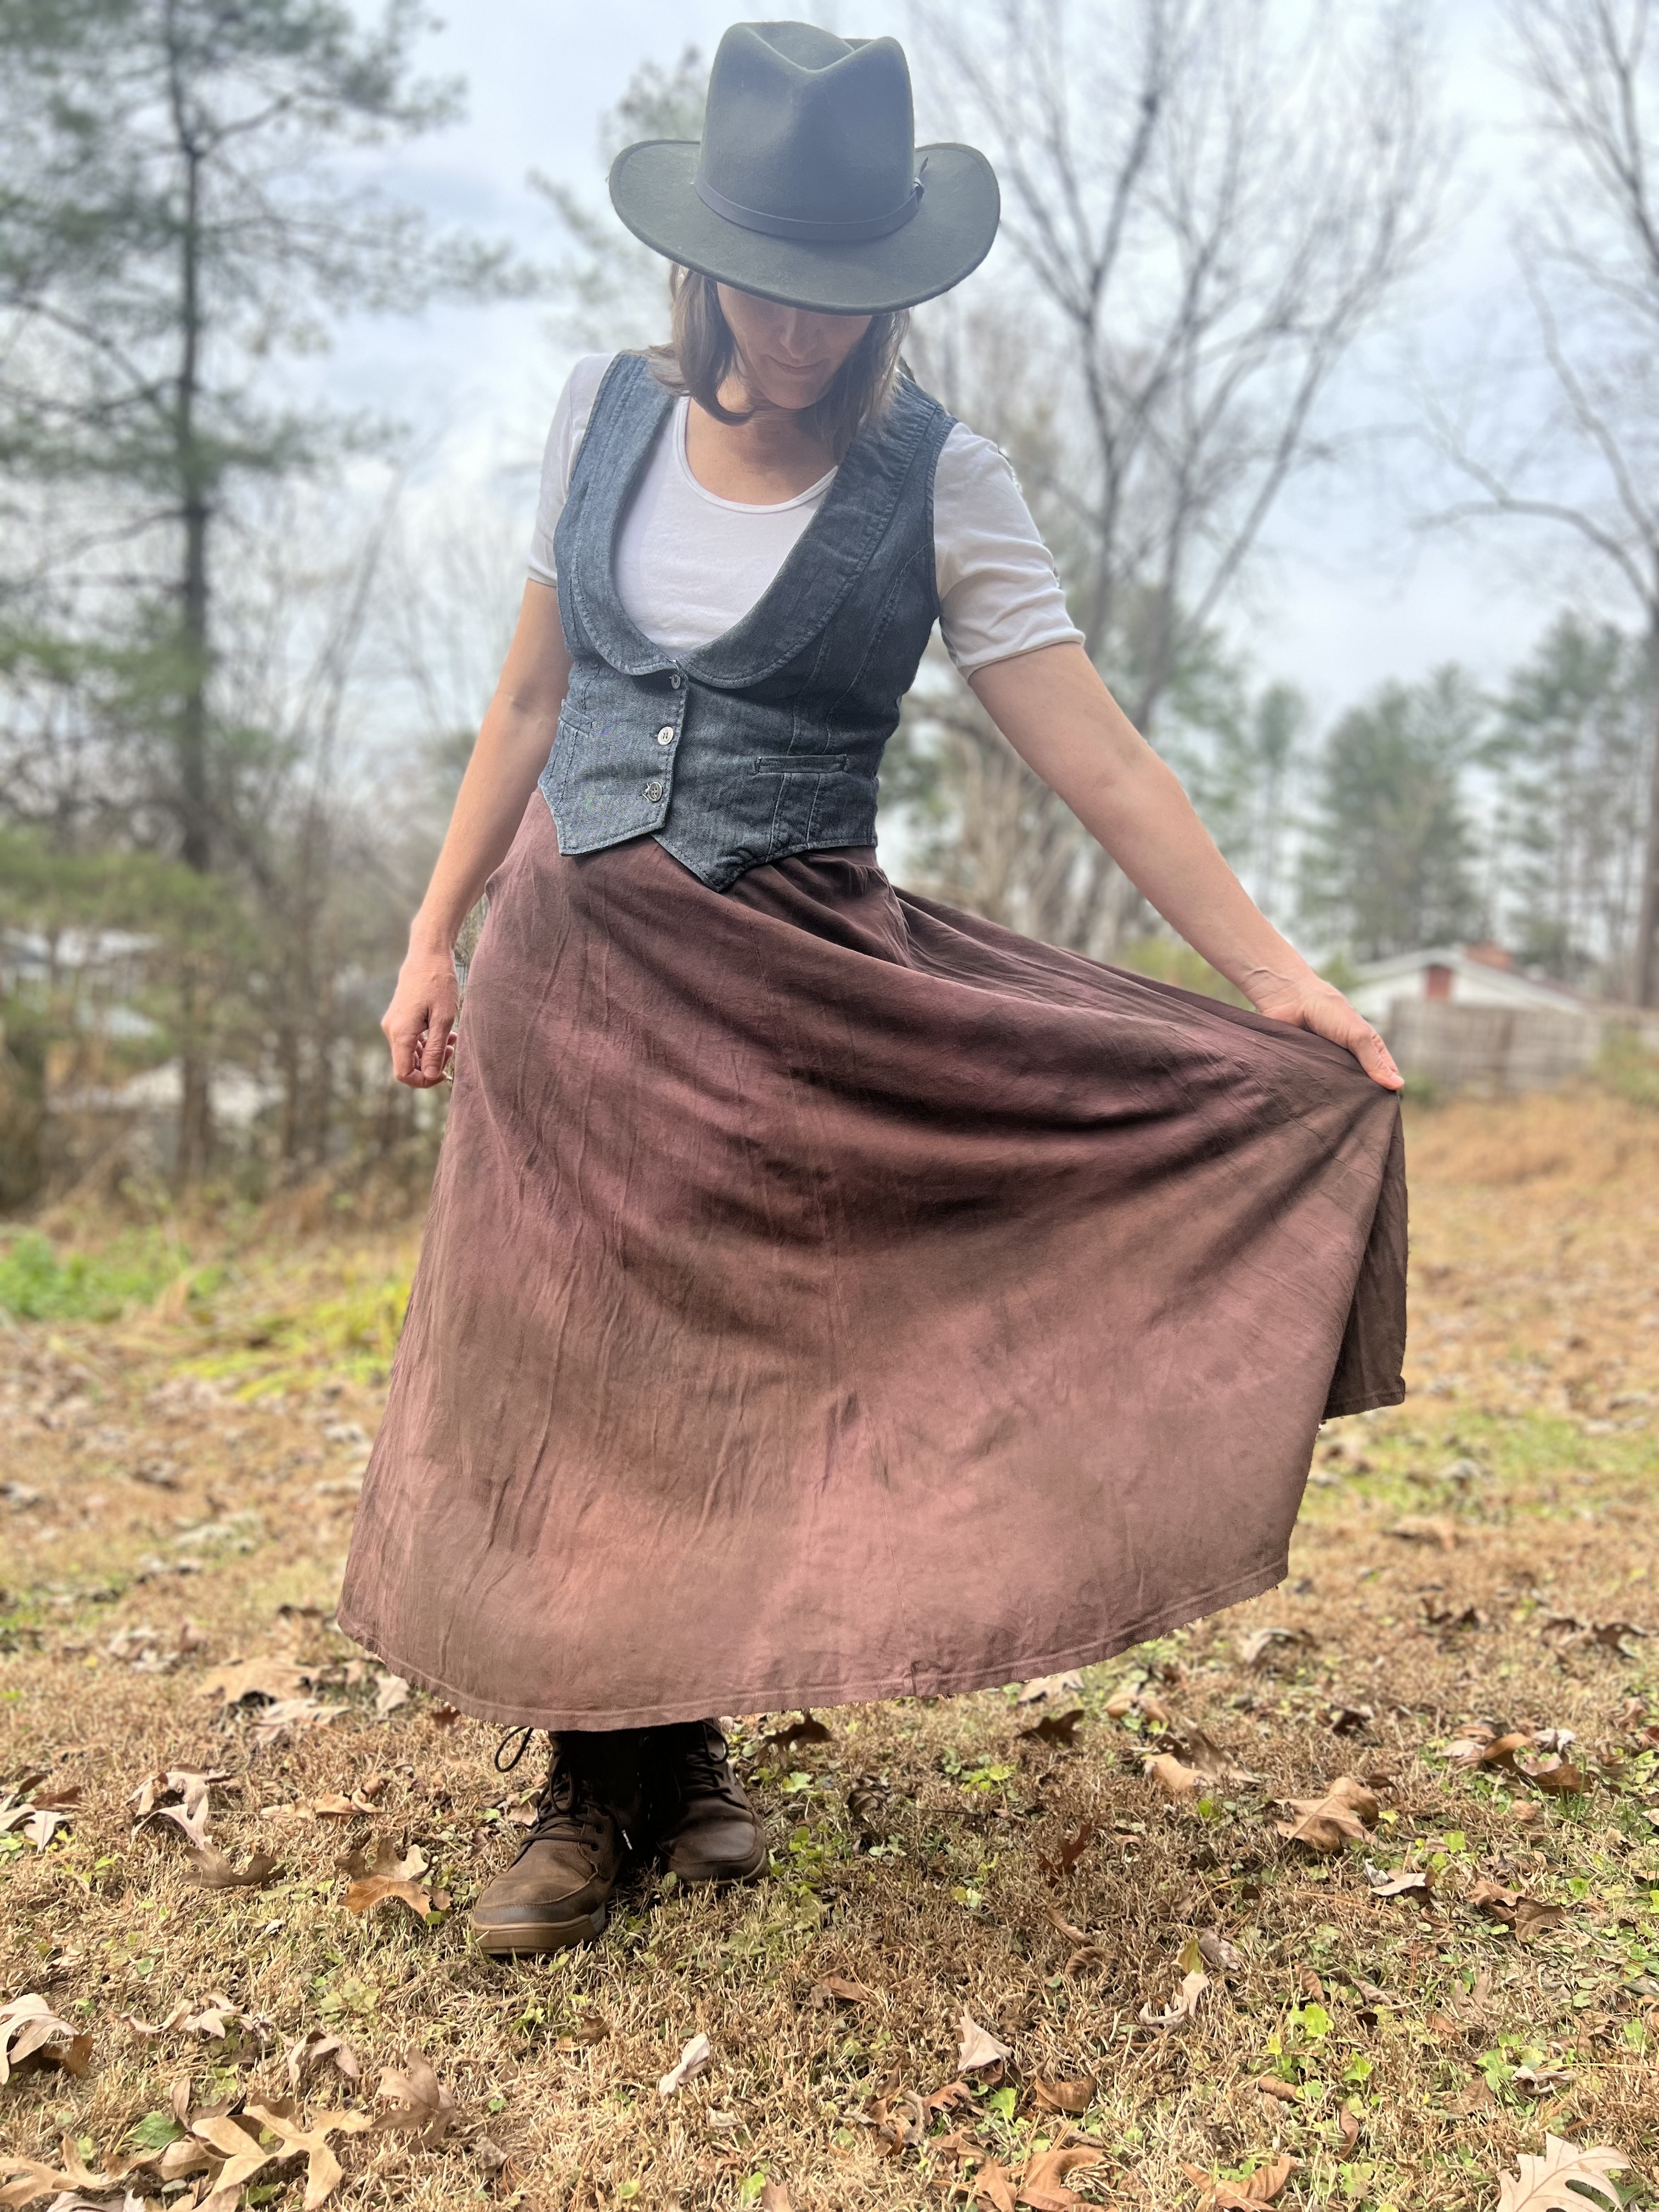
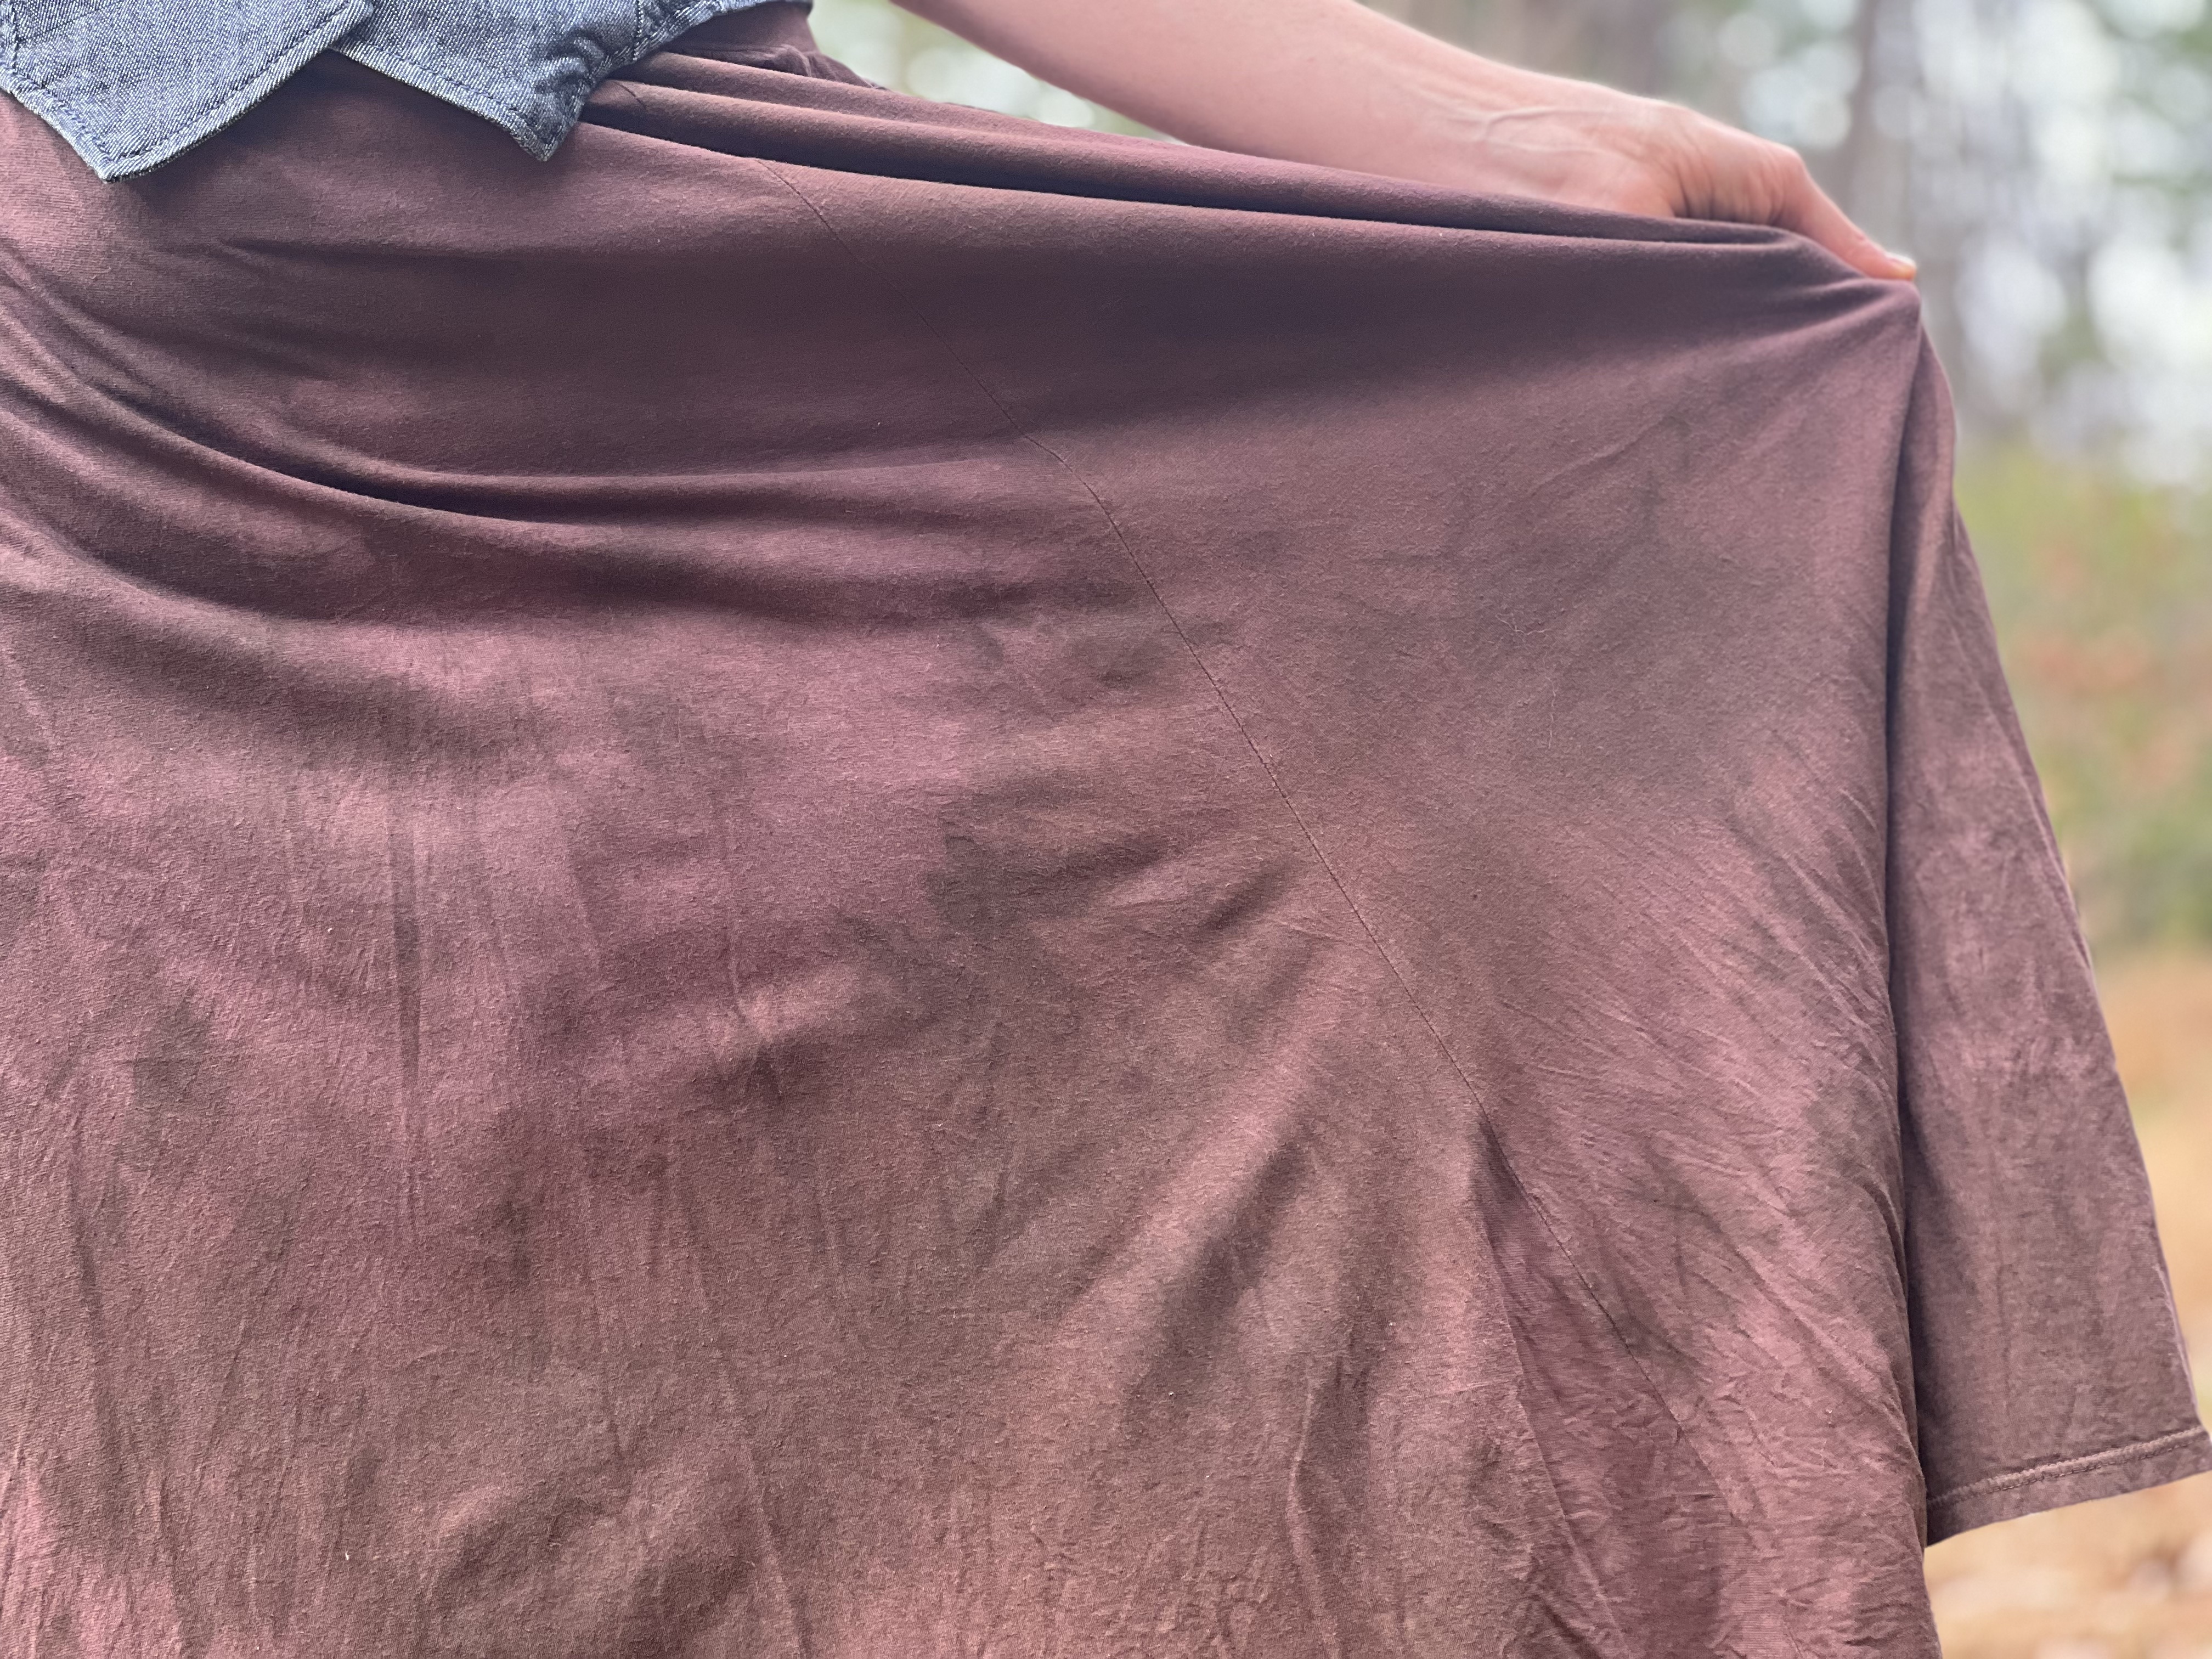
In order to truly understand how the process with Green Matters Dye Company plays out, I brought a favorite skirt of my daughters – it WAS pink and stained and thus she never wore it. She had asked me to dye it but I don’t have a pot big enough to even hope to get it dyed well. Green Matters Dye Company sent it back to us transformed, dyed in “rum raisin”, which is a combination of cutch and madder and lightly treated with iron in a “tie dyed” design, in order to further camouflage the original staining. This post dye treatment is an option. Now it’s a skirt that she loves to wear – and it even came with care instructions.

If you are looking for a sustainable gift for a special someone this holiday season, consider gifting a dye lot. It will come with all you need to ship off a garment and give it a new life.

Fermented Indigo Vat: Blog Post #5:  Getting Started with the Fermentation Vat and things to consider before making a vat

© Catharine Ellis, as posted to the blog: Natural Dye: Experiments and Results

Determine the size of your indigo vat: 

This decision is primarily based on your intended use of the vat. If the vat is made for only small scale test dyeing, perhaps a 1-liter jar is adequate. Larger test dyeing and the dyeing of small pieces can likely be done in a 5-gallon bucket (approximately 18 liters). If you wish to dye garments, multiple skeins of yarn, or fabrics, I think the minimum size for good dyeing is approximately 50 liters. 

Importantly, undissolved materials (lime, bran, etc.) will build up over time in the bottom of the vat, leaving only the upper portion of the vat available for dyeing.  Fourteen gallon plastic drums can be sourced, from a variety of suppliers, which are significantly taller than they are wide, allowing plenty of room at the top of the vat for good dyeing, while allowing the solid materials to settle to the bottom half of the vessel.  

Three 14 gallon drum for indigo vats. Two of the vats are wrapped in a bucket heater band

It is highly recommended that the dyer who is new to the use of fermented indigo vats begin with small (one liter) test vats to become familiar with and confident with the process before moving on to a large vat. 

Once successfully reduced, test vat(s) can be used  to “seed” a larger vat when you are ready to build one for serious dyeing. “Seeding” a larger vat in this way will stimulate bacteria growth and can significantly decrease the time required for the larger vat to reduce. 

Small test vats can also be added to older vats that have decreased in volume from evaporation or just the process of dyeing.

My dye studio frequently has indigo testing going on, as I compare variations of the vats. Note that some of the vats are wrapped in heating pads in order to stimulate fermentation.

Water: 

It’s important to consider the source of your water. Is it acidic? neutral? City water may have chlorine incorporated, which will inhibit the growth of bacteria needed for the vat. The amount of chlorine can be influenced by the distance from the chlorination facility as chlorine will dissipate. If your water is chlorinated or smells of chlorine, there are three ways that can be used to remove it:

•       Boil the water for 15 minutes to release the chlorine. 

•       Leave the water in an open container at room temperature for 24 hours.

•       The use of filtration systems can also be used to remove chlorine. 

How long will it take for the vat to reduce and begin dyeing?

My vats will typically reduce and begin giving me a full, clear indigo blue after 7-14 days.  But I have seen it take as long as 40 days!  Much of this depends on how well the vat is tended; temperature, pH, etc.  You will only learn the length of time required for the vat to be ready by making that vat and by careful monitoring and testing. Trust me. You will know when it’s ready. Your test strips will be blue!

How long will a fermented vat last?

The life of a vat depends on:

  • how much the vat is used for dyeing  
  • how much indigo is in the vat 
  • vat maintenance 
  • organic matter in the vat

I have had fermented vats that lasted 3 years or longer, with careful monitoring and maintenance. Over time, though, the solids will build up at the bottom of the vat, decreasing the usable solution that is available for dyeing in the upper portion of the vat. For this reason, many dyers will plan to use a vat for about 6-12 months and then discard it. I usually dispose old vats on the compost pile, but, after neutralization, the liquids can be put down the drain but it’s best to strain out any solids on the bottom. 

The amount of indigo pigment used when making the initial vat will determine how long the vat can be used for dyeing. Counterintuitively, a vat that has 2 grams of indigo per liter will initially result in nearly the same depth of blue dye as one with 8 grams of indigo. I know that this sounds illogical but I know this from observation. Importantly, the vat with the lesser amount of dye will weaken sooner, as the dye gets used up, and result in pale blue colors. This can be very desirable, as the ability to achieve a pale blue is sometimes important for controlled color mixing.  For this reason, I would recommend using smaller amounts of indigo (2 grams per liter) when the vat is begun. As the vat becomes weaker and results in pale colors, start a second vat to produce darker shades.  

Does the fermented vat require heat?

I have found that the vat does best with supplemental heat (between 16°C/60°F and 30°C/85°F) in the initial stage while fermentation is starting. If the ambient temperature in the dye studio is warm enough, there is no reason for added heat. If supplemental heat is required, it’s best to use a heater that will surround the vessel.  Avoid immersion bucket heaters, which can get too hot very and concentrated high temperatures can kill the live bacteria. Some form of temperature control is ideal. A plastic covered household heating pad, set on low, will work well for small vats. For larger vats, a bucket wrap heater with a thermostat is ideal. For this reason I use a temperature controller with an immersible probe. This will automatically turn the heater on and off to maintain an ideal temperature.

Once fermentation has been established and the vat is in reduction, ideally, you would maintain those same temperatures. But, I have found that it is not always necessary to continue to apply supplemental heat to the vat.  I have maintained fermented vats successfully through the winter where the overnight ambient temperature in the studio is as low as 5°C/42°F. One winter I had two vats with heat and another without heat. All vats continued to dye well. But there may be better penetration of fibers with a warmer vat. 

What form of indigo is used for the fermented vat? 

The vats described here are made with extracted indigo pigment. I prefer to use natural indigo pigment, but the vat can also be made successfully using synthetic pigment. I have had success using dried indigo pigment or indigo paste pigment (pigment that has been freshly extracted and never dried). I assume that paste pigment may still contain bacteria that will aid in the reduction of the vat which is, obviously, a plus.

What is the source of alkalinity for the fermented vat?

These vats can be successfully made using soda ash (sodium carbonate), potash (potassium carbonate) or wood ash lye, which is made from hardwood ashes.  The processes of making wood ash lye will be described in a later blog post.  From my research, it is suggested that soda ash or potash was typically used in European production workshops vats of the 18th and 19th century. 

The maintenance of the vat requires the addition of very small amounts of lime (calcium hydroxide) to maintain the pH, since it is a much more potent alkaline substance.

What is the source of the bacteria used to reduce the fermented vat?

While composted sukumo is a source of indigo pigment, some of the bacteria, and of the plant material for bacterial growth, the vats made with extracted indigo pigment require additional organic material to begin and maintain the fermentation process. 

•       Wheat bran is a primary source of bacteria for the vat and is used for all fermented vats, including in the sukumo vat. 

•       In addition, the vat requires a source of “food” for the bacteria, which also contributes to the diversity of anaerobic bacteria in the vat. 

•       Traditional European dyers used “spent” madder root. This is finely ground madder root that has already been used for its red dye. 

•       Hisako Sumi, Japanese indigo dyer and researcher, recommends the use of dried indigofera tinctoria leaves as an alternative bacteria/food source for the vats. (I would speculate that these leaves also contain very small amounts of indigo precursors). The Indigofera tinctoria leaves are dried, finely ground and are often used for used as a dye for hair.  The ground, dried leaves are sometimes referred to (and sold as) “black henna”, since a combination of henna and indigo powder will result in a natural black hair dye. 

I have been successful using alternative plant materials and will go into that in more detail in a later blog post. Research and my own observation indicate that diverse sources of bacteria will help contribute to, and maintain, successful fermentation. 

In addition to the madder root and/or dried indigofera tinctoria leaves used during the construction of the vat, other organic substances can be added to the vat and will contributes to the fermentation process and include:

  • Woad balls can be made by grinding fresh leaves of the Isatis tinctoria plant, forming the balls and drying. These balls can also be “couched” or lightly composted by breaking them apart, adding a bit of water, and allowing them to ferment. 
  • Fresh leaves from Polygonum tinctorium or Indigofera sp. can be ground, formed into small “patties” and then dried. These also can be broken up and added to the vat.

Additional wheat bran is used on a regular basis to maintain fermentation throughout the life of the vat.

Does the fermented vat have an “odor”?

Yes! The vat has a distinct smell from the bacterial fermentation. The smell is also a useful indicator that the vat is “working”. This is not a sweet-smelling vat, such as a vat reduced with bananas or fructose. Personally, I do not find the odor unpleasant (once I got used to it!) but it is likely you will not want to keep this vat in a closed “living space” as you (or your housemate) may find it objectionable.

The NEXT post will have the first “instructions” for building a fermentation vat. 

Fermented Indigo Vat: Blog Post #4:  How Does Fermentation Reduce an Indigo Vat?  

© Catharine Ellis, as posted to the blog: Natural Dye: Experiments and Results

Fermentation is a biochemical process in which complex organic molecules are broken down into smaller molecules through the action of bacteria, yeasts, or other microorganisms.

In food production, it can broadly refer to any process in which the activity of microorganisms can bring about a desirable change to a foodstuff or beverage, such as the making of cheese, yogurt, sourdough bread, vinegar, fermented vegetables (pickles and kimchi), or beer, wine, or kombucha, in which sugars are transformed to alcohol.

In biochemistry (and specifically in indigo fermentation) fermentation is a process that occurs through the action of microbial enzymes under alkaline and anaerobic (in the absence of oxygen) conditions. The result is a reduction of the indigo dye molecule to make it soluble.  

Many microorganisms and bacteria thrive in this unique alkaline/anaerobic environment. The most important are Alkalibacterium sp., which produces lactic acid as a biproduct. The lactic acid will also bring down the pH.

Many grains contain this lactic acid bacteria. When grains are dry, those bacteria are dormant. But when soaked in water (or an alkaline liquid as in the case of indigo) the bacteria become active and produces enzymes that are useful to the reduction process. Wheat bran is a substance in which the indigo reducing bacteria/organisms live.  It is a key ingredient in the fermentation vat. Traditional recipes use wheat bran as an element of the vat, and it is added periodically to maintain the health of the fermented vat.

Sukumo is composted indigo (polygonum tinctorium) leaves. Though it might already contain some of the bacteria that are needed for fermentation, wheat bran is always added to this vat as well.  

Extracted indigo pigment lacks the microorganisms necessary to initiate the fermentation. This is especially the case of any pigment that has been dried. Organic material MUST be added to the vat to stimulate and maintain fermentation. Since medieval times spent madder root (Rubia tinctorium) was added to the vat to maintain fermentation. This “spent” madder was a waste product from madder red dyeing after the roots had been used to extract the red dye. The fermentation delivers a constant supply of glucose by breaking down starches and celluloses from the organic matter (madder root). 

Over the last few years, I have experimented with spent madder root and other organic substances to determine alternative plant materials that can be used in place of the madder root, or in addition to it. I have successfully used spent rhubarb root, dock root, and dried Indigofera tinctoria leaves.  

Ground madder root, which has already been used for dyeing, dried in a shallow tray. It will be stored and ready for use in an indigo vat.

Some bacteria in the vat create lactic acid as a byproduct, which is a major reason for the decrease in pH that will naturally occur in the vat. For this reason, the pH of the vat must be carefully monitored and maintained on a regular basis.  A fermented vat is a long-term investment. Be prepared to treat it as one and commit the time to monitor it by regular stirring, pH testing, feeding – and of course, dyeing in it!  

Having a good pH meter on hand is very helpful (This is the one I have) but pH papers with multiple pads for enhanced accuracy can also work well. 

 For further reading: This is a sampling of scientific papers (with links) that discuss the bacterial process of fermented indigo vats. 

Fermentation Blues: Analyzing the Microbiota of Traditional Indigo Vat Dyeing in Hunan

Analysis of bacterial flora of indigo fermentation fluids utilizing composted indigo leaves (sukumo) and indigo extracted from plants (Ryukyu-ai and Indian indigo)

Indigofera tinctoria leaf powder as a promising additive to improve indigo fermentation prepared with sukumo (composted Polygonum tinctorium leaves)

Fermented Indigo Vat: Blog Post #3:   What IS Indigo Reduction? (explained to the best of MY ability)  

© Catharine Ellis, as posted to the blog: Natural Dye: Experiments and Results

The chemical formula of indigo is C16H10N2O2

Why is reduction called “reduction”?

In the early days of chemistry, oxidation was defined as a gaining of oxygen atoms, and reduction was a loss of oxygen atoms. Indigo was said to be reduced because it lost an oxygen atom. 

In actuality, there is no loss or gain of the oxygen molecule. The molecule of the insoluble indigo pigment contains double bonds to oxygen. During reduction, that molecule gains 2 electrons and, as a result, the bonds to the oxygen molecule become single bonds, thus making it soluble. This soluble indigo is referred to as leucoindigo or “indigo white”. Leucoindigo is the water-soluble yellowish molecule that soaks into and dyes the textile. 
This is one of the grand “mysteries” of dyeing and chemistry! 

Leucoindigo is visible as the characteristic yellowish color below the surface of some vats. The leuco color of fermentation vat is more green than yellow. Once a textile is immersed in the vat it come out of that vat with the leuco color (yellow or green). The textile will turn blue through exposure to oxygen.  

What is Redox?
Redox is a chemical reaction that takes place between an oxidizing substance and a reducing substance. The oxidizing substance loses electrons in the reaction, and the reducing substance gains electrons. These two things happen simultaneously, and one does not happen without the other
 
All indigo vats require a high alkalinity (high pH) for proper functioning.  The plants, carbohydrates, sugars, or minerals used for the indigo vat are reductive, which means that they oxidize and give off electrons. In the alkaline environment of the vat, reduction is even stronger. 
The indigo molecule is forced to receive the two negatively charged electrons, which is a reduction; this influences the oxygen bonds of the indigo pigment, making the indigo molecule attractive to the positively charged portion of the water molecule. In this way the indigo becomes soluble (leucoindigo). Once it is soluble, the dye can penetrate the textile. After dyeing, oxidation (exposure to air) will once again make the indigo insoluble in the textile.


Fermented Indigo Vat: Blog Post #2: Fermented Indigo Vats vs. Quick Reduction Vats vs. Chemical Vats 

© Catharine Ellis, as posted to the blog: Natural Dye: Experiments and Results

Fermentation vats are the oldest method of reducing indigo. These vats rely on the effect of bacteria present in an alkaline environment to cause the reduction that will allow the indigo molecule to become soluble. The bacteria existing in an oxygen-free environment is referred to as anaerobic. An indigo vat is reduced in anaerobic conditions. 

A “sukumo” vat, traditional in Japan, is a fermented vat that uses composted indigo leaves from the polygonum tinctorium plant as a source of the dye plus cellulose plant material that will help feed the vat. A sukumo vat contains no added indigo pigment. The preparation of sukumo is a lengthy process requiring the composting of indigo leaves after they have been harvested and carefully air dried.  

For those of us who do not have access to sukumo, it is important to know that a fermented vat can also be made using indigo pigment. This is the approach that was often used by 18th century commercial dye workshops in Europe.  Since the pigment is inert, suitable sources of bacteria and “food” for that bacteria must be added to the vat. 

•       Advantages of the fermented vat: A fermented vat uses a lower pH (9.5-11) versus the quick reduction vats, which makes it suitable for both protein and cellulose fibers. The correct pH of a fermentation vat can be obtained using wood ash lye, soda ash, or potash. Only small amounts of lime are used throughout the life of the vat to maintain a correct pH. These vats are suitable for long-term use, provided they are maintained correctly. That is something that will be covered.

•       Challenges of the fermented vat: Typically, the vat requires 7 -14 days to reach full reduction, but I have seen it take as long as 30 days. The vats must be carefully monitored and maintained by making regular additions of lime and organic material to maintain appropriate pH levels and insure a continuous source of bacteria.

Quick Reduction vats, though used historically, were re-introduced to contemporary  dyers by Michel Garcia and have gained great popularity amongst contemporary practitioners. These are the vats that we presented in The Art and Science of Natural Dyeing. They are easy to make. They rely on the use of sugars, fruits, plants, or minerals and require a very alkaline environment (pH 11-13) to achieve reduction. This high pH necessitates the use of significant amounts of lime (calcium hydroxide) as an alkali.

•       Advantages: These vats reduce quickly – usually in a day (or less). They use no harmful chemicals, though they do require working with a very alkaline substance and solution. Vats made with reducing sugars can be kept for several weeks and, with careful and regular maintenance, can be used for several months.

•     Challenges: The high pH is not suitable for all fibers (a high pH will damage protein). The large quantity of lime (calcium hydroxide) used to achieve the pH builds up quickly in the vat. The lime is also very difficult to remove from the finished textile and can compromise the dye and color, possibly resulting in “unexplained” fading of the blue. 

Chemical Vats use either sodium hydrosulfite or thiourea dioxide to reduce the indigo molecule. This process is used extensively in industry, and I know that some hand dyers also use this process, as it is very predictable. 

•      Advantages: Complete reduction takes place very quickly – usually within minutes. The pH of the vat is 10-11. 

•     Challenges: Reduction chemicals can potentially have a very detrimental effect on the lungs and health of the dyer. When used in combination with a high pH, they can also damage the tactile qualities of wool fibers. Personally, I do not like the smell of the chemicals. 

Because reduction is so complete using reduction chemicals, it can be challenging to achieve pale colors when using chemical reduction.  It is also difficult to use multiple immersions in the vat to increase the depth of shade, as repeated immersions will re-dissolve the indigo already incorporated in the textile.    

The Fermented Indigo Vat: an Introduction

Last year, I made the decision to stop travel/teaching. It’s been a long journey since my first weaving in 1970, my first dyeing in 1972, my first teaching in 1976 and my committment to natural dye in 2008. This year I will turn 74 years old. I am also a grandmother for the first time and am actively involved in the unfolding life of a 18 month old little boy (who makes us smile every day).

What I have not done, is to stop learning, exploring, or asking questions about natural dye, dyeing,  weaving, and/or how they might combine. Slowing some things down in my life is giving me to time to think more deeply about others, particularly indigo fermentation.  

“Lessons”, a queen size quilt by Catharine Ellis using early woven shibori samples. Border fabric has been dyed with indigo using a fermentation vat.

Some time ago, Joy Boutrup and I discussed the possibility of another dye book that would expand what we presented in The Art and Science of Natural Dyes (Schiffer, 2019). While contemplating this dilemma, I came across the following quote from Annie Dillard:

“One of the things I know about writing is this: spend it all, shoot it, play it, lose it, all, right away, every time. Do not hoard what seems good for a later place in the book or for another book; give it, give it all, give it now. The impulse to save something good for a better place later is the signal to spend it now.
Something more will arise for later, something better. These things fill from behind, from beneath, like well water. Similarly, the impulse to keep to yourself what you have learned is not only shameful, it is destructive.
Anything you do not give freely and abundantly becomes lost to you. You open your safe and find ashes.”

Annie Dillard

So now, Joy and I have together made the decision that I would share the information I have learned using blogposts, instead of writing another book.  
Through a number of upcoming posts, I will discuss the process of indigo fermentation vats, the experiments I have done, and what I have learned about making, maintaining, and dyeing in those vats. I will explain, to the best of my ability, what is happening in those vats and why.  Hopefully, this will encourage more of you to try fermented indigo vats and will provide enough information for a high likelihood of success.  Each post will contain a link to a downloadable pdf version, which you are welcome to print and kept for studio reference.  I would ask that you be respectful of this information though you are most welcome to share the link to my blog for reference.