Fermented Indigo Vat: Blog Post #5:  Getting Started with the Fermentation Vat and things to consider before making a vat

© Catharine Ellis, as posted to the blog: Natural Dye: Experiments and Results

Determine the size of your indigo vat: 

This decision is primarily based on your intended use of the vat. If the vat is made for only small scale test dyeing, perhaps a 1-liter jar is adequate. Larger test dyeing and the dyeing of small pieces can likely be done in a 5-gallon bucket (approximately 18 liters). If you wish to dye garments, multiple skeins of yarn, or fabrics, I think the minimum size for good dyeing is approximately 50 liters. 

Importantly, undissolved materials (lime, bran, etc.) will build up over time in the bottom of the vat, leaving only the upper portion of the vat available for dyeing.  Fourteen gallon plastic drums can be sourced, from a variety of suppliers, which are significantly taller than they are wide, allowing plenty of room at the top of the vat for good dyeing, while allowing the solid materials to settle to the bottom half of the vessel.  

Three 14 gallon drum for indigo vats. Two of the vats are wrapped in a bucket heater band

It is highly recommended that the dyer who is new to the use of fermented indigo vats begin with small (one liter) test vats to become familiar with and confident with the process before moving on to a large vat. 

Once successfully reduced, test vat(s) can be used  to “seed” a larger vat when you are ready to build one for serious dyeing. “Seeding” a larger vat in this way will stimulate bacteria growth and can significantly decrease the time required for the larger vat to reduce. 

Small test vats can also be added to older vats that have decreased in volume from evaporation or just the process of dyeing.

My dye studio frequently has indigo testing going on, as I compare variations of the vats. Note that some of the vats are wrapped in heating pads in order to stimulate fermentation.

Water: 

It’s important to consider the source of your water. Is it acidic? neutral? City water may have chlorine incorporated, which will inhibit the growth of bacteria needed for the vat. The amount of chlorine can be influenced by the distance from the chlorination facility as chlorine will dissipate. If your water is chlorinated or smells of chlorine, there are three ways that can be used to remove it:

•       Boil the water for 15 minutes to release the chlorine. 

•       Leave the water in an open container at room temperature for 24 hours.

•       The use of filtration systems can also be used to remove chlorine. 

How long will it take for the vat to reduce and begin dyeing?

My vats will typically reduce and begin giving me a full, clear indigo blue after 7-14 days.  But I have seen it take as long as 40 days!  Much of this depends on how well the vat is tended; temperature, pH, etc.  You will only learn the length of time required for the vat to be ready by making that vat and by careful monitoring and testing. Trust me. You will know when it’s ready. Your test strips will be blue!

How long will a fermented vat last?

The life of a vat depends on:

  • how much the vat is used for dyeing  
  • how much indigo is in the vat 
  • vat maintenance 
  • organic matter in the vat

I have had fermented vats that lasted 3 years or longer, with careful monitoring and maintenance. Over time, though, the solids will build up at the bottom of the vat, decreasing the usable solution that is available for dyeing in the upper portion of the vat. For this reason, many dyers will plan to use a vat for about 6-12 months and then discard it. I usually dispose old vats on the compost pile, but, after neutralization, the liquids can be put down the drain but it’s best to strain out any solids on the bottom. 

The amount of indigo pigment used when making the initial vat will determine how long the vat can be used for dyeing. Counterintuitively, a vat that has 2 grams of indigo per liter will initially result in nearly the same depth of blue dye as one with 8 grams of indigo. I know that this sounds illogical but I know this from observation. Importantly, the vat with the lesser amount of dye will weaken sooner, as the dye gets used up, and result in pale blue colors. This can be very desirable, as the ability to achieve a pale blue is sometimes important for controlled color mixing.  For this reason, I would recommend using smaller amounts of indigo (2 grams per liter) when the vat is begun. As the vat becomes weaker and results in pale colors, start a second vat to produce darker shades.  

Does the fermented vat require heat?

I have found that the vat does best with supplemental heat (between 16°C/60°F and 30°C/85°F) in the initial stage while fermentation is starting. If the ambient temperature in the dye studio is warm enough, there is no reason for added heat. If supplemental heat is required, it’s best to use a heater that will surround the vessel.  Avoid immersion bucket heaters, which can get too hot very and concentrated high temperatures can kill the live bacteria. Some form of temperature control is ideal. A plastic covered household heating pad, set on low, will work well for small vats. For larger vats, a bucket wrap heater with a thermostat is ideal. For this reason I use a temperature controller with an immersible probe. This will automatically turn the heater on and off to maintain an ideal temperature.

Once fermentation has been established and the vat is in reduction, ideally, you would maintain those same temperatures. But, I have found that it is not always necessary to continue to apply supplemental heat to the vat.  I have maintained fermented vats successfully through the winter where the overnight ambient temperature in the studio is as low as 5°C/42°F. One winter I had two vats with heat and another without heat. All vats continued to dye well. But there may be better penetration of fibers with a warmer vat. 

What form of indigo is used for the fermented vat? 

The vats described here are made with extracted indigo pigment. I prefer to use natural indigo pigment, but the vat can also be made successfully using synthetic pigment. I have had success using dried indigo pigment or indigo paste pigment (pigment that has been freshly extracted and never dried). I assume that paste pigment may still contain bacteria that will aid in the reduction of the vat which is, obviously, a plus.

What is the source of alkalinity for the fermented vat?

These vats can be successfully made using soda ash (sodium carbonate), potash (potassium carbonate) or wood ash lye, which is made from hardwood ashes.  The processes of making wood ash lye will be described in a later blog post.  From my research, it is suggested that soda ash or potash was typically used in European production workshops vats of the 18th and 19th century. 

The maintenance of the vat requires the addition of very small amounts of lime (calcium hydroxide) to maintain the pH, since it is a much more potent alkaline substance.

What is the source of the bacteria used to reduce the fermented vat?

While composted sukumo is a source of indigo pigment, some of the bacteria, and of the plant material for bacterial growth, the vats made with extracted indigo pigment require additional organic material to begin and maintain the fermentation process. 

•       Wheat bran is a primary source of bacteria for the vat and is used for all fermented vats, including in the sukumo vat. 

•       In addition, the vat requires a source of “food” for the bacteria, which also contributes to the diversity of anaerobic bacteria in the vat. 

•       Traditional European dyers used “spent” madder root. This is finely ground madder root that has already been used for its red dye. 

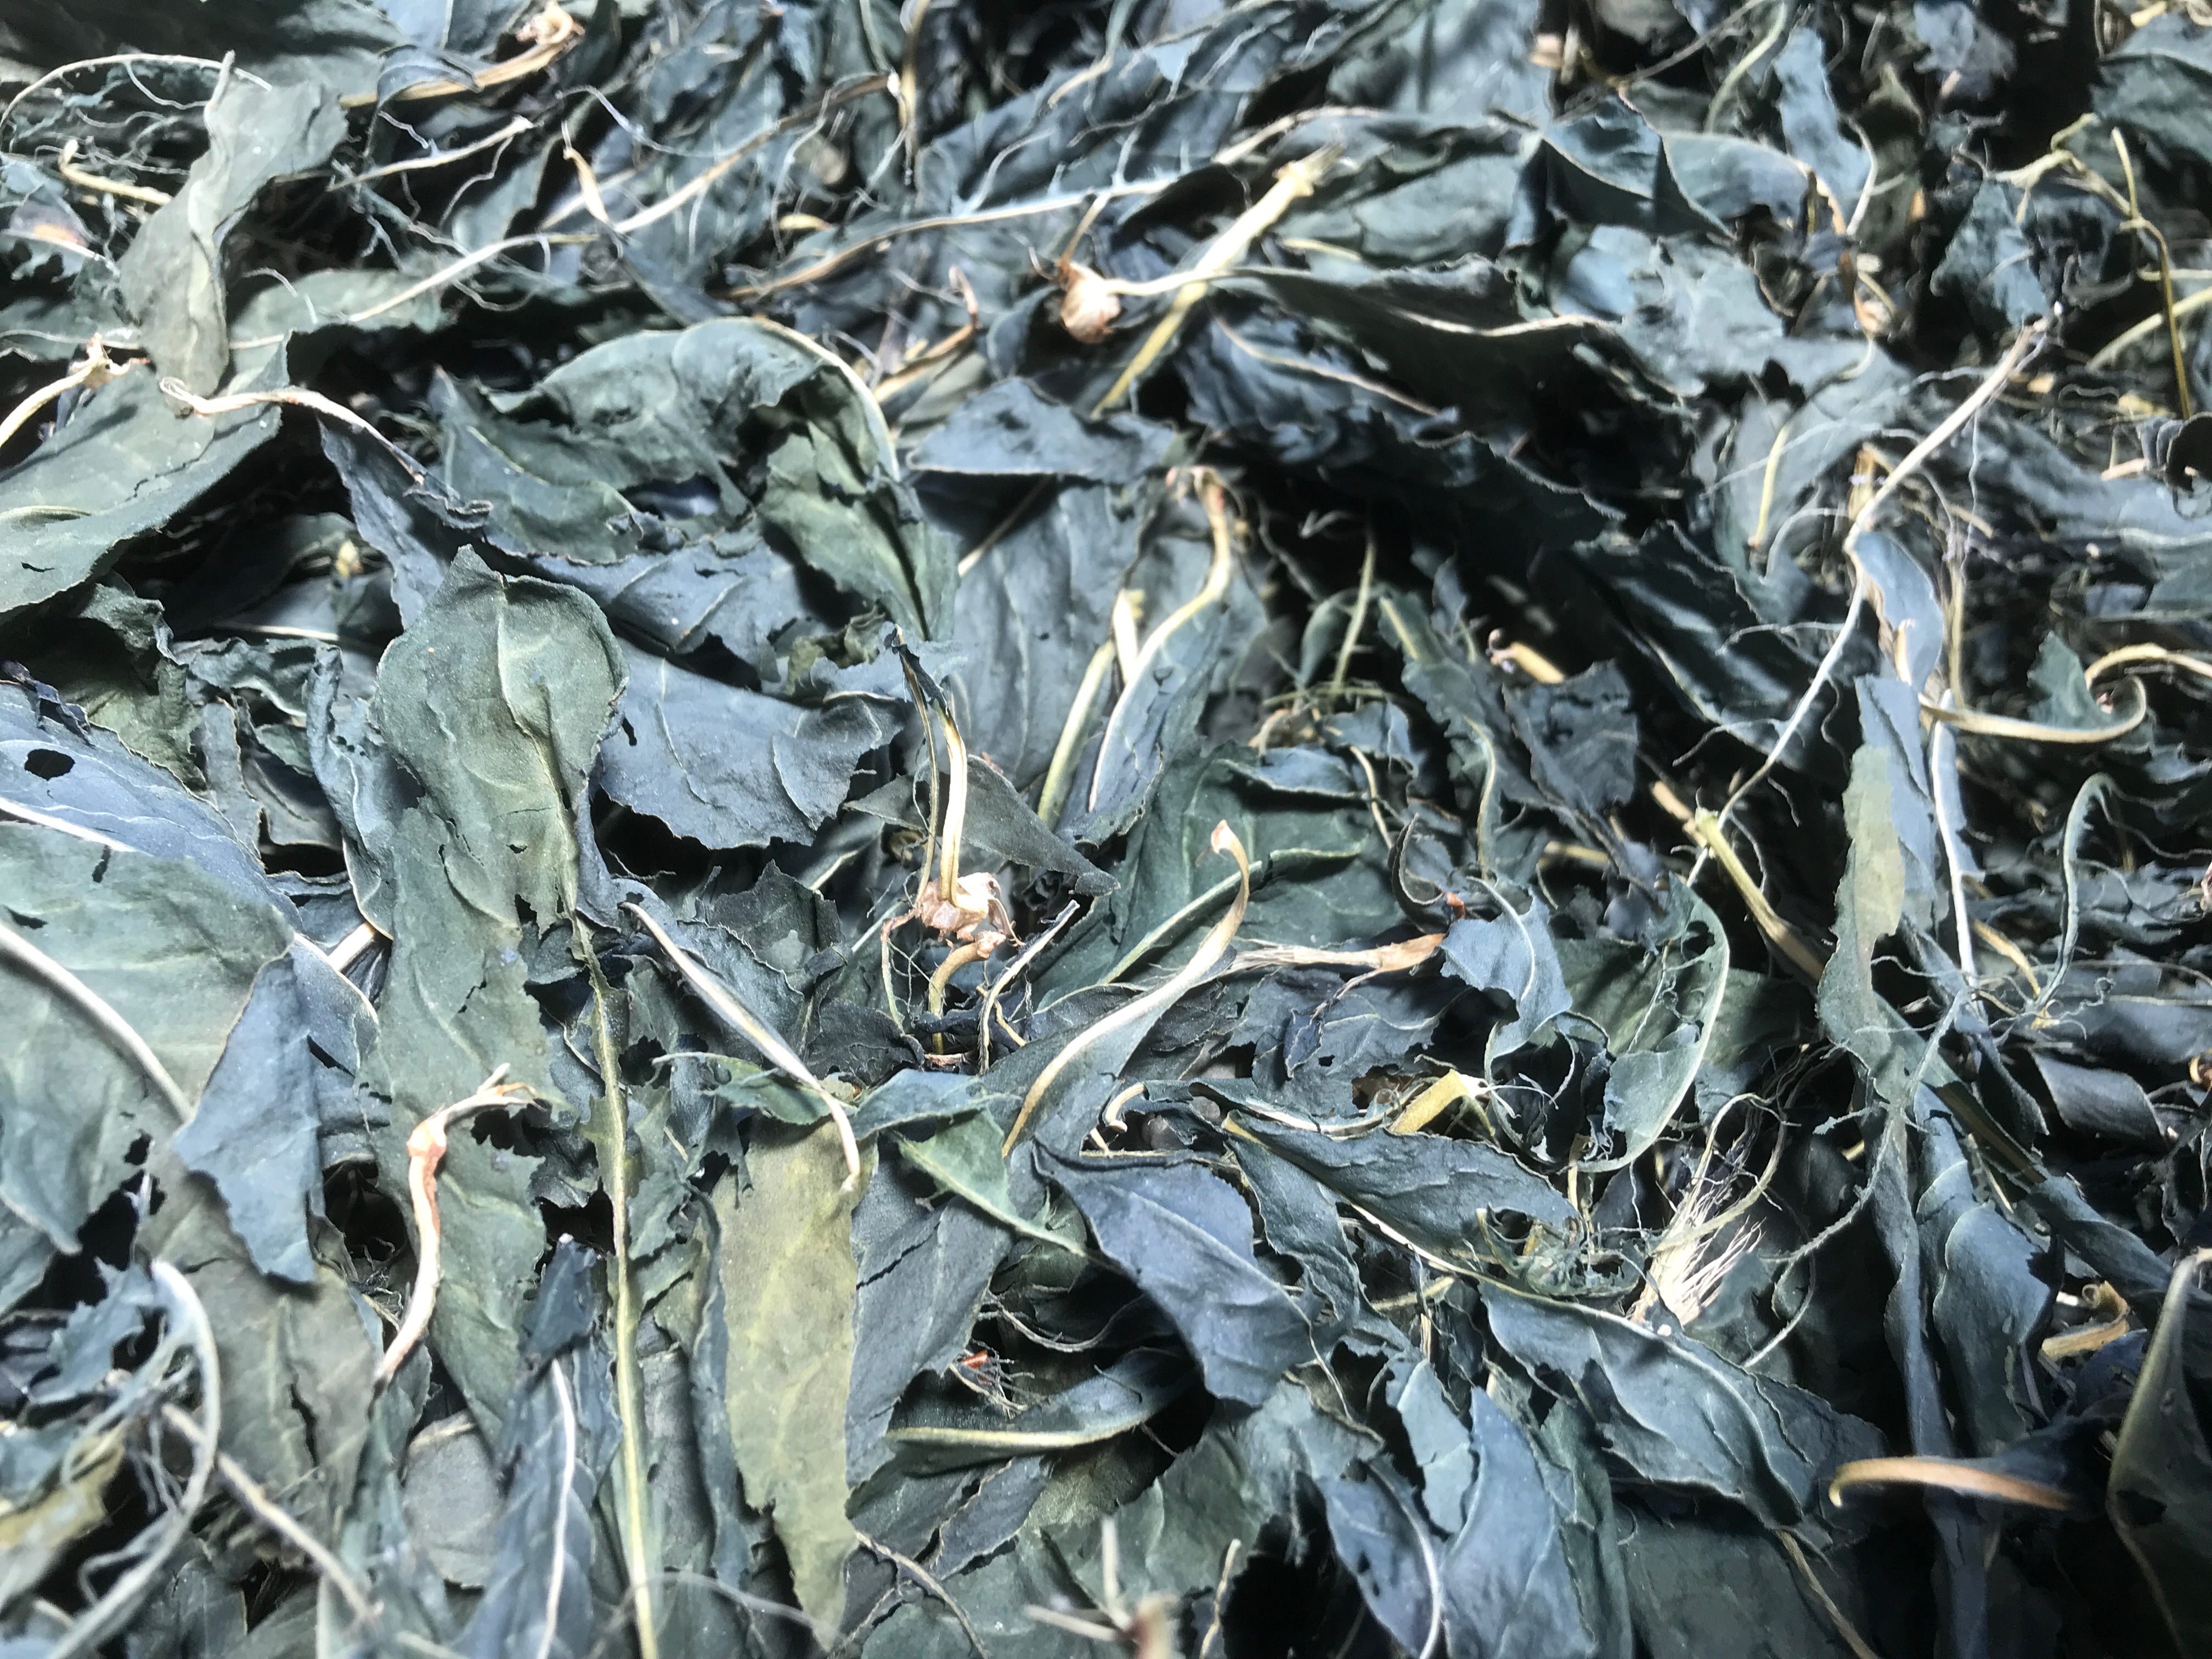
•       Hisako Sumi, Japanese indigo dyer and researcher, recommends the use of dried indigofera tinctoria leaves as an alternative bacteria/food source for the vats. (I would speculate that these leaves also contain very small amounts of indigo precursors). The Indigofera tinctoria leaves are dried, finely ground and are often used for used as a dye for hair.  The ground, dried leaves are sometimes referred to (and sold as) “black henna”, since a combination of henna and indigo powder will result in a natural black hair dye. 

I have been successful using alternative plant materials and will go into that in more detail in a later blog post. Research and my own observation indicate that diverse sources of bacteria will help contribute to, and maintain, successful fermentation. 

In addition to the madder root and/or dried indigofera tinctoria leaves used during the construction of the vat, other organic substances can be added to the vat and will contributes to the fermentation process and include:

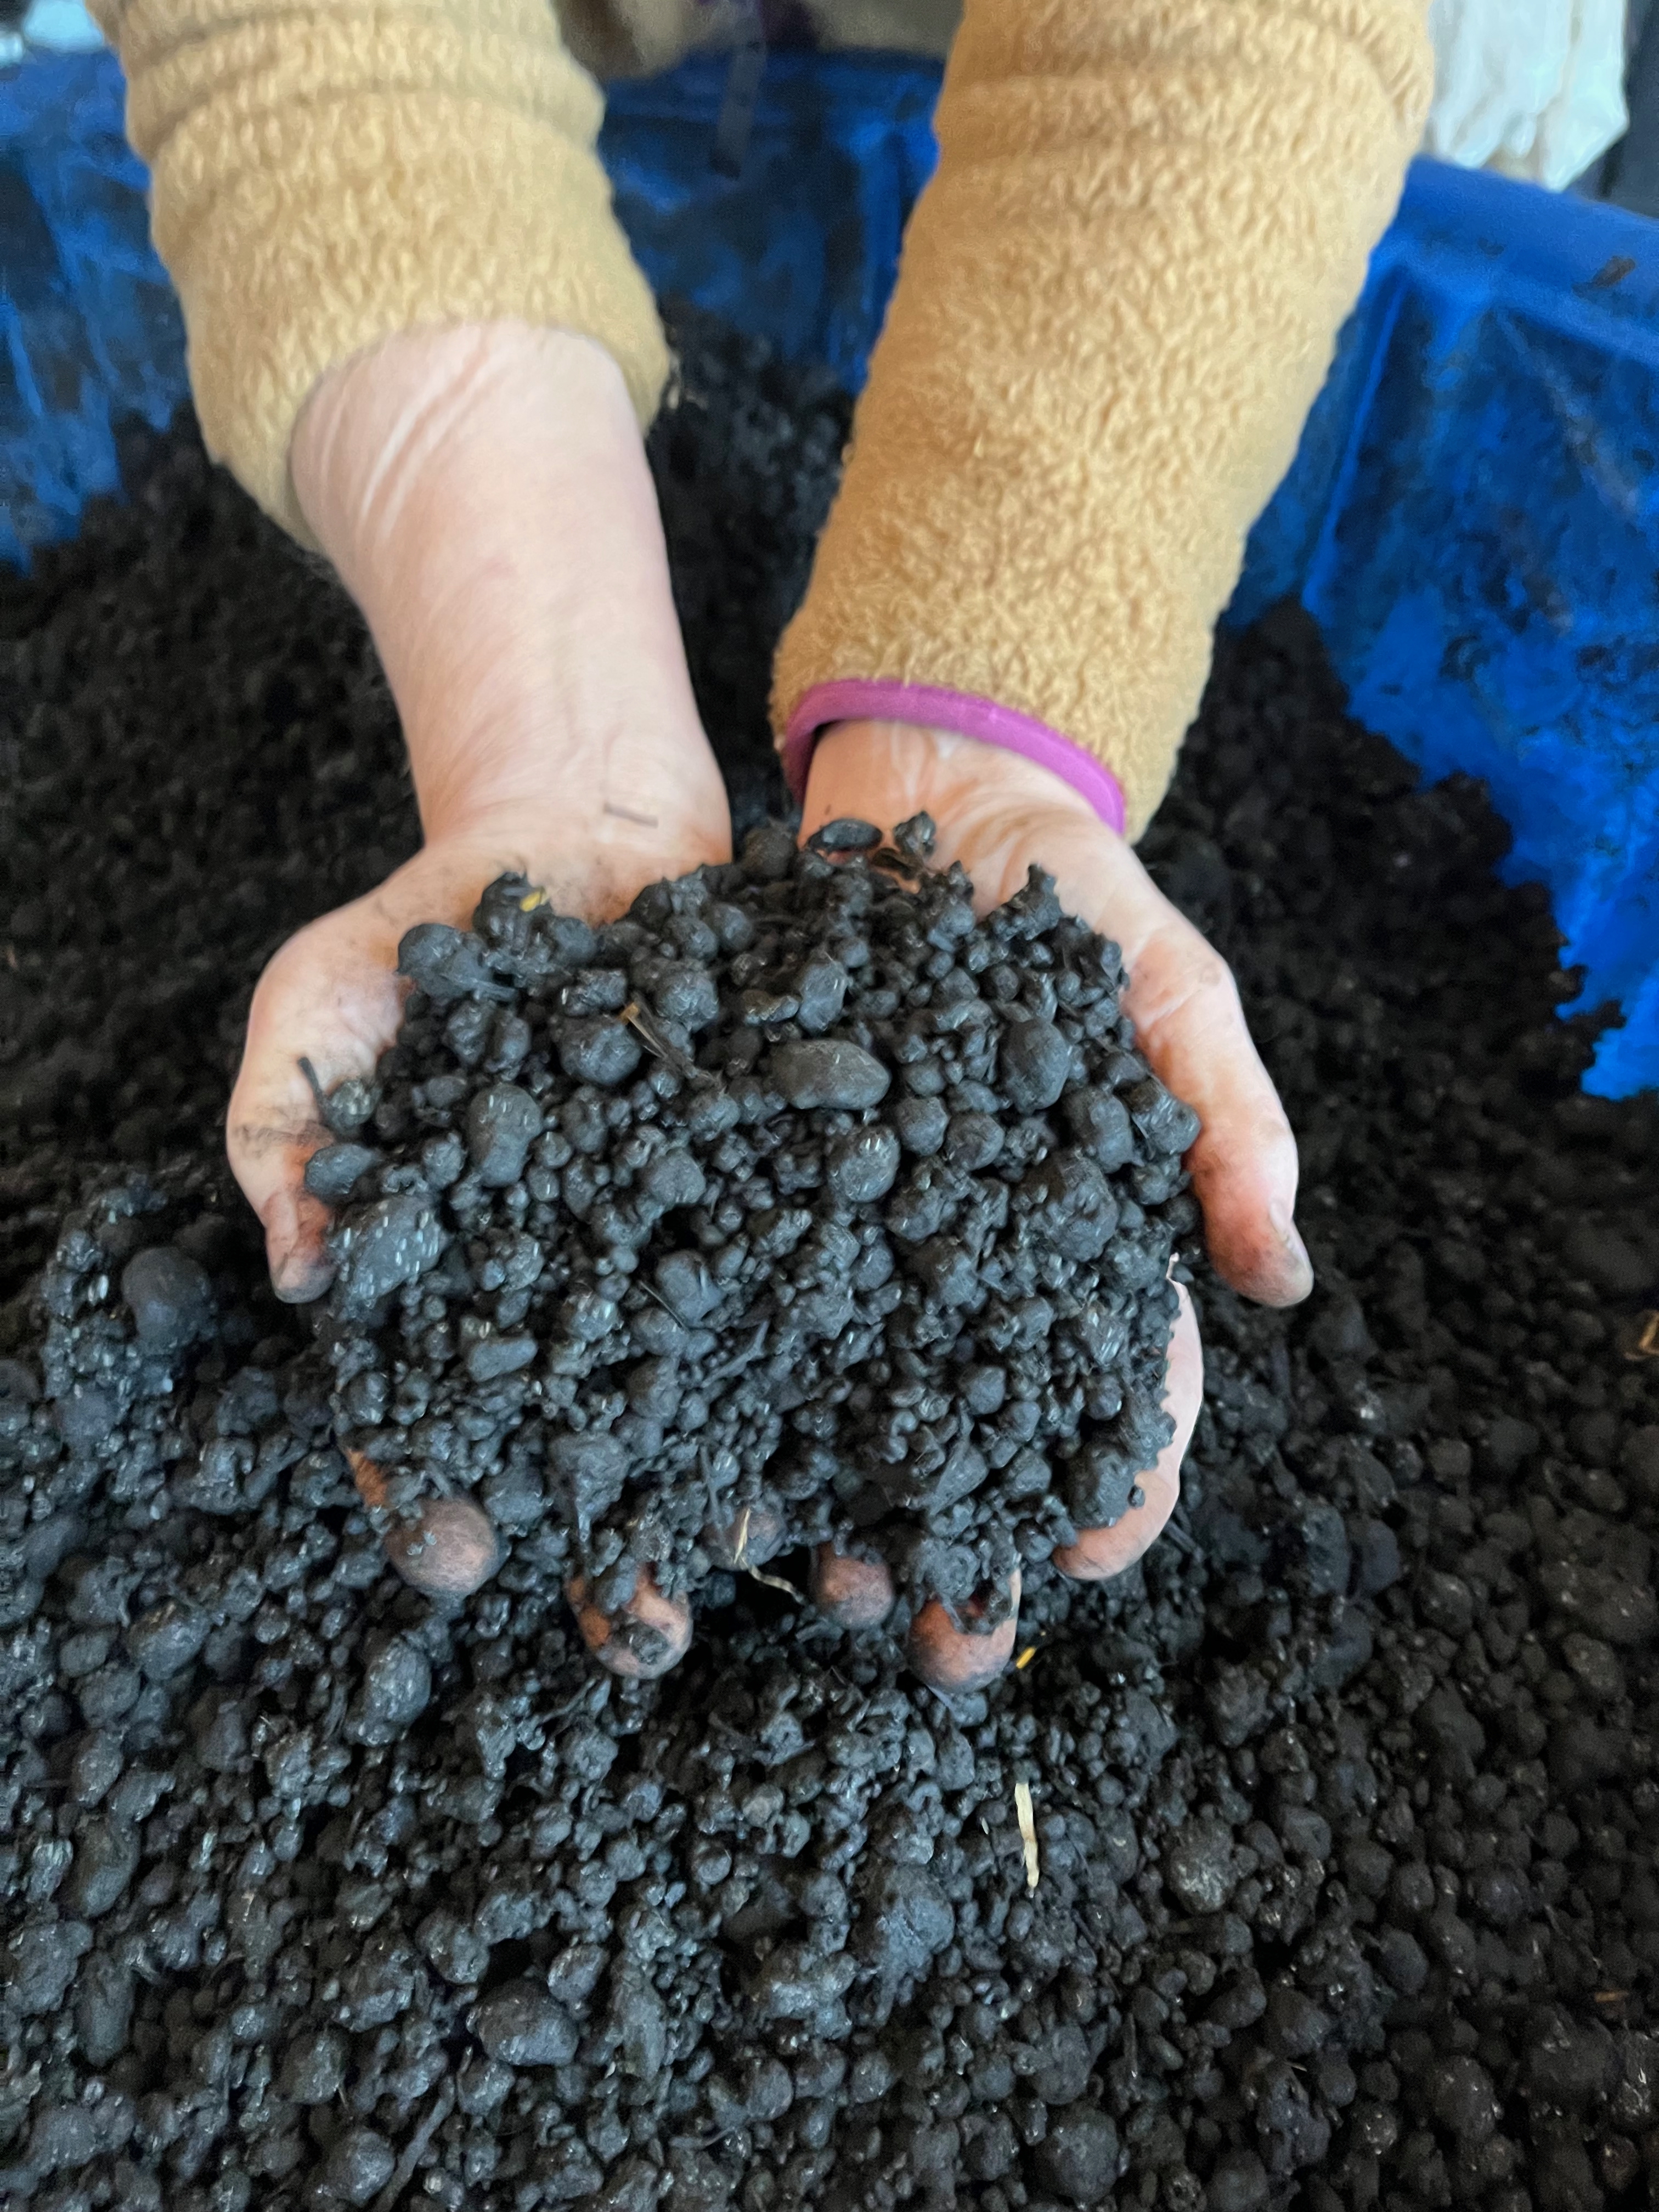
  • Woad balls can be made by grinding fresh leaves of the Isatis tinctoria plant, forming the balls and drying. These balls can also be “couched” or lightly composted by breaking them apart, adding a bit of water, and allowing them to ferment. 
  • Fresh leaves from Polygonum tinctorium or Indigofera sp. can be ground, formed into small “patties” and then dried. These also can be broken up and added to the vat.

Additional wheat bran is used on a regular basis to maintain fermentation throughout the life of the vat.

Does the fermented vat have an “odor”?

Yes! The vat has a distinct smell from the bacterial fermentation. The smell is also a useful indicator that the vat is “working”. This is not a sweet-smelling vat, such as a vat reduced with bananas or fructose. Personally, I do not find the odor unpleasant (once I got used to it!) but it is likely you will not want to keep this vat in a closed “living space” as you (or your housemate) may find it objectionable.

The NEXT post will have the first “instructions” for building a fermentation vat. 

Fermented Indigo Vat: Blog Post #2: Fermented Indigo Vats vs. Quick Reduction Vats vs. Chemical Vats 

© Catharine Ellis, as posted to the blog: Natural Dye: Experiments and Results

Fermentation vats are the oldest method of reducing indigo. These vats rely on the effect of bacteria present in an alkaline environment to cause the reduction that will allow the indigo molecule to become soluble. The bacteria existing in an oxygen-free environment is referred to as anaerobic. An indigo vat is reduced in anaerobic conditions. 

A “sukumo” vat, traditional in Japan, is a fermented vat that uses composted indigo leaves from the polygonum tinctorium plant as a source of the dye plus cellulose plant material that will help feed the vat. A sukumo vat contains no added indigo pigment. The preparation of sukumo is a lengthy process requiring the composting of indigo leaves after they have been harvested and carefully air dried.  

For those of us who do not have access to sukumo, it is important to know that a fermented vat can also be made using indigo pigment. This is the approach that was often used by 18th century commercial dye workshops in Europe.  Since the pigment is inert, suitable sources of bacteria and “food” for that bacteria must be added to the vat. 

•       Advantages of the fermented vat: A fermented vat uses a lower pH (9.5-11) versus the quick reduction vats, which makes it suitable for both protein and cellulose fibers. The correct pH of a fermentation vat can be obtained using wood ash lye, soda ash, or potash. Only small amounts of lime are used throughout the life of the vat to maintain a correct pH. These vats are suitable for long-term use, provided they are maintained correctly. That is something that will be covered.

•       Challenges of the fermented vat: Typically, the vat requires 7 -14 days to reach full reduction, but I have seen it take as long as 30 days. The vats must be carefully monitored and maintained by making regular additions of lime and organic material to maintain appropriate pH levels and insure a continuous source of bacteria.

Quick Reduction vats, though used historically, were re-introduced to contemporary  dyers by Michel Garcia and have gained great popularity amongst contemporary practitioners. These are the vats that we presented in The Art and Science of Natural Dyeing. They are easy to make. They rely on the use of sugars, fruits, plants, or minerals and require a very alkaline environment (pH 11-13) to achieve reduction. This high pH necessitates the use of significant amounts of lime (calcium hydroxide) as an alkali.

•       Advantages: These vats reduce quickly – usually in a day (or less). They use no harmful chemicals, though they do require working with a very alkaline substance and solution. Vats made with reducing sugars can be kept for several weeks and, with careful and regular maintenance, can be used for several months.

•     Challenges: The high pH is not suitable for all fibers (a high pH will damage protein). The large quantity of lime (calcium hydroxide) used to achieve the pH builds up quickly in the vat. The lime is also very difficult to remove from the finished textile and can compromise the dye and color, possibly resulting in “unexplained” fading of the blue. 

Chemical Vats use either sodium hydrosulfite or thiourea dioxide to reduce the indigo molecule. This process is used extensively in industry, and I know that some hand dyers also use this process, as it is very predictable. 

•      Advantages: Complete reduction takes place very quickly – usually within minutes. The pH of the vat is 10-11. 

•     Challenges: Reduction chemicals can potentially have a very detrimental effect on the lungs and health of the dyer. When used in combination with a high pH, they can also damage the tactile qualities of wool fibers. Personally, I do not like the smell of the chemicals. 

Because reduction is so complete using reduction chemicals, it can be challenging to achieve pale colors when using chemical reduction.  It is also difficult to use multiple immersions in the vat to increase the depth of shade, as repeated immersions will re-dissolve the indigo already incorporated in the textile.    

Fermented Indigo Vat #1:  A Journey from Quick Reduction to Slow Fermentation

© Catharine Ellis, as posted to the blog: Natural Dye: Experiments and Results

On this blog site, I have previously written about the indigo fermentation vats in very general terms. I have been using these fermentation vats exclusively for over 5 years now and I feel strongly that it is the best approach to use for indigo dyeing. So, I have made the decision that I would like to share much more specific information regarding how to make and maintain these vats through a series of posts in coming weeks. I hope to roll a new one out every few days days or so.  

Since I began the transition to using ONLY natural dyes in 2008, I have continued to learn and to refine my practice. Dyeing with indigo has been one of the most rewarding, yet challenging adventures. Striving for, and practicing a level of mastery related to indigo dyeing, is necessary to achieve a full palette of color using natural dyes and having the ability to control shades of indigo blue is a necessary skill. 

In the 1970s, I did my first indigo dyeing using sodium hydrosulfite as a reduction agent for my vat. I never liked dealing with the reducing chemicals, such as sodium hydrosulfite or thiourea dioxide. The smell was off-putting and, more importantly, I had concerns regarding the safety of such chemicals.  I abandoned their use (and indigo dyeing) until many years later.

I was thrilled when I learned from Michel Garcia that indigo vats could be made using benign substances such as  sugars, plants, ferrous sulfate, and lime (calcium hydroxide) which I was able to purchase in the grocery store as “pickling lime”. Vats made this way are considered to be, or described as,  “quick reduction” vats. They reduce and are ready for dyeing within hours and can be maintained for an extended period with proper attention. I was very happy. These are the vats that Joy and I included in our book “The Art and Science of Natural Dyes”.  I believe that these are still the best vats for short term dyeing workshops and other situations where a working vat is required quickly.

Over time, though, I observed that there are issues and challenges with these vats.

Crocking (the rubbing off of color) was a problem, despite proper finishing and  washing, and especially when dealing with knitting or weaving yarns, which are handled a great deal.  All indigo dye seems to exhibit poor resistance to rubbing to some extent, but the quick reduction vats seems to crock more. What I understand is that excess calcium may react with the reduced indigo and makes it into insoluble compound. These vats depend on the use of large quantities of calcium (calcium hydroxide). I am now thinking that it is possibly the reason for the bad rubbing fastness or crocking.  

This shows the “fading” which occurred on the folded cotton cloth that was stored in a dark place for a number of months. The indigo blue has nearly disappeared in some places. The fading mirrors the actual folds that were in the cloth. It is NOT an intentional design element.

The color often faded inexplicably, turning pale and displaying washed out areas, or just completely disappearing.  I have observed this occurred where cloth was folded and put away on the shelf.  Even when a textile was rolled up and stored in the dark, I would find that the blue had literally disappeared in some parts of a textile despite careful finishing and neutralization. I’ve had discussions with other dyers who have also experienced this same phenomenon, so I know I am not the only one who took note. I always do lightfast test on the dyes that I choose to use for my work but this was something else entirely

The “lime cycle” illustrates how limestone is heated to create quicklime. Water is added to make slaked lime. Does exposure to air/carbon dioxide turn the lime back into limestone again?

In 2017 I began my journey using indigo vats that reduce by the activity of fermentation  after meeting Hisako Sumi, Japanese indigo dyer and researcher. Hisako encouraged me, guided me, and even put together and gifted me a small “kit” which she mailed from  Japan, so that I could start my first fermented vat.  I began experimenting, testing, dyeing, observing, and never looked back. Hisako generously ‘coached” and mentored me from from her home in in Hokkaido and provided me with a much deeper understanding of my vats.

The COVID pandemic kept many of us home for long stretches of time, and during that period many of us learned new skills or honed old ones. That time provided me the opportunity and focus to tend indigo vats and to develop and refine an understanding of the fermentation process. My indigo dyed textiles have never been better! I no longer fret over potential “unexplained” fading. The quick fermentation vats require high alkalinity (pH 12). The fermented vats are able to be maintained at a lower pH than the quick reduction vats (pH 9.5-11). This is accomplished by the use of wood ash lye, soda ash, OR potash to achieve the correct pH. I have used all of these alkaline sources  successfully. Lime (calcium hydroxide) is used in very small amounts and only to “tweak” the pH maintain desired levels. The lower alkalinity of the fermented vats is more suitable for all fibers.  I will likely never return to quick reduction vats, unless specific circumstances require their use.        

In some of my previous blog posts, I have written about this process in general terms and also have given credit to Cheryl Kolander, whose online recipe was a good starting point for me, but until this time, I was not ready to publish anything definitive of my own. In fact, I have never published an “actual” recipe on my blog: Natural Dye: Experiments and Results

I am not a trained scientist/chemist, but through experimenting and multiple observations I have done my best to understand what happens in the fermented indigo vat so that I can use and maintain the vat. And now it is time to share that specific information and information about the process I have used. Over the coming weeks (and about a dozen blog posts) I hope to “walk through” the planning/making/maintaining of a fermented vat and to encourage and guide dyers to explore on their own. And, as we approach summer in the northern hemisphere, it is a good time to try these vats. But do keep in mind, fermentation vats may not be the best for a beginning dyer or for someone who does not have the time and focus for it.

One does not do this alone. I owe much to Hisako Sumi, Michel Garcia, Joy Boutrup, Dr. Kim Borges of Warren Wilson College, and to all my colleagues and students who have been willing to experiment with me. 

As a dyeing community, perhaps we can all help each other to learn, understand, and to work through the process of indigo fermentation. Your comments are most welcome. My goal is to start that process with a series of blog posts that might help you begin your own journey. By all means, if you have a “dye mentor”, do consult them! I don’t have all the answers but maybe we can get there together.